
Installing Red Hat OpenShift in a disconnected/air-gapped environment
Why Disconnected OpenShift
Not every customer environment gets to talk to the internet. Highly regulated industries, air-gapped data centers, or simply a customer’s security policy can mean that an OpenShift cluster has to be built and operated without any direct internet connectivity at all.
OpenShift is designed to perform many automatic functions that depend on an internet connection, such as retrieving release images from a registry or retrieving update paths and recommendations for the cluster. Without a direct internet connection, you must perform additional setup and configuration for your cluster to maintain full functionality in the disconnected environment.
Source: Understanding disconnected installation mirroring
I built exactly such a lab: a fully disconnected 3-node OpenShift cluster, installed using the Agent-Based Installer method, with all images served from a local mirror registry. In this post I’m walking you through the whole journey. From preparing the bastion host, to seting up the mirror registry to all the way to troubleshooting a disconnected cluster stuck in insufficient state.
How Mirroring Makes It Work
Connected Mirroring vs. Disconnected Mirroring
There are basically two flavors of mirroring, depending on what your bastion host can reach:
Connected Mirroring - if you have a host that can access both the internet and your mirror registry. You can directly mirror the content from that machine.
Disconnected Mirroring - if you have no such setup, you must download the images first and transport such via a media device (USB stick for example) into your restricted environment.
My lab uses the disconnected flavor but with one exception. My bastion host is dual-homed, ergo transporting the downloaded images can be done via simple scp.
Resources
- 🔥 OpenShift Mirror-GUI on
Mirror-GUI is a web-based interface for managing OpenShift Container Platform (OCP) mirroring operations using oc-mirror v2.
- Red Hat Developer Blog introducing project ABA - Simplify OpenShift installation in air-gapped environments
- ABA on - ABA — Install and Manage OpenShift in Disconnected Environments
This article introduces aba, a new tool designed to simplify OpenShift installations in air-gapped (fully disconnected) environments.
This cheat sheet shows you how to perform an OpenShift disconnected installation in a secured environment.
Bastion Host Preparation
Hostname
First things first, make sure your hostname is set correctly.
hostnamectlFor Linux applies: Hostname = Fully Qualified Domain Name (FQDN)
sudo hostnamectl set-hostname rguske-rhel9-disco-bastion.rguske.coe.muc.redhat.com
sudo reboot
RHEL Subscription Manager
Register the host with the RHEL Subscription Manager:
sudo subscription-manager register --username <username> --password '<password>' --auto-attachNetworking the Bastion Host
I’ve installed my bastion host dual-homed. Means, I have two NICs. One is connected to the “internet-zone” and the other one to the disconnected network. Ultimately, the idea is that the OpenShift cluster will pull all the images via the disconnected network from the bastion host/mirror-registry.
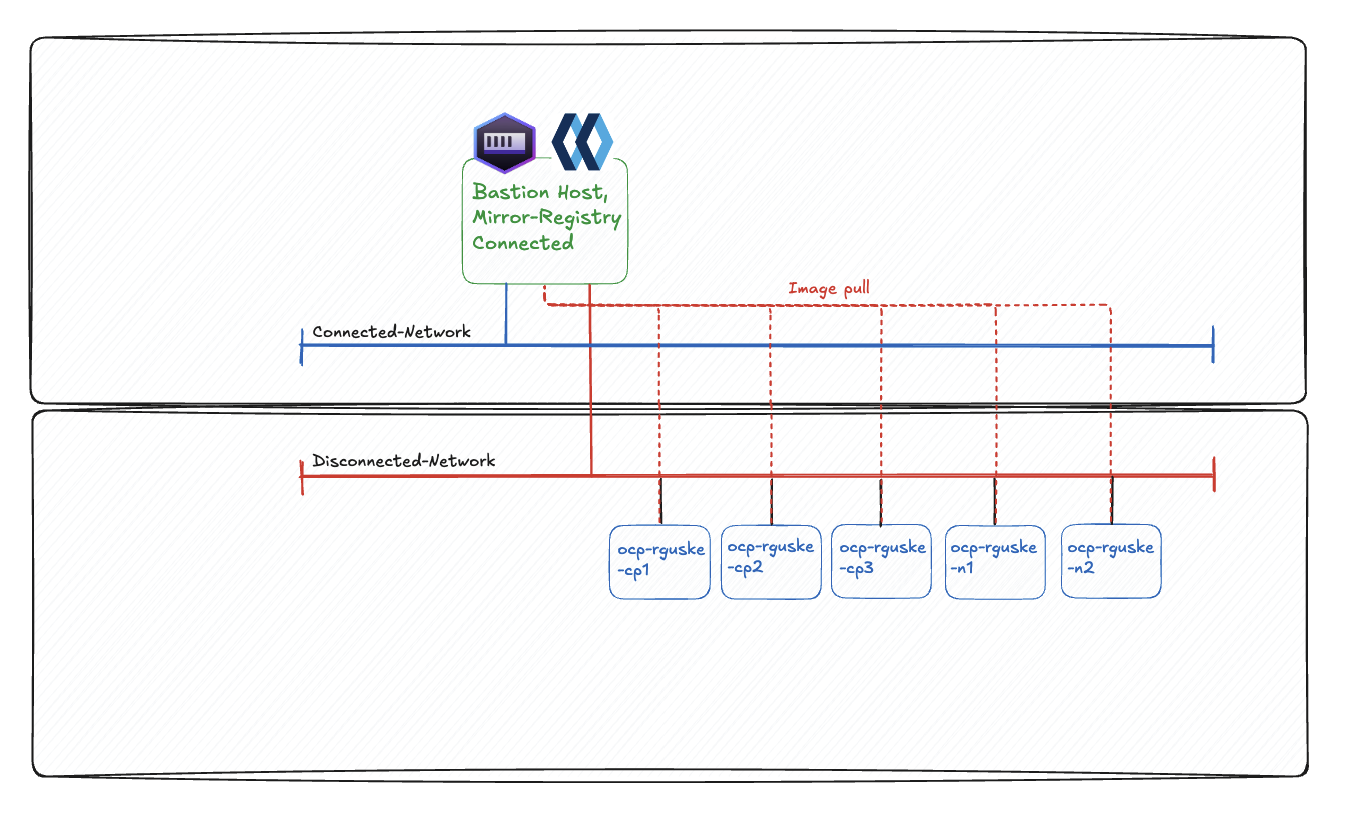
Configure the interfaces accordingly. First, the interface which has internet connection:
nmcli con show

NAME                UUID                                  TYPE      DEVICE
System eth0         5fb06bd0-0bb0-7ffb-45f1-d6edd65f3e03  ethernet  eth0
lo                  dd314177-6d3f-4ad3-a1af-2875d094c193  loopback  lo
Wired connection 1  c8d40ef7-3d02-3ba5-b047-dacd6d013b24  ethernet  --
nmcli con mod "System eth0" \
ipv4.addresses 10.32.96.145/20 \
ipv4.gateway 10.32.111.254 \
ipv4.dns "10.32.96.1,10.32.96.31" \
ipv4.method manualNow the interface which is connected to the disconnected network:
nmcli con mod "Wired connection 1" \
ipv4.addresses 192.168.69.208/24 \
ipv4.method manual
Bring both interfaces up:
nmcli dev reapply eth0 && nmcli dev reapply eth1

Connection successfully reapplied to device 'eth0'.
Connection successfully reapplied to device 'eth1'.
Alternatively:
nmcli con up "System eth0" && nmcli con up "Wired connection 1"

Connection successfully activated (D-Bus active path: /org/freedesktop/NetworkManager/ActiveConnection/25)
Connection successfully activated (D-Bus active path: /org/freedesktop/NetworkManager/ActiveConnection/26)
Check the new config:
ip -br a

lo               UNKNOWN        127.0.0.1/8 ::1/128
eth0             UP             10.32.96.145/20 2620:52:0:2060:d8:6dff:fe0f:3ed3/64 fe80::d8:6dff:fe0f:3ed3/64
eth1             UP             192.168.69.208/24 fe80::a0eb:9896:d4e1:3fbb/64
The configuration is stored under:
nmcli -f NAME,UUID,FILENAME con show

NAME                UUID                                  FILENAME
System eth0         5fb06bd0-0bb0-7ffb-45f1-d6edd65f3e03  /etc/sysconfig/network-scripts/ifcfg-eth0
Wired connection 1  c8d40ef7-3d02-3ba5-b047-dacd6d013b24  /etc/NetworkManager/system-connections/Wired connection 1.nmconnection
lo                  dd314177-6d3f-4ad3-a1af-2875d094c193  /run/NetworkManager/system-connections/lo.nmconnection
Readable configuration:
less /etc/sysconfig/network-scripts/ifcfg-eth0

# Created by cloud-init automatically, do not edit.
#
AUTOCONNECT_PRIORITY=120
BOOTPROTO=none
DEVICE=eth0
HWADDR=02:D8:6D:0F:3E:D3
IPV6INIT=yes
ONBOOT=yes
TYPE=Ethernet
USERCTL=no
PROXY_METHOD=none
BROWSER_ONLY=no
IPADDR=10.32.96.145
PREFIX=20
GATEWAY=10.32.111.254
DNS1=10.32.96.1
DNS2=10.32.96.31
DEFROUTE=yes
IPV4_FAILURE_FATAL=no
IPV6_AUTOCONF=yes
IPV6_DEFROUTE=yes
IPV6_FAILURE_FATAL=no
NAME="System eth0"
UUID=5fb06bd0-0bb0-7ffb-45f1-d6edd65f3e03
And the other interface:
less /etc/NetworkManager/system-connections/Wired\ connection\ 1.nmconnection

[connection]
id=Wired connection 1
uuid=c8d40ef7-3d02-3ba5-b047-dacd6d013b24
type=ethernet
autoconnect-priority=-999
interface-name=eth1

[ethernet]

[ipv4]
address1=192.168.69.208/24
method=manual

[ipv6]
addr-gen-mode=default
method=auto

[proxy]
Enable IP forwarding, which allows the VM to forward packets between interfaces:
sysctl -w net.ipv4.ip_forward=1Make it permanent:
vi /etc/sysctl.conf
net.ipv4.ip_forward = 1
Apply the changes: sysctl -p
On Red Hat Enterprise Linux, firewall-cmd is provided by the firewalld package. It’s not guaranteed to be installed in minimal VM images, so check first:
rpm -q firewalldIf it’s missing, install and enable it:
sudo dnf install -y firewalld
sudo systemctl enable --now firewalld
Allow forwarding:
firewall-cmd --permanent --add-forward-port=port=22:proto=tcp:toport=22Add trusted zones for both interfaces:
firewall-cmd --permanent --zone=public --add-interface=eth0
firewall-cmd --permanent --zone=trusted --add-interface=eth1
Check the configs:
firewall-cmd --get-active-zones
public
  interfaces: eth0
trusted
  interfaces: eth1
firewall-cmd --zone=public --list-all
public (active)
target: default
icmp-block-inversion: no
interfaces: eth0
sources:
services: cockpit dhcpv6-client ssh
ports:
protocols:
forward: yes
masquerade: no
forward-ports:
source-ports:
icmp-blocks:
rich rules:firewall-cmd --zone=trusted --list-all
trusted (active)
target: ACCEPT
icmp-block-inversion: no
interfaces: eth1
sources:
services:
ports:
protocols:
forward: yes
masquerade: no
forward-ports:
source-ports:
icmp-blocks:
rich rules:We will need to open up port 8443 for Quay:
firewall-cmd --add-port 8443/tcp --permanentReload firewall rules: firewall-cmd --reload
If devices in 192.168.69.0/24 need internet access via the VM, you need NAT:
sudo firewall-cmd --permanent --add-masquerade
sudo firewall-cmd --reload
Check IP forwarding: cat /proc/sys/net/ipv4/ip_forward
SSH
Configure ssh access to the bastion host:
cat ~/.ssh/id_ed25519.pub | ssh rguske@rguske-rhel9-disco-bastion.rguske.coe.muc.redhat.com "mkdir -p ~/.ssh && cat >> ~/.ssh/authorized_keys && chmod 600 ~/.ssh/authorized_keys && chmod 700 ~/.ssh"It’s also a good idea to generate a dedicated SSH key pair on the bastion host itself. You can use this key pair later to authenticate into the OpenShift cluster nodes after it is deployed.
ssh-keygen -t ed25519 -N '' -f ~/.ssh/id_ed25519Command Line Interfaces (CLIs)
On the bastion host, download the necessary CLIs from the Red Hat Hybrid Cloud Console downloads page.
You could use curl -LO <url> for it:
OCP_VERSION='4.21.11'OpenShift Client:
curl -LO "https://mirror.openshift.com/pub/openshift-v4/clients/ocp/${OCP_VERSION}/openshift-client-linux-amd64-rhel9-${OCP_VERSION}.tar.gz"OpenShift Mirror CLI:
curl -LO https://mirror.openshift.com/pub/openshift-v4/x86_64/clients/ocp/latest/oc-mirror.rhel9.tar.gzAnd ultimately download the local, minimal single-instance of the Red Hat Quay registry which is necessary to bootstrap the disconnected OpenShift cluster:
curl -LO https://mirror.openshift.com/pub/cgw/mirror-registry/latest/mirror-registry-amd64.tar.gzThis is how it looks once everything is downloaded:
tree
.
├── clis
│   ├── oc-mirror.rhel9.tar.gz
│   ├── openshift-client-linux-amd64-rhel9-4.21.11.tar.gz
│   └── openshift-install-rhel9-amd64.tar.gz
└── mirror-registry
    └── mirror-registry-amd64.tar.gz
A little alias helps un-tar-ing all these packages:
alias untar='tar -zxvf'Unpack the .gz files - except execution-environment.tar, image-archive.tar and sqlite3.tar from the mirror-registry folder - and move the resulting binaries into /usr/local/bin:
sudo mv {kubectl,oc,oc-mirror,openshift-install-fips} /usr/local/binApply the right permissions:
sudo chown root:root /usr/local/bin/{kubectl,oc,oc-mirror,openshift-install-fips}
sudo chmod 755 /usr/local/bin/{kubectl,oc,oc-mirror,openshift-install-fips}
tree /usr/local/bin
/usr/local/bin
├── execution-environment.tar
├── firstboot-network-firewall.sh
├── image-archive.tar
├── kubectl
├── mirror-registry
├── oc
├── oc-mirror
├── openshift-install-fips
└── sqlite3.tar
0 directories, 9 filesIf /usr/local/bin isn’t included in your $PATH, run:
export PATH=/usr/local/bin:$PATHInstall Podman and Nmstate
In order to run the mirror registry, the bastion host needs a container runtime installed.
Podman is the runtime of choice for me and is included in the container-tools package:
sudo dnf install container-tools -yThe installer also uses nmstatectl for the creation of the agent ISO. Install it via:
sudo dnf install nmstate -yOtherwise, you’ll run into this error:
FATAL * failed to validate network yaml for host 0, install nmstate package, exec: "nmstatectl": executable file not found in $PATHInstalling Podman Offline
If your bastion host really has zero internet access, even for RHEL packages, you can install Podman directly from a RHEL installation ISO.
- Mount a RHEL installation ISO file to the system (VM or BM via the Board Management Controller).
Check e.g. with lsblk for the disconnected “cdrom” (iso) device:
lsblk
NAME          MAJ:MIN RM   SIZE RO TYPE MOUNTPOINTS
sda             8:0    0   120G  0 disk
├─sda1          8:1    0   600M  0 part /boot/efi
├─sda2          8:2    0     1G  0 part /boot
└─sda3          8:3    0 118.4G  0 part
  ├─rhel-root 253:0    0    70G  0 lvm  /
  ├─rhel-swap 253:1    0   7.9G  0 lvm  [SWAP]
  └─rhel-home 253:2    0  40.5G  0 lvm  /home
sr0 11:0 1 11G 0 rom- Create a folder in which the ISO content will be accessible:
mkdir -p /mnt/rhel-iso- Mount the ISO accordingly (in my case a VM, so the loop device is the virtual CD-ROM):
mount -o loop /dev/sr0 /mnt/rhel-iso- Create a local repository pointing at the mounted ISO:
cat <<EOF | tee /etc/yum.repos.d/rhel9-iso.repo
[rhel9-iso-BaseOS]
name=RHEL9-ISO-BaseOS
baseurl=file:///mnt/rhel-iso/BaseOS/
enabled=1
gpgcheck=0

[rhel9-iso-AppStream]
name=RHEL9-ISO-AppStream
baseurl=file:///mnt/rhel-iso/AppStream/
enabled=1
gpgcheck=0
EOF- Install Podman as well as
nmstate:
sudo dnf install -y podman nmstateInstalling the OpenShift Mirror Registry on the Bastion Host
Prerequisites
- An OpenShift Container Platform subscription.
- Red Hat Enterprise Linux (RHEL) 8 or 9 with Podman 3.4.2 or later and OpenSSL installed. If you are using Podman 5.7 or later, see “Configuring rootless Podman networking”.
- A fully qualified domain name for the Red Hat Quay service, which must resolve through a DNS server.
- Key-based SSH connectivity on the target host. SSH keys are automatically generated for local installs. For remote hosts, you must generate your own SSH keys.
- 2 or more vCPUs.
- 8 GB of RAM.
- About 12 GB for OpenShift Container Platform 4.21 release images, or about 358 GB for OpenShift Container Platform 4.21 release images and OpenShift Container Platform 4.21 Red Hat Operator images.
You can use any container registry that supports Docker v2-2, such as Red Hat Quay, Artifactory or Harbor for example.
The technical reason is that OpenShift release and Operator mirroring relies heavily on digest-addressed images, for example: quay.io/openshift-release-dev/ocp-release@sha256:<digest>
At this point it’s important to mention again that my bastion host is dual-homed:
dig +short rguske-rhel9-disco-bastion.rguske.coe.muc.redhat.com
10.32.96.145

dig +short rguske-rhel9-disco-bastion.disco.local
192.168.69.208
In this scenario it’s important to use the DNS record which points to the IP in the disconnected subnet (192.168.69.0/24).
mirror-registry install --quayHostname rguske-rhel9-disco-bastion.disco.local --quayRoot '/home/$USER/downloads/mirror-registry/root' --initPassword 'r3dh4t1!' --verbose

  __   __
 /  \ /  \     ______   _    _     __   __   __
/ /\ / /\ \   /  __  \ | |  | |   /  \  \ \ / /
/ /  / /  \ \  | |  | | | |  | |  / /\ \  \   /
\ \  \ \  / /  | |__| | | |__| | / ____ \  | |
 \ \/ \ \/ /   \_  ___/  \____/ /_/    \_\ |_|
  \__/ \__/      \ \__
                  \___\ by Red Hat
 Build, Store, and Distribute your Containers

INFO[2026-04-22 05:16:03] Install has begun
DEBU[2026-04-22 05:16:03] Ansible Execution Environment Image: quay.io/quay/mirror-registry-ee:latest
DEBU[2026-04-22 05:16:03] Pause Image: registry.access.redhat.com/ubi8/pause:8.10-5
DEBU[2026-04-22 05:16:03] Quay Image: registry.redhat.io/quay/quay-rhel8:v3.12.14
DEBU[2026-04-22 05:16:03] Redis Image: registry.redhat.io/rhel8/redis-6:1-1766406130
INFO[2026-04-22 05:16:03] Found execution environment at /usr/local/bin/execution-environment.tar
INFO[2026-04-22 05:16:03] Loading execution environment from execution-environment.tar

[...]

TASK [mirror_appliance : Create init user] ***********************************
included: /runner/project/roles/mirror_appliance/tasks/create-init-user.yaml for rguske@rguske-rhel9-disco-bastion.rguske.coe.muc.redhat.com

TASK [mirror_appliance : Creating init user at endpoint https://rguske-rhel9-disco-bastion.disco.local:8443/api/v1/user/initialize] ***
ok: [rguske@rguske-rhel9-disco-bastion.rguske.coe.muc.redhat.com]

TASK [mirror_appliance : Enable lingering for systemd user processes] ***
changed: [rguske@rguske-rhel9-disco-bastion.rguske.coe.muc.redhat.com]

PLAY RECAP *********************************************************************
rguske@rguske-rhel9-disco-bastion.rguske.coe.muc.redhat.com : ok=49   changed=29   unreachable=0    failed=0    skipped=15   rescued=0    ignored=0

INFO[2026-04-24 10:18:34] Quay installed successfully, config data is stored in /home/$USER/downloads/mirror-registry/root
INFO[2026-04-24 10:18:34] Quay is available at https://rguske-rhel9-disco-bastion.disco.local:8443 with credentials (init, r3dh4t1!)
Note! The installation output provides necessary information which you should document in order to share it within your team(s) or to use it in case of oblivion 😉.
INFO[2026-04-24 10:18:34] Quay installed successfully, config data is stored in /home/$USER/downloads/mirror-registry/root
INFO[2026-04-24 10:18:34] Quay is available at https://rguske-rhel9-disco-bastion.disco.local:8443 with credentials (init, r3dh4t1!)
Furthermore, the mirror-registry command provides few options in order to support your requirements/your environment:
mirror-registry install --help

[...]

Flags:
      --additionalArgs string   Additional arguments you would like to append to the ansible-playbook call. Used mostly for development.
      --askBecomePass           Whether or not to ask for sudo password during SSH connection.
  -h, --help                    help for install
  -i, --image-archive string    An archive containing images
      --initPassword string     The password of the initial user. If not specified, this will be randomly generated.
      --initUser string         The username of the initial user. This defaults to init. (default "init")
      --quayHostname string     The value to set SERVER_HOSTNAME in the Quay config.yaml. This defaults to <targetHostname>:8443
  -r, --quayRoot string         The folder where quay persistent data are saved. This defaults to ~/quay-install (default "~/quay-install")
      --quayStorage string      The folder where quay persistent storage data is saved. This defaults to a Podman named volume 'quay-storage'. Root is required to uninstall. (default "quay-storage")
      --sqliteStorage string    The folder where quay sqlite data is saved. This defaults to a Podman named volume 'sqlite-storage'. Root is required to uninstall. (default "sqlite-storage")
  -k, --ssh-key string          The path of your ssh identity key. This defaults to ~/.ssh/quay_installer (default "/home/rguske/.ssh/quay_installer")
      --sslCert string          The path to the SSL certificate Quay should use
      --sslCheckSkip            Whether or not to check the certificate hostname against the SERVER_HOSTNAME in config.yaml.
      --sslKey string           The path to the SSL key Quay should use
  -H, --targetHostname string   The hostname of the target you wish to install Quay to. This defaults to $HOST (default "rguske-rhel9-disco-bastion.rguske.coe.muc.redhat.com")
  -u, --targetUsername string   The user on the target host which will be used for SSH. This defaults to $USER (default "rguske")

Global Flags:
  -c, --no-color   Control colored output
  -v, --verbose    Display verbose logs
Source: Mirror registry for Red Hat OpenShift flags
Validating the Installation
After the installation is finished, you can check the instantiated containers using the podman cli:
[rguske@rguske-rhel9-disco-bastion ~]$ podman ps -a

CONTAINER ID  IMAGE                                          COMMAND     CREATED      STATUS      PORTS                                       NAMES
f4d35ef567d6  registry.access.redhat.com/ubi8/pause:8.10-5   infinity    2 weeks ago  Up 2 weeks  0.0.0.0:8443->8443/tcp                      4ec56af2ae41-infra
a0cc6acf90dd  registry.redhat.io/rhel8/redis-6:1-1766406130  run-redis   2 weeks ago  Up 2 weeks  0.0.0.0:8443->8443/tcp, 6379/tcp            quay-redis
6bb27ceb8b73  registry.redhat.io/quay/quay-rhel8:v3.12.14    registry    2 weeks ago  Up 2 weeks  0.0.0.0:8443->8443/tcp, 7443/tcp, 8080/tcp  quay-app
Systemd auto-start is also configured for us:
sudo systemctl list-units --type service | grep quay
  quay-app.service                                      loaded active running Quay Container
  quay-pod.service                                      loaded active exited  Infra Container for Quay
  quay-redis.service                                    loaded active running Redis Podman Container for Quay
By using the bastion hostname and port :8443 you’ll be able to access the minimal version of the Quay registry.
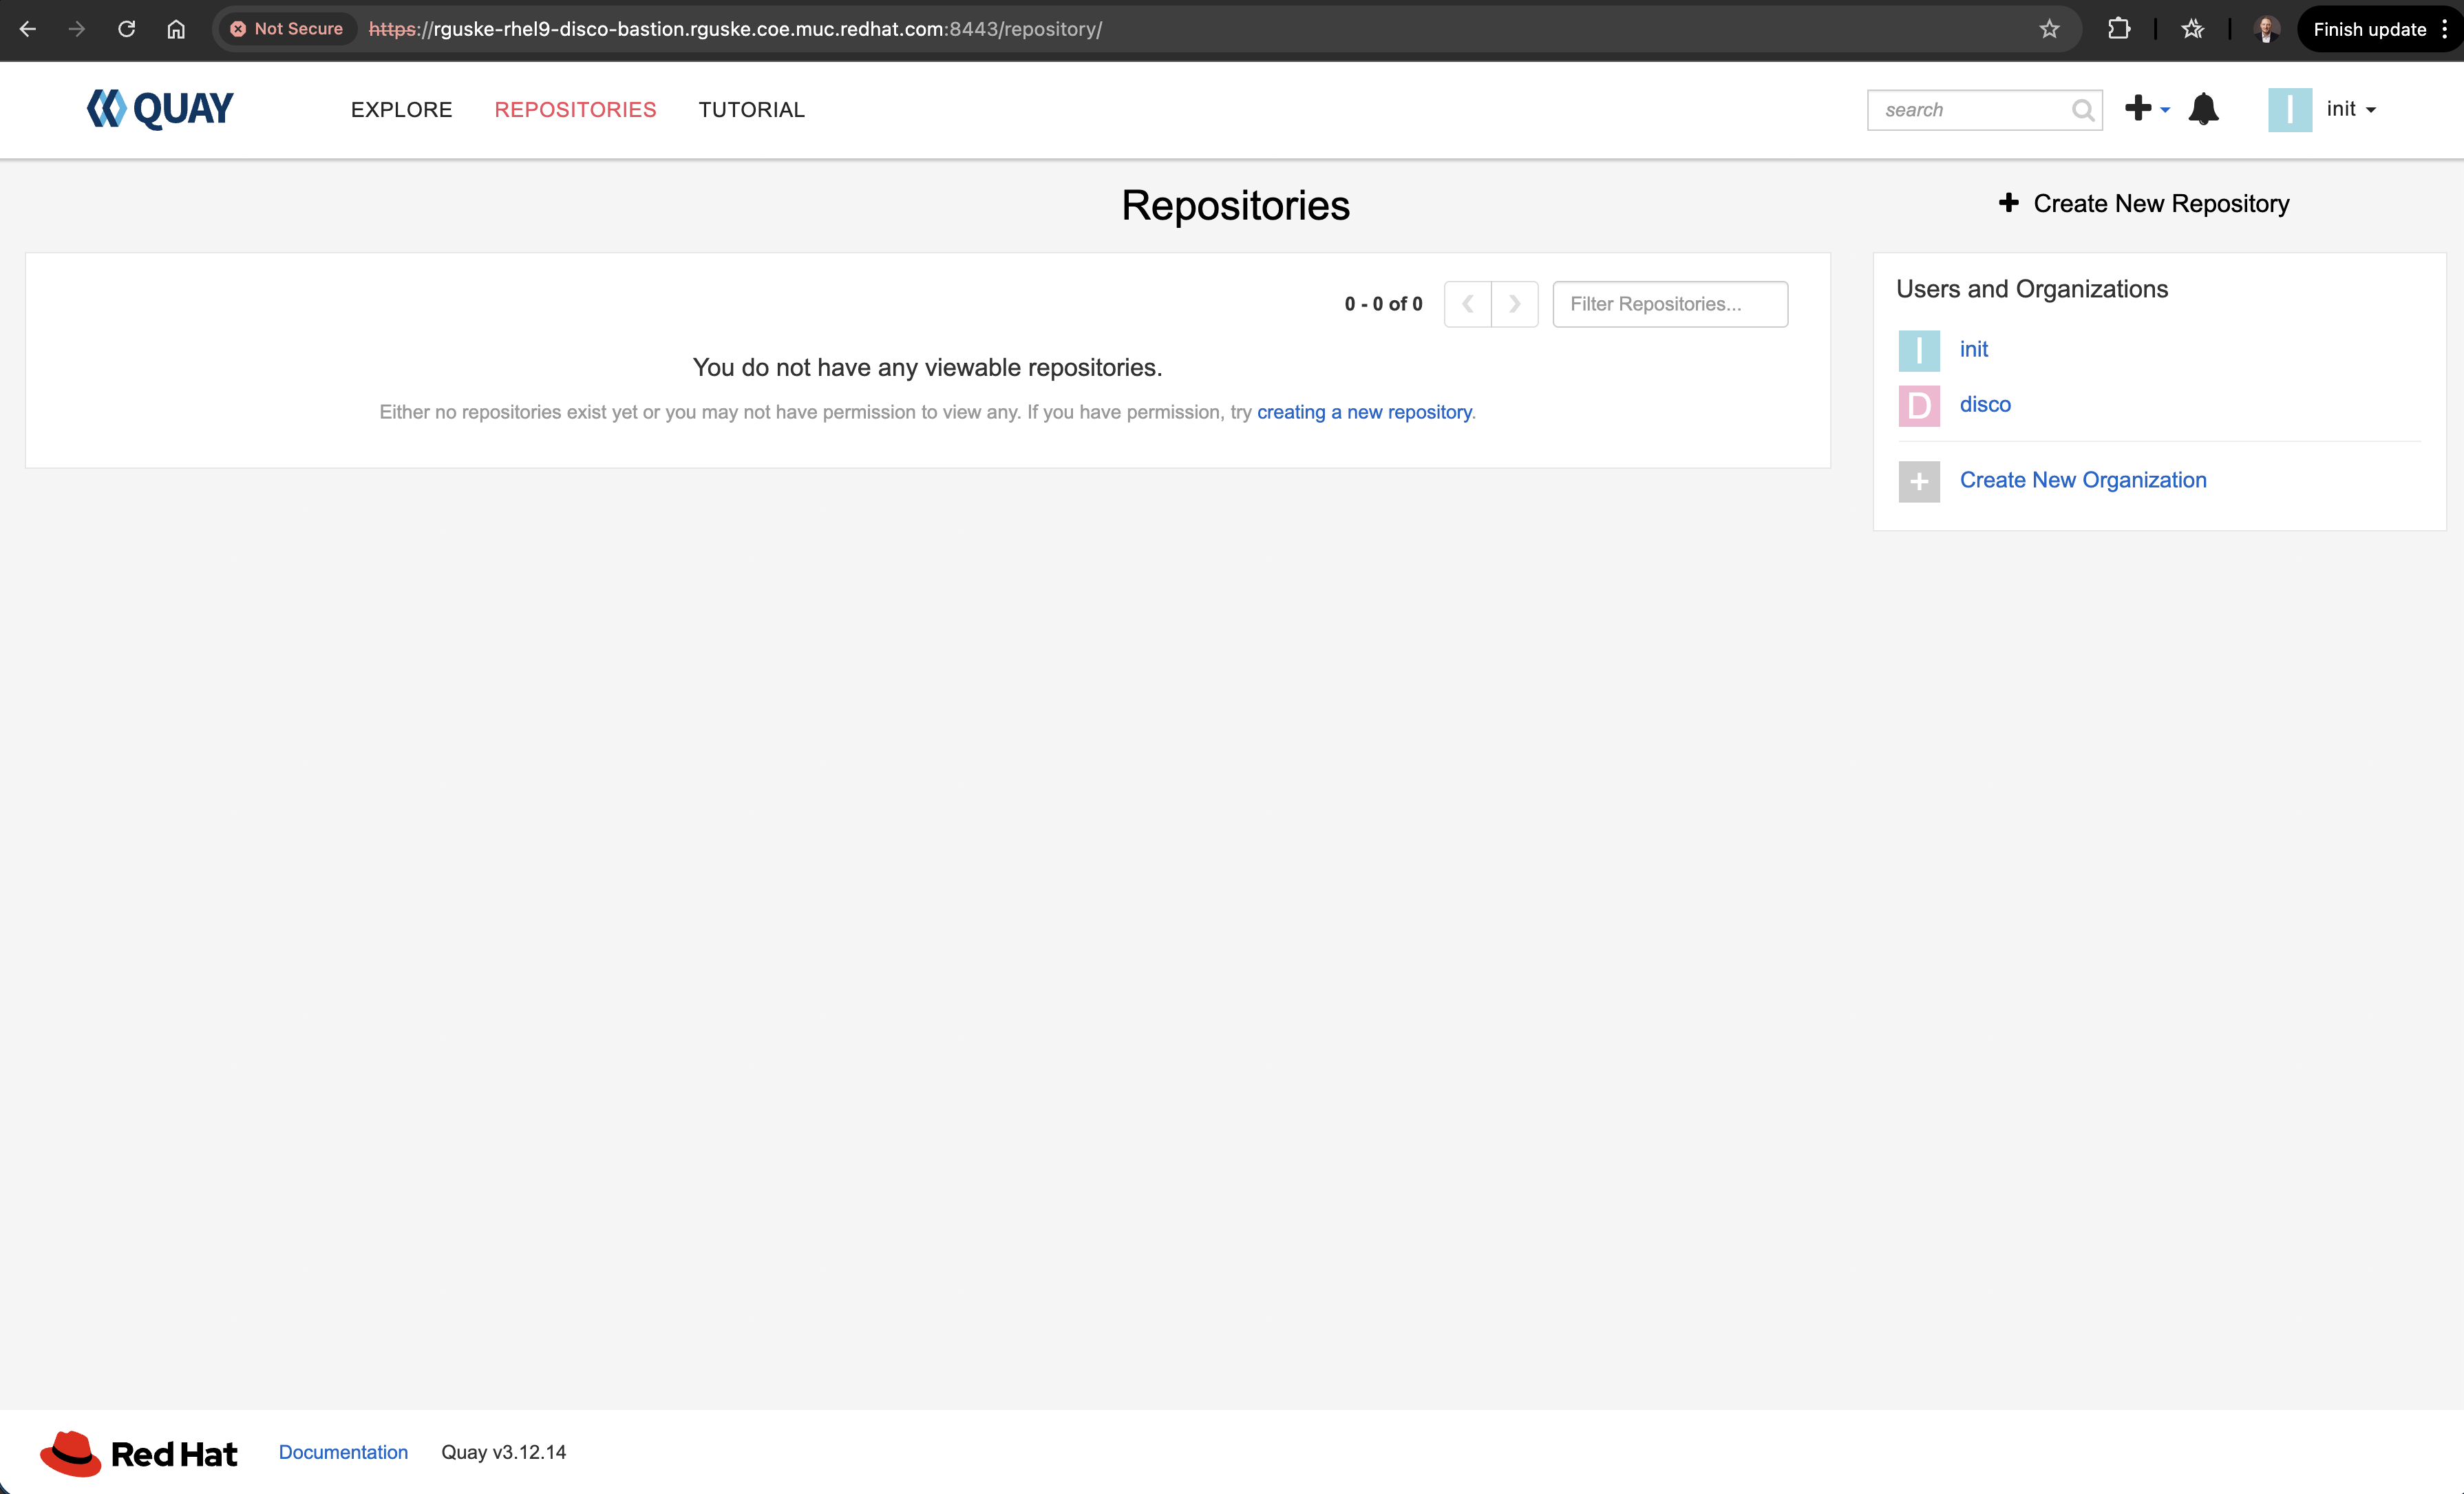
Alternatively, validate the endpoint using curl:
curl -k https://rguske-rhel9-disco-bastion.disco.local:8443/health/instance
{"data":{"services":{"auth":true,"database":true,"disk_space":true,"registry_gunicorn":true,"service_key":true,"web_gunicorn":true}},"status_code":200}
Check the certificate:
echo | openssl s_client -connect rguske-rhel9-disco-bastion.disco.local:8443 -showcerts
Connecting to 192.168.69.208
CONNECTED(00000003)
depth=1 C=US, ST=VA, L=New York, O=Quay, OU=Division, CN=rguske-rhel9-disco-bastion.disco.local
verify error:num=19:self-signed certificate in certificate chain
verify return:1
depth=1 C=US, ST=VA, L=New York, O=Quay, OU=Division, CN=rguske-rhel9-disco-bastion.disco.local
verify return:1
depth=0 CN=quay-enterprise
verify return:1
---
Certificate chain
 0 s:CN=quay-enterprise
   i:C=US, ST=VA, L=New York, O=Quay, OU=Division, CN=rguske-rhel9-disco-bastion.disco.local
   a:PKEY: RSA, 2048 (bit); sigalg: sha256WithRSAEncryption
   v:NotBefore: Apr 24 14:17:18 2026 GMT; NotAfter: Apr 15 14:17:18 2027 GMT
-----BEGIN CERTIFICATE-----
[...]
Also validate the certificate we’re going to trust on our bastion host:
openssl x509 -in ~/downloads/mirror-registry/root/quay-config/ssl.cert -text -noout
Certificate:
    Data:
        Version: 3 (0x2)
        Serial Number:
            16:06:dd:b0:be:99:47:81:76:52:85:9c:15:1e:76:0d:ab:99:35:ea
        Signature Algorithm: sha256WithRSAEncryption
        Issuer: C=US, ST=VA, L=New York, O=Quay, OU=Division, CN=rguske-rhel9-disco-bastion.disco.local
        Validity
            Not Before: Apr 24 14:17:18 2026 GMT
            Not After : Apr 15 14:17:18 2027 GMT
[...]
Login into the Mirror Registry
podman login -u init -p 'r3dh4t1!' https://rguske-rhel9-disco-bastion.disco.local:8443 --tls-verify=falseIt’s also possible without --tls-verify=false by trusting the newly created certificates, which are stored under root/quay-config:
tree
.
├── pause.tar
├── quay.tar
├── redis.tar
└── root
    ├── quay-config
    │   ├── config.yaml
    │   ├── openssl.cnf
    │   ├── ssl.cert
    │   ├── ssl.csr
    │   └── ssl.key
    └── quay-rootCA
        ├── rootCA.key
        ├── rootCA.pem
        └── rootCA.srl
Copy the certs:
sudo cp ~/downloads/mirror-registry/root/quay-config/ssl.cert /etc/pki/ca-trust/source/anchors/tree /etc/pki/ca-trust/source/anchors/
└── ssl.cert
0 directories, 1 fileUpdate the trust store:
update-ca-trustLogout:
podman logout https://rguske-rhel9-disco-bastion.disco.local:8443

Removed login credentials for rguske-rhel9-disco-bastion.disco.local:8443
Login again:
podman login -u init -p 'r3dh4t1!' 'https://rguske-rhel9-disco-bastion.disco.local:8443'

Login Succeeded!
Uninstalling the Mirror Registry
If you ever need to tear it down again:
mirror-registry uninstallMirroring Images
Docs - Chapter 5. Mirroring images for a disconnected installation by using the oc-mirror plugin v2
Procedure and prerequisites:
- You configured a mirror registry to use in your disconnected environment.
- You’re able to login using the configured user/password combination (
init/r3dh4t1!). - You can create a repository.
Obtain your Pull Secret from the Red Hat Hybrid Cloud Console and paste the JSON content into $XDG_RUNTIME_DIR/containers/auth.json. Be careful, it must be in json!
Docs Chapter 5.3.2 - Configuring credentials that allow images to be mirrored
Make a copy of your pull secret in JSON format:
cat ./pull-secret | jq . > $(pwd)/pull-secret.jsonReplace the existing auth.json file in $XDG_RUNTIME_DIR/containers/:
sudo mv pull-secret.json $XDG_RUNTIME_DIR/containers/auth.jsonNext, generate the base64-encoded username and password (or token) for your mirror registry:
echo -n '<user_name>:<password>' | base64 -w0For <user_name> and <password>, specify the username and password that you configured for your registry, e.g.:
echo -n 'init:r3dh4t1!' | base64 -w0Edit the JSON file and add a section that describes your registry to it:
{
  "auths": {
    "rguske-rhel9-disco-bastion.rguske.coe.muc.redhat.com:8443": {
      "auth": "aW5pdD...",
      "email": "user@foo.bar"
    },
    "cloud.openshift.com": {

[...]

  }
}
Creating the Image Set Configuration
The ImageSetConfiguration is a YAML configuration file used by oc-mirror to define which container images should be mirrored from external registries into a private container registry. Its primary purpose is to ensure that all required container images are available locally, allowing OpenShift clusters to be installed, updated, and operated without direct internet access.
Create an ImageSetConfiguration.yaml file and modify it to include your required images.
List the available OpenShift operators using:
oc mirror list operators --catalogs --version=4.21 --v1Define the operators you’d need for your OpenShift installation as well as the ones you need for addtional services. Create the ImageSetConfiguration:
tee imagesetconfiguration.yaml > /dev/null <<'EOF'
kind: ImageSetConfiguration
apiVersion: mirror.openshift.io/v2alpha1
mirror:
  operators:
    - catalog: registry.redhat.io/redhat/redhat-operator-index:v4.21
      packages:
        - name: cincinnati-operator
          channels:
            - name: v1
              minVersion: 5.0.3
        - name: kubernetes-nmstate-operator
          channels:
            - name: stable
              minVersion: 4.21.0-202604080925
        - name: kubevirt-hyperconverged
          channels:
            - name: stable
              minVersion: 4.21.3
        - name: metallb-operator
          channels:
            - name: stable
              minVersion: 4.21.0-202604140043
        - name: web-terminal
          channels:
            - name: fast
              minVersion: 1.16.0
        - name: devworkspace-operator
          channels:
            - name: fast
              minVersion: 0.40.1
  additionalImages:
    - name: quay.io/rhn_support_sreber/curl:latest
    - name: registry.redhat.io/ubi9/ubi-minimal:latest
    - name: quay.io/containerdisks/centos-stream:9
    - name: registry.redhat.io/rhel9/rhel-guest-image:latest
    - name: quay.io/containerdisks/fedora:latest
  platform:
    graph: true
    channels:
      - name: stable-4.21
        type: ocp
        minVersion: 4.21.10
        maxVersion: 4.21.11
        shortestPath: true
EOF
Make sure the CLIs are in your $PATH (otherwise export PATH=/usr/local/bin:$PATH).
Mirror the images from the specified image set configuration to disk:
oc mirror -c $(pwd)/openshift/imagesetconfiguration.yaml file://$(pwd) --v2In my case:
oc-mirror -c $(pwd)/openshift/imagesetconfiguration.yaml file:///home/rguske/openshift/mirror --v2Result:
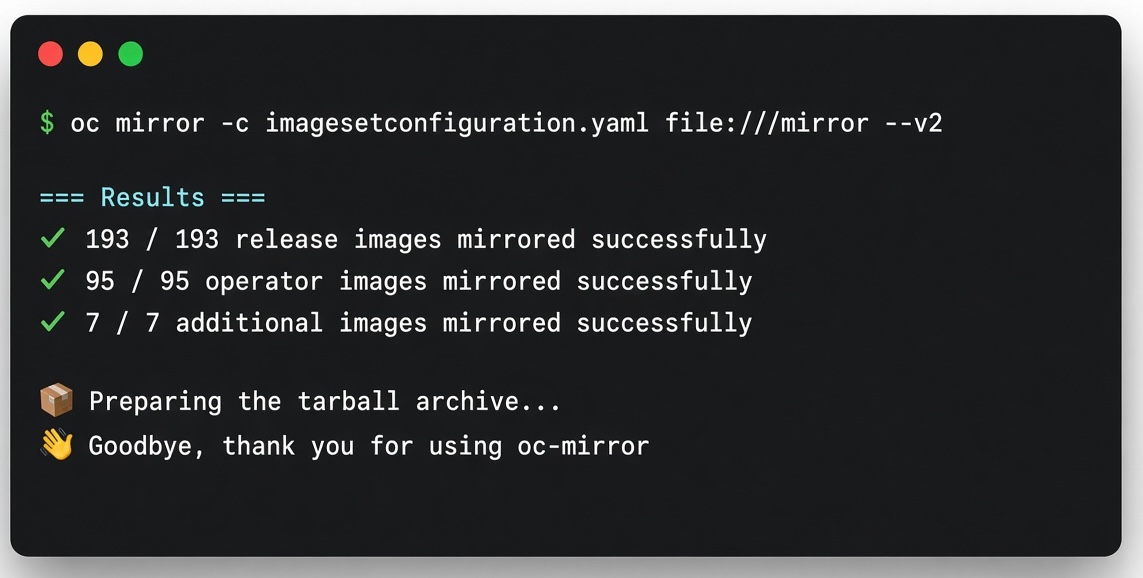
2026/04/23 12:55:55  [INFO]   : === Results ===
2026/04/23 12:55:55  [INFO]   :  ✓  193 / 193 release images mirrored successfully
2026/04/23 12:55:55  [INFO]   :  ✓  95 / 95 operator images mirrored successfully
2026/04/23 12:55:55  [INFO]   :  ✓  7 / 7 additional images mirrored successfully
2026/04/23 12:55:55  [INFO]   : 📦 Preparing the tarball archive...
2026/04/23 12:58:48  [INFO]   : mirror time     : 19m53.229903012s
2026/04/23 12:58:48  [INFO]   : 👋 Goodbye, thank you for using oc-mirror
ls -ltr
total 61212944
drwxr-xr-x. 12 rguske rguske 4096 Apr 23 12:39 working-dir
-rw-r--r--. 1 rguske rguske 62682043392 Apr 23 12:58 mirror_000001.tar~58 GB in a single tarball - upload it to your mirror registry:
oc mirror -c $(pwd)/imagesetconfiguration.yaml --from file://$(pwd)/mirror/ docker://rguske-rhel9-disco-bastion.disco.local:8443/disco --v2Results:
2026/04/24 11:34:43  [INFO]   : === Results ===
2026/04/24 11:34:43  [INFO]   :  ✓  193 / 193 release images mirrored successfully
2026/04/24 11:34:43  [INFO]   :  ✓  95 / 95 operator images mirrored successfully
2026/04/24 11:34:43  [INFO]   :  ✓  7 / 7 additional images mirrored successfully
2026/04/24 11:34:43  [INFO]   : 📄 Generating IDMS file...
2026/04/24 11:34:43  [INFO]   : /home/rguske/openshift/mirror/working-dir/cluster-resources/idms-oc-mirror.yaml file created
2026/04/24 11:34:43  [INFO]   : 📄 Generating ITMS file...
2026/04/24 11:34:43  [INFO]   : /home/rguske/openshift/mirror/working-dir/cluster-resources/itms-oc-mirror.yaml file created
2026/04/24 11:34:43  [INFO]   : 📄 Generating CatalogSource file...
2026/04/24 11:34:43  [INFO]   : /home/rguske/openshift/mirror/working-dir/cluster-resources/cs-redhat-operator-index-v4-21.yaml file created
2026/04/24 11:34:43  [INFO]   : 📄 Generating ClusterCatalog file...
2026/04/24 11:34:43  [INFO]   : /home/rguske/openshift/mirror/working-dir/cluster-resources/cc-redhat-operator-index-v4-21.yaml file created
2026/04/24 11:34:43  [INFO]   : 📄 Generating Signature Configmap...
2026/04/24 11:34:43  [INFO]   : /home/rguske/openshift/mirror/working-dir/cluster-resources/signature-configmap.json file created
2026/04/24 11:34:43  [INFO]   : /home/rguske/openshift/mirror/working-dir/cluster-resources/signature-configmap.yaml file created
2026/04/24 11:34:43  [INFO]   : 📄 Generating UpdateService file...
2026/04/24 11:34:43  [INFO]   : /home/rguske/openshift/mirror/working-dir/cluster-resources/updateService.yaml file created
2026/04/24 11:34:43  [INFO]   : mirror time     : 50m26.676667165s
2026/04/24 11:34:43  [INFO]   : 👋 Goodbye, thank you for using oc-mirror
All these generated cluster-resource manifests will become important again later, when we configure OLM and the Update Service for the disconnected cluster.
unexpected status code 413 Request Entity Too Large
If this hits you during the upload, try using the following options:
oc mirror -c $(pwd)/imagesetconfiguration.yaml --from file://$(pwd)/mirror/ docker://rguske-rhel9-disco-bastion.disco.local:8443/disco --image-timeout 2h --parallel-images=10 --parallel-layers=10 --retry-times=5 --retry-delay=10s --v2Documented in oc-mirror v2 fails with context deadline exceeded when mirroring large images to a local registry in RHOCP 4.
--image-timeout 2hsets the maximum allowed time for mirroring a single image to two hours. The default is only 10m, so this is useful for very large images or slow registry/storage/network paths.--parallel-images=10allows up to 10 different images to be processed concurrently. The default in current oc-mirror v2 is 4, and 10 is the documented maximum. This can significantly increase throughput if the registry, network, CPU, and storage can keep up.--parallel-layers=10controls concurrency within image transfers: up to 10 image layers can be transferred in parallel. The default is 5, with 10 again being the documented maximum.--retry-times=5tells oc-mirror to retry a failed operation up to 5 times instead of the default 2.--retry-delay=10swaits 10 seconds between retries. The default is 1s. A longer delay gives the registry or network more time to recover instead of immediately hammering it again.
Installing a Disconnected Cluster using the Agent-Based Installer
additionalTrustBundle field of the install-config.yaml file.The overall workflow looks like this:
- Create mirror registry content (
oc mirror) ✅ - Create installation assets (
install-config.yaml) - Create the cluster
- Apply mirror configuration to the new cluster
Cluster Preparations
My little disconnected cluster lives on its own network:
- Network:
192.168.69.0/24 - DNS:
192.168.69.6 - GW:
192.168.69.254 - VLAN ID:
69
Collecting the necessary NIC information upfront saves you a lot of trouble later:
| hostname | nic | mac | ipv4 | comment |
|---|---|---|---|---|
| rguske-ocp42-disco-1.disco.local | enp1s0 | 02:d8:6d:0f:3e:dc | 192.168.69.202 | Node 1 |
| rguske-ocp42-disco-2.disco.local | enp1s0 | 02:d8:6d:0f:3e:dd | 192.168.69.203 | Node 2 |
| rguske-ocp42-disco-3.disco.local | enp1s0 | 02:d8:6d:0f:3e:de | 192.168.69.204 | Node 3 |
BaseDomain: disco.local
Configurations
Create the agent-config.yaml as well as the install-config.yaml:
tree rguske-ocp42-disco/
rguske-ocp42-disco/
└── conf
    ├── agent-config.yaml
    └── install-config.yaml
cat > agent-config.yaml << EOF
apiVersion: v1beta1
kind: AgentConfig
metadata:
name: rguske-ocp42-disco
rendezvousIP: 192.168.69.202
hosts:
- hostname: rguske-ocp42-disco-1.disco.local
role: master
interfaces:
- name: enp1s0
macAddress: 02:d8:6d:0f:3e:dc
networkConfig:
interfaces:
- name: enp1s0
type: ethernet
state: up
mac-address: 02:d8:6d:0f:3e:dc
ipv4:
enabled: true
address:
- ip: 192.168.69.202
prefix-length: 24
dhcp: false
dns-resolver:
config:
server:
- 192.168.69.6
routes:
config:
- destination: 0.0.0.0/0
next-hop-address: 192.168.69.254
next-hop-interface: enp1s0
table-id: 254
- hostname: rguske-ocp42-disco-2.disco.local
role: master
interfaces:
- name: enp1s0
macAddress: 02:d8:6d:0f:3e:dd
networkConfig:
interfaces:
- name: enp1s0
type: ethernet
state: up
mac-address: 02:d8:6d:0f:3e:dd
ipv4:
enabled: true
address:
- ip: 192.168.69.203
prefix-length: 24
dhcp: false
dns-resolver:
config:
server:
- 192.168.69.6
routes:
config:
- destination: 0.0.0.0/0
next-hop-address: 192.168.69.254
next-hop-interface: enp1s0
table-id: 254
- hostname: rguske-ocp42-disco-3.disco.local
role: master
interfaces:
- name: enp1s0
macAddress: 02:d8:6d:0f:3e:de
networkConfig:
interfaces:
- name: enp1s0
type: ethernet
state: up
mac-address: 02:d8:6d:0f:3e:de
ipv4:
enabled: true
address:
- ip: 192.168.69.204
prefix-length: 24
dhcp: false
dns-resolver:
config:
server:
- 192.168.69.6
routes:
config:
- destination: 0.0.0.0/0
next-hop-address: 192.168.69.254
next-hop-interface: enp1s0
table-id: 254
EOFThe SSL certificate of the mirror registry, which will be used in the install-config.yaml, can be found within the mirror-registry/root/quay-rootCA folder.
Also, include the json data of your pull_secret.json which you’ve created in the previous section and which got moved to $XDG_RUNTIME_DIR/containers/auth.json.
{
  "auths": {
    "rguske-rhel9-disco-bastion.rguske.coe.muc.redhat.com:8443": {
      "auth": "aW5pdD...",
      "email": "user@foo.bar"
    }
  }
}
Create the install-config.yaml file accordingly. Important for the installation is to point to the new ImageDigestSources, so the installation can pull the images from your Mirror Registry.
Docs Chapter 2.1 - About mirroring the OpenShift Container Platform image repository for a disconnected registry
The imageDigestSources entries in install-config.yaml come from the mirror mappings produced by your mirroring workflow. With oc-mirror v2, the relevant source –> mirror mappings are generated in the workspace under: <workspace>/working-dir/cluster-resources/
There you will find generated ImageDigestMirrorSet resources. Those IDMS objects contain the source and mirrors mappings that correspond conceptually to what you need for imageDigestSources.
cat > install-config.yaml << EOF
apiVersion: v1
baseDomain: disco.local
ImageDigestSources:
- mirrors:
  - rguske-rhel9-disco-bastion.disco.local:8443/disco/openshift/release
  source: quay.io/openshift-release-dev/ocp-v4.0-art-dev
- mirrors:
  - rguske-rhel9-disco-bastion.disco.local:8443/disco/openshift/release-images
  source: quay.io/openshift-release-dev/ocp-release
additionalTrustBundle: |
  -----BEGIN CERTIFICATE-----
  MIIEHDCCAwSgAwIBAgIUFY/Z+WmgJ+8SIREIa3Cl3FRj9jYwDQYJKoZIhvcNAQEL
  BQAwgYAxCzAJBgNVBAYTAlVTMQswCQYDVQQIDAJWQTERMA8GA1UEBwwITmV3IFlv
  cmsxDTALBgNVBAoMBFF1YXkxETAPBgNVBAsMCERpdmlzaW9uMS8wLQYDVQQDDCZy
  Z3Vza2UtcmhlbDktZGlzY28tYmFzdGlvbi5kaXNjby5sb2NhbDAeFw0yNjA0MjQx
  NDE3MTZaFw0yOTAyMTExNDE3MTZaMIGAMQswCQYDVQQGEwJVUzELMAkGA1UECAwC
  [...]
  ZyYMLJyR83M5sD7sVbbuSOkYgNt20ZdIcqigIkyABRkqcahC7kOypXXJbhkj3fYL
  kyGukgbJRF96hCB9oO8bW3evact/P40arsjHT6qKRIZf0kKm7CYUVRjI4+jlz+oV
  n7iB3Rs8P16UvuFB2LfWmyNfuu21InZhXLmJ+rZJc0qnpq6Rm8iXAq0n8L5ycCHc
  gPt4JJQZJ8JP6bSREgAhqfNSngfLj73O1+S2fuN7i3mCQEv0UajEhQgHQtcZ6r1C
  -----END CERTIFICATE-----
compute:
- name: worker
  replicas: 0
controlPlane:
  name: master
  replicas: 3
metadata:
  name: rguske-ocp42-disco
networking:
  clusterNetwork:
    - cidr: 10.128.0.0/14
      hostPrefix: 23
  machineNetwork:
    - cidr: 192.168.69.0/24
  serviceNetwork:
    - 172.30.0.0/16
  networkType: OVNKubernetes
platform:
  baremetal:
    apiVIPs:
    - 192.168.69.200
    ingressVIPs:
    - 192.168.69.201
fips: false
pullSecret: '{
  "auths": {
    "rguske-rhel9-disco-bastion.disco.local:8443": {
      "auth": "aW5pdDpyM2RoNHQxIQ==",
      "email": "rguske@redhat.com"
    }
  }
}'
sshKey: 'ssh-ed25519 AAAAC3NzaC1lZ...VzGQ/Ur5Ek0v9gF rguske@rguske-rhel9-disco-bastion.rguske.coe.muc.redhat.com'
EOF
Now create a new openshift-install-fips binary which only points to your mirror registry:
export LOCAL_SECRET_JSON='/home/rguske/openshift/new-pull-secret.json'
export LOCAL_REGISTRY='rguske-rhel9-disco-bastion.disco.local:8443'
export LOCAL_REPOSITORY='disco/openshift/release-images'
export OCP_RELEASE='4.21.10'
export ARCHITECTURE='x86_64'
oc adm release extract -a ${LOCAL_SECRET_JSON} --idms-file=/home/rguske/openshift/mirror/working-dir/cluster-resources/idms-oc-mirror.yaml --command=openshift-install-fips "${LOCAL_REGISTRY}/${LOCAL_REPOSITORY}:${OCP_RELEASE}-${ARCHITECTURE}"tree -L 1
.
├── downloads
├── oc-mirror-web-app
├── openshift
└── openshift-install-fipsValidate it:
./openshift-install-fips version
./openshift-install-fips 4.21.10
built from commit 6285755d199e7aa7bf29db5fe6964ce7f3684ed9
release image rguske-rhel9-disco-bastion.disco.local:8443/disco/openshift/release-images@sha256:5d591a70c92a6dfa3b6b948ffe5e5eac7ab339c49005744006aa0dd9d6d98898
Release Image Architecture is unknown
release architecture unknown
default architecture amd64This binary is what will be used to create the agent ISO.
Create the Agent ISO
Create the install-config.yaml and agent-config.yaml files, and run:
./openshift-install-fips agent create image --dir /home/rguske/openshift/rguske-ocp42-disco/conf/Example output:
INFO Configuration has 3 master replicas, 0 arbiter replicas, and 0 worker replicas
WARNING The imageDigestSources configuration in install-config.yaml should have at least one source field matching the releaseImage value rguske-rhel9-disco-bastion.disco.local:8443/disco/openshift/release-images@sha256:5d591a70c92a6dfa3b6b948ffe5e5eac7ab339c49005744006aa0dd9d6d98898
INFO The rendezvous host IP (node0 IP) is 192.168.69.202
INFO Extracting base ISO from release payload
INFO Base ISO obtained from release and cached at [/home/rguske/.cache/agent/image_cache/coreos-x86_64.iso]
INFO Consuming Install Config from target directory
INFO Consuming Agent Config from target directory
INFO Generated ISO at /home/rguske/openshift/rguske-ocp42-disco/conf/agent.x86_64.iso.
If you still have problems with the release-image reference, override it explicitly:
export OPENSHIFT_INSTALL_RELEASE_IMAGE_OVERRIDE='rguske-rhel9-disco-bastion.rguske.coe.muc.redhat.com:8443/disco/openshift/release-images@sha256:5d591a70c92a6dfa3b6b948ffe5e5eac7ab339c49005744006aa0dd9d6d98898'Mount the agent.x86_64.iso on the machines (BM or VM).
Boot the machines and wait until the installation completes. Validate the installer’s progress using:
./openshift-install-fips wait-for install-complete --dir /home/rguske/openshift/rguske-ocp42-disco/conf/ --log-level=debugSharing the ISO via a httpd Webserver
Depending on your environment, providing the created ISO to bare-metal or VM hosts can be cumbersome. One quick and easy way is making it downloadable via a webserver.
Install httpd on the bastion host:
dnf install httpd
sudo systemctl enable --now httpd
sudo firewall-cmd --permanent --add-service=http
sudo firewall-cmd --reload
Validate the service is running:
sudo ss -tuln | grep :80
curl -I http://localhost
sudo tail -f /var/log/httpd/error_log
Copy the created ISO into /var/www/html/ on the bastion host, then download it from the target side with wget:
wget http://<bastion-name/ip>/agent.x86_64.isoExample:
wget http://bastion-rguske.rguske.coe.muc.redhat.com/agent.x86_64.iso
Connecting to bastion-rguske.rguske.coe.muc.redhat.com (10.32.96.138:80)
saving to 'agent.x86_64.iso'
agent.x86_64.iso      21%  ********************************************   |  261M  0:00:10 ETA
Using Operator Lifecycle Manager in Disconnected Environments
Source: Using Operator Lifecycle Manager in disconnected environments
In section Creating the Image Set Configuration we’ve initiated the mirroring process which resulted in the creation of the following files which got stored in folder ../working-dir/cluster-resources:
ImageDigestMirrorSet(IDMS) - handles registry mirror rules when using image digest pull specifications. Generated if at least one image of the image set is mirrored by digest.ImageTagMirrorSet(ITMS) - handles registry mirror rules when using image tag pull specifications. Generated if at least one image from the image set is mirrored by tag.CatalogSource- retrieves information about the available Operators in the mirror registry. Used by Operator Lifecycle Manager (OLM).ClusterCatalog- retrieves information about the available cluster extensions (which includes Operators) in the mirror registry. Used by OLM v1.UpdateService- provides update graph data to the disconnected environment. Used by the OpenShift Update Service.
Before applying the newly created resource manifests, disable the sources for the default catalogs first by adding disableAllDefaultSources: true to the OperatorHub object:
oc patch OperatorHub cluster --type json \
    -p '[{"op": "add", "path": "/spec/disableAllDefaultSources", "value": true}]'
Create the above listed resources by simply executing:
oc apply -f /home/rguske/openshift/mirror/working-dir/cluster-resourcesIf this step is done, delete the old CatalogSource using oc -n openshift-marketplace delete catalogsource redhat-operators.
New CatalogSource
Validate the new catalog source:
oc -n openshift-marketplace get catalogsource

NAME                           DISPLAY                    TYPE   PUBLISHER   AGE
my-operator-catalog  Red Hat Operators          grpc   Red Hat     15m
New UpdateService
Besides the new CatalogSource object, a new OpenShift Update Service Operator object (based on updateService.yaml) was also part of the previous operation. But the new UpdateService won’t trust your registry yet. You need to create a ConfigMap with the root certificate of your mirror registry.
Docs: Configuring access to a secured registry for the OpenShift Update Service and Configuring additional trust stores for image registry access
You can add references to a ConfigMap that has additional certificate authorities (CAs) to be trusted during image registry access to the image.config.openshift.io/cluster custom resource (CR).
updateservice-registry, which will be picked up by the Cluster Service Operator.oc -n openshift-config apply -f - <<EOF
apiVersion: v1
kind: ConfigMap
metadata:
name: my-mirror-registry-ca
data:
updateservice-registry: |
-----BEGIN CERTIFICATE-----
MIIEHDCCAwSgAwIBAgIUFY/Z+WmgJ+8SIREIa3Cl3FRj9jYwDQYJKoZIhvcNAQEL
BQAwgYAxCzAJBgNVBAYTAlVTMQswCQYDVQQIDAJWQTERMA8GA1UEBwwITmV3IFlv
cmsxDTALBgNVBAoMBFF1YXkxETAPBgNVBAsMCERpdmlzaW9uMS8wLQYDVQQDDCZy
Z3Vza2UtcmhlbDktZGlzY28tYmFzdGlvbi5kaXNjby5sb2NhbDAeFw0yNjA0MjQx
NDE3MTZaFw0yOTAyMTExNDE3MTZaMIGAMQswCQYDVQQGEwJVUzELMAkGA1UECAwC
[...]
kyGukgbJRF96hCB9oO8bW3evact/P40arsjHT6qKRIZf0kKm7CYUVRjI4+jlz+oV
n7iB3Rs8P16UvuFB2LfWmyNfuu21InZhXLmJ+rZJc0qnpq6Rm8iXAq0n8L5ycCHc
gPt4JJQZJ8JP6bSREgAhqfNSngfLj73O1+S2fuN7i3mCQEv0UajEhQgHQtcZ6r1C
-----END CERTIFICATE-----
rguske-rhel9-disco-bastion.rguske.coe.muc.redhat.com..8443: |
-----BEGIN CERTIFICATE-----
MIIEHDCCAwSgAwIBAgIUFY/Z+WmgJ+8SIREIa3Cl3FRj9jYwDQYJKoZIhvcNAQEL
BQAwgYAxCzAJBgNVBAYTAlVTMQswCQYDVQQIDAJWQTERMA8GA1UEBwwITmV3IFlv
cmsxDTALBgNVBAoMBFF1YXkxETAPBgNVBAsMCERpdmlzaW9uMS8wLQYDVQQDDCZy
Z3Vza2UtcmhlbDktZGlzY28tYmFzdGlvbi5kaXNjby5sb2NhbDAeFw0yNjA0MjQx
[...]
kyGukgbJRF96hCB9oO8bW3evact/P40arsjHT6qKRIZf0kKm7CYUVRjI4+jlz+oV
n7iB3Rs8P16UvuFB2LfWmyNfuu21InZhXLmJ+rZJc0qnpq6Rm8iXAq0n8L5ycCHc
gPt4JJQZJ8JP6bSREgAhqfNSngfLj73O1+S2fuN7i3mCQEv0UajEhQgHQtcZ6r1C
-----END CERTIFICATE-----
EOFAfter creating the ConfigMap, patch the config.openshift.io/v1 CR named cluster with the new additionalTrustedCA:
oc patch image.config.openshift.io/cluster --type=merge \
  -p '{"spec":{"additionalTrustedCA":{"name":"my-mirror-registry-ca"}}}'
Check the pods within the openshift-update-service namespace:
oc -n openshift-update-service get pods

NAME                                      READY   STATUS    RESTARTS   AGE
graph-data-tag-digest                     1/1     Running   0          2m17s
update-service-oc-mirror-98764cbd-cj2sd   2/2     Running   0          8m4s
update-service-oc-mirror-98764cbd-t87tf   2/2     Running   0          8m4s
updateservice-operator-74d959fd7d-qzj8s   1/1     Running   0          46m
The next step is to update the Cluster Version Operator with the new route object.
Option 1 - CLI:
oc -n openshift-update-service get route

NAME                             HOST/PORT                                                                                     PATH   SERVICES                                 PORT            TERMINATION   WILDCARD
update-service-oc-mirror-route update-service-oc-mirror-route-openshift-update-service.apps.rguske-ocp42-disco.disco.local update-service-oc-mirror-policy-engine policy-engine edge/None NonePOLICY_ENGINE_GRAPH_URI="$(oc -n openshift-update-service get updateservice update-service-oc-mirror \
-o jsonpath='{.status.policyEngineURI}/api/upgrades_info/v1/graph{"\n"}')"oc patch clusterversion/version \
--type=merge \
-p "{\"spec\":{\"upstream\":\"${POLICY_ENGINE_GRAPH_URI}\"}}"Option 2 - WebConsole:
Go to Administration → Cluster Settings → Upstream Configuration and select Default update server. Select Custom update service and paste the output of oc -n openshift-update-service get route in here.
The service will initially complain about the untrusted cluster certificate. It’s necessary to patch the cluster-wide proxy configuration with a ConfigMap object that contains the cluster’s self-signed certificate.
Obtain the certificate:
oc get secret router-ca \
  -n openshift-ingress-operator \
  -o jsonpath='{.data.tls\.crt}' \
  | base64 -d > router-ca.pem
Create the ConfigMap:
oc apply -f - <<EOF
apiVersion: v1
kind: ConfigMap
metadata:
  name: ocp-disco-ingress-cert
  namespace: openshift-config
data:
  ca-bundle.crt: |
`sed 's/^/    /' router-ca.pem`
EOF
Patch the proxy object:
oc patch proxy/cluster \
     --type=merge \
     --patch='{"spec":{"trustedCA":{"name":"ocp-disco-ingress-cert"}}}'
Check the updates to the cluster operators:
oc get co -wAfter a successful reconciliation, the update graph should look good.
Additionally
Disable Insights
oc get secret pull-secret -n openshift-config \
  -o jsonpath='{.data.\.dockerconfigjson}' \
  | base64 -d \
  | jq 'del(.auths["cloud.openshift.com"])' \
  > pull-secret-without-insights.json
oc set data secret/pull-secret -n openshift-config \
--from-file=.dockerconfigjson=pull-secret-without-insights.jsonoc apply -n openshift-insights -f - <<'EOF'
apiVersion: v1
kind: ConfigMap
metadata:
name: insights-config
namespace: openshift-insights
data:
config.yaml: |
alerting:
disabled: true
EOFDisable Devfiles
oc patch consoles.operator.openshift.io/cluster  --type=merge \
  -p '{"spec":{"customization":{"developerCatalog":{"types":{"state":"Disabled","disabled":["Devfile"]}}}}}'
Troubleshooting
Typical disconnected blockers in OpenShift agent-based installs are:
- release image not mirrored correctly
- OS image URL inaccessible
- missing release signatures
- mirrored registry CA not trusted
- incorrect
imageContentSources/ImageDigestMirrorSet - registry auth not included in pull secret
- missing boot artifacts in the disconnected cache
- cluster never transitions from
insufficient→ready
Networking
ssh -i ~/.ssh/id_ed25519 core@rguske-ocp42-disco-2.disco.localDNS:
[core@rguske-ocp42-disco-1 ~]$ dig +short rguske-ocp42-disco-2.disco.local
192.168.69.203
[core@rguske-ocp42-disco-1 ~]$ dig +short rguske-ocp42-disco-1.disco.local
192.168.69.202
[core@rguske-ocp42-disco-1 ~]$ dig +short rguske-ocp42-disco-3.disco.local
192.168.69.204
[core@rguske-ocp42-disco-1 ~]$ dig +short api.rguske-ocp42-disco.disco.local
192.168.69.200
[core@rguske-ocp42-disco-1 ~]$ dig +short console.apps.rguske-ocp42-disco.disco.local
192.168.69.201
Ping:
[core@rguske-ocp42-disco-2 ~]$ ping -c 3 rguske-ocp42-disco-1
PING rguske-ocp42-disco-1.disco.local (192.168.69.202) 56(84) bytes of data.
64 bytes from rguske-ocp42-disco-1.disco.local (192.168.69.202): icmp_seq=1 ttl=64 time=0.311 ms
64 bytes from rguske-ocp42-disco-1.disco.local (192.168.69.202): icmp_seq=2 ttl=64 time=0.435 ms
64 bytes from rguske-ocp42-disco-1.disco.local (192.168.69.202): icmp_seq=3 ttl=64 time=0.341 ms

--- rguske-ocp42-disco-1.disco.local ping statistics ---
3 packets transmitted, 3 received, 0% packet loss, time 2003ms
rtt min/avg/max/mdev = 0.311/0.362/0.435/0.052 ms
[core@rguske-ocp42-disco-2 ~]$ ping -c 3 rguske-ocp42-disco-2
PING rguske-ocp42-disco-2.disco.local (192.168.69.203) 56(84) bytes of data.
64 bytes from rguske-ocp42-disco-2.disco.local (192.168.69.203): icmp_seq=1 ttl=64 time=0.052 ms
64 bytes from rguske-ocp42-disco-2.disco.local (192.168.69.203): icmp_seq=2 ttl=64 time=0.103 ms
64 bytes from rguske-ocp42-disco-2.disco.local (192.168.69.203): icmp_seq=3 ttl=64 time=0.082 ms

--- rguske-ocp42-disco-2.disco.local ping statistics ---
3 packets transmitted, 3 received, 0% packet loss, time 2027ms
rtt min/avg/max/mdev = 0.052/0.079/0.103/0.020 ms
[core@rguske-ocp42-disco-2 ~]$ ping -c 3 rguske-ocp42-disco-3
PING rguske-ocp42-disco-3.disco.local (192.168.69.204) 56(84) bytes of data.
64 bytes from rguske-ocp42-disco-3.disco.local (192.168.69.204): icmp_seq=1 ttl=64 time=0.360 ms
64 bytes from rguske-ocp42-disco-3.disco.local (192.168.69.204): icmp_seq=2 ttl=64 time=1.24 ms
64 bytes from rguske-ocp42-disco-3.disco.local (192.168.69.204): icmp_seq=3 ttl=64 time=1.25 ms
Logs
On the rendezvous host run:
journalctl assisted-service.service -fOn the other nodes run:
journalctl -b -f -u release-image.service -u bootkube.service -u node-image-pull.service -fCluster Status Validations
Inspect the cluster validation status directly:
curl -s http://localhost:8090/api/assisted-install/v2/clusters | jqYou’ll likely be greeted with an authorization error first:
{ "code": 401, "message": "unauthenticated for invalid credentials" }Obtain the token from the running assisted-service container:
podman inspect 580  | jq '.[0].Config.Env' | grep USER_AUTH_TOKEN
  "USER_AUTH_TOKEN=eyJhbGciOiJFUzI1Ni...OFQ1DwtPZBRY3UKEswjgXEJSbrQ",
Check the cluster status:
TOKEN="eyJhbGciOiJFUzI1Ni...OFQ1DwtPZBRY3UKEswjgXEJSbrQ"

curl -s \
  -H "Authorization: $TOKEN" \
  http://localhost:8090/api/assisted-install/v2/clusters | jq
The status summary told me exactly what I needed to know:
{
  "status": "insufficient",
  "status_info": "Cluster is not ready for install",
  "validations_info": {
    "hosts-data": [
      {
        "id": "all-hosts-are-ready-to-install",
        "status": "failure",
        "message": "The cluster has hosts that are not ready to install."
      },
      {
        "id": "sufficient-masters-count",
        "status": "success",
        "message": "The cluster has the exact amount of dedicated control plane nodes."
      }
    ],
    "network": [
      {
        "id": "api-vips-defined",
        "status": "success",
        "message": "API virtual IPs are defined."
      },
      {
        "id": "cluster-cidr-defined",
        "status": "success",
        "message": "The Cluster Network CIDR is defined."
      },
      {
        "id": "network-type-valid",
        "status": "success",
        "message": "The cluster has a valid network type"
      }
    ]
  }
}
The status_info was telling me exactly where to look:
status: insufficient
status_info: Cluster is not ready for install
Specifically:
"all-hosts-are-ready-to-install" = failure
"The cluster has hosts that are not ready to install."
The next step is to inspect the host validation failures directly:
curl -s \
  -H "Authorization: $TOKEN" \
  http://localhost:8090/api/assisted-install/v2/clusters/ceeb9d66-c894-4224-adcc-72283fd213f4/hosts \
| jq '.[] | {hostname: .requested_hostname, status: .status, status_info: .status_info, validations: .validations_info}'
My cluster was stuck in validation because of a simple “copy/paste” mistake in the hostname section. I had configured the same hostname twice 😅
Affected hosts:

Host ID 35ddb3ef-...
Host ID 96f0818e-...

Validation failure:

hostname-unique = failure
Hostname rguske-ocp42-disco-2.disco.local is not unique in cluster
If the discovery was successful, run:
journalctl -b -f -u release-image.service -u bootkube.service -u node-image-pull.service -fFirewall Blocking Image Pulls
I also faced the issue that my disconnected cluster suddenly couldn’t pull images from my mirror registry anymore. First, some basic checks from one of the nodes:
nc -vz rguske-rhel9-disco-bastion.disco.local 8443curl -vk https://rguske-rhel9-disco-bastion.disco.local:8443/v2/On the mirror registry host:
sudo ss -tulpn | grep 8443sudo firewall-cmd --list-allsudo firewall-cmd --permanent --add-port=8443/tcp
sudo firewall-cmd --reloadOpening port 8443 again did the trick:
nc -vz rguske-rhel9-disco-bastion.disco.local 8443
Ncat: Version 7.92 ( https://nmap.org/ncat )
Ncat: Connected to 192.168.69.208:8443.
Ncat: 0 bytes sent, 0 bytes received in 0.02 seconds.
✅
Conclusion
Running OpenShift fully disconnected requires quite a bit more upfront planning than a regular connected install. A well prepared bastion host, a local mirror registry, a carefully crafted ImageSetConfiguration, and a trust chain that needs to be threaded through the installer, OLM, and the Update Service alike. But once the mirror registry and the generated IDMS/ITMS/CatalogSource manifests are in place, the Agent-Based Installer takes care of the rest just like in a connected environment.
If you hit a wall, the assisted-service API and its validations_info are your best friend - in my case, it was “just” a duplicated hostname.
Contributions
Shoutout to Joachim von Thadden and Robert Bohne for reviewing the article and for providing valueable feedback.