vSphere with Tanzu Supervisor Services Part I - Introduction and How-To
 offering a multitude of benefits by e.g. providing a simple and opinionated way to deploy central services to DevOps and AppDev teams. This post introduces the Supervisor Services and the concept behind them as well as how-to install such on a Supervisor Cluster.")
To begin with, if you are familiar with vSphere Pods in general, you can skip the first chapter of this post and directly go to the chapter Supervisor Services.
Recap - Embed Containers and Kubernetes into vSphere
When VMware released vSphere 7 back in 2020, it was announced that under the hood a lot of architectural efforts flowed into VMware’s core platform. These efforts had to be done in order to embed containers and Kubernetes into vSphere, to unify them with virtual machines as first class citizens.
If you aren’t new to the “Tanzu-Game”, you know that VMware’s Kubernetes Runtime VMware Tanzu Kubernetes Grid (TKG) allows you to deploy and lifecycle Kubernetes clusters on vSphere. These functionalities aren’t implemented in the vSphere management plane (the vCenter Server).
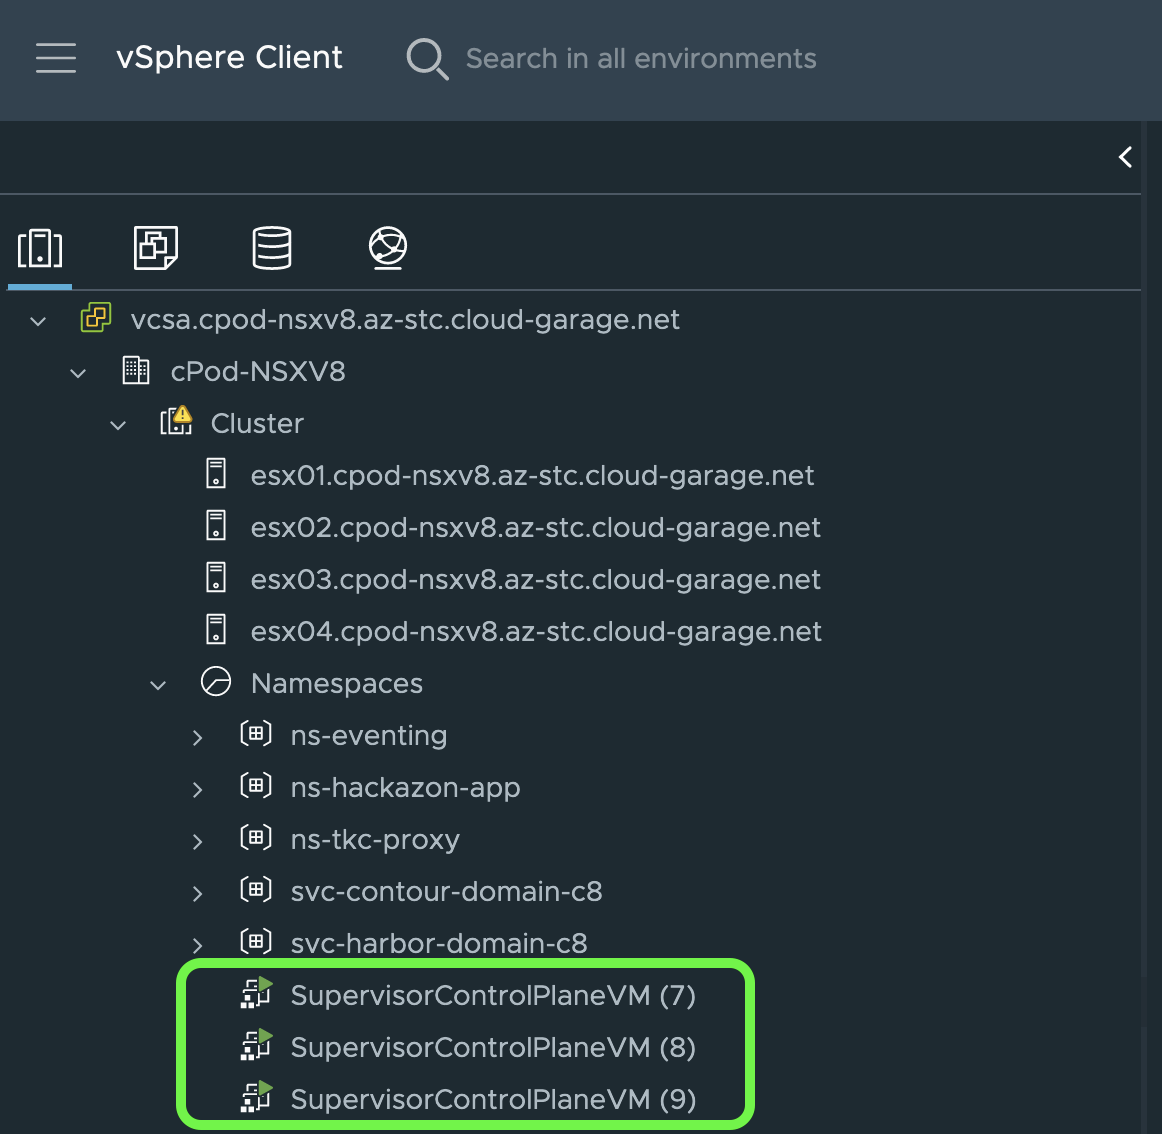
Instead of, VMware is leveraging the concept of a Kubernetes control plane cluster which in vSphere with Tanzu aka TKGS is called a Supervisor Cluster (Figure I & II).

vSphere Pods
Besides these terrific new capabilities in vSphere, which is the proper coordination and management of resources such as e.g. Tanzu Kubernetes Clusters (TKC), it was also introduced to have Kubernetes Pods running natively on vSphere alongside Virtual Machines. This feature was introduced as vSphere (Native) Pods.
In order to have Pods running natively on vSphere, it was necessary to extend the ESXi Hypervisor with Kubernetes Worker Node characteristics. This is implemented by installing an additional process via a VMware Installation Bundle (VIB) named the Spherelet.
It is a kubelet that is ported natively to ESXi and allows the ESXi host to become part of the Kubernetes cluster.
Besides the Spherelet, another component is necessary to ultimately have a Pod scheduled and running on the ESXi. This component is called the Container Runtime Executive (CRX).
CRX is similar to a VM from the perspective of Hostd and vCenter Server. CRX includes a paravirtualized Linux kernel that works together with the hypervisor.
Back in 2020, Frank Denneman has written a deep-dive post about the “Initial Placement of a vSphere Pod” which introduces the overall concept quiet comprehensively.
Furthermore, the following by Alex Vino is also pretty well written. vSphere Pod: Deep Dive into Use Case Patterns — Part-1
A Requirement to run vSphere Pods
There’s one small thing that is currently (vSphere 7.0 Ux and 8.0) still a requirement for having vSphere Pods running on vSphere. vSphere Pods can only be used in combination with VMware NSX.
Didn’t he just say "[…] one small thing […]" ?
Okay, the dependency on NSX isn’t really a small thing but please keep in mind that having NSX in place is a huge valuable addition that provides additional networking and security capabilities to vSphere environments such as e.g. Micro-Segmentation, Service-Insertion or Multi-Cloud connectivity.
However, a requirement can be a subject to change, can’t it? 😉 …
The changes on the NSX requirement were announced shortly after I published this article. Now, with vSphere 8 Update 1 the Supervisor Services can be used with the vSphere Distributed Switch.
Supervisor Services
So, what are Supervisor Services in vSphere with Tanzu and how fits vSphere Pods into the picture?
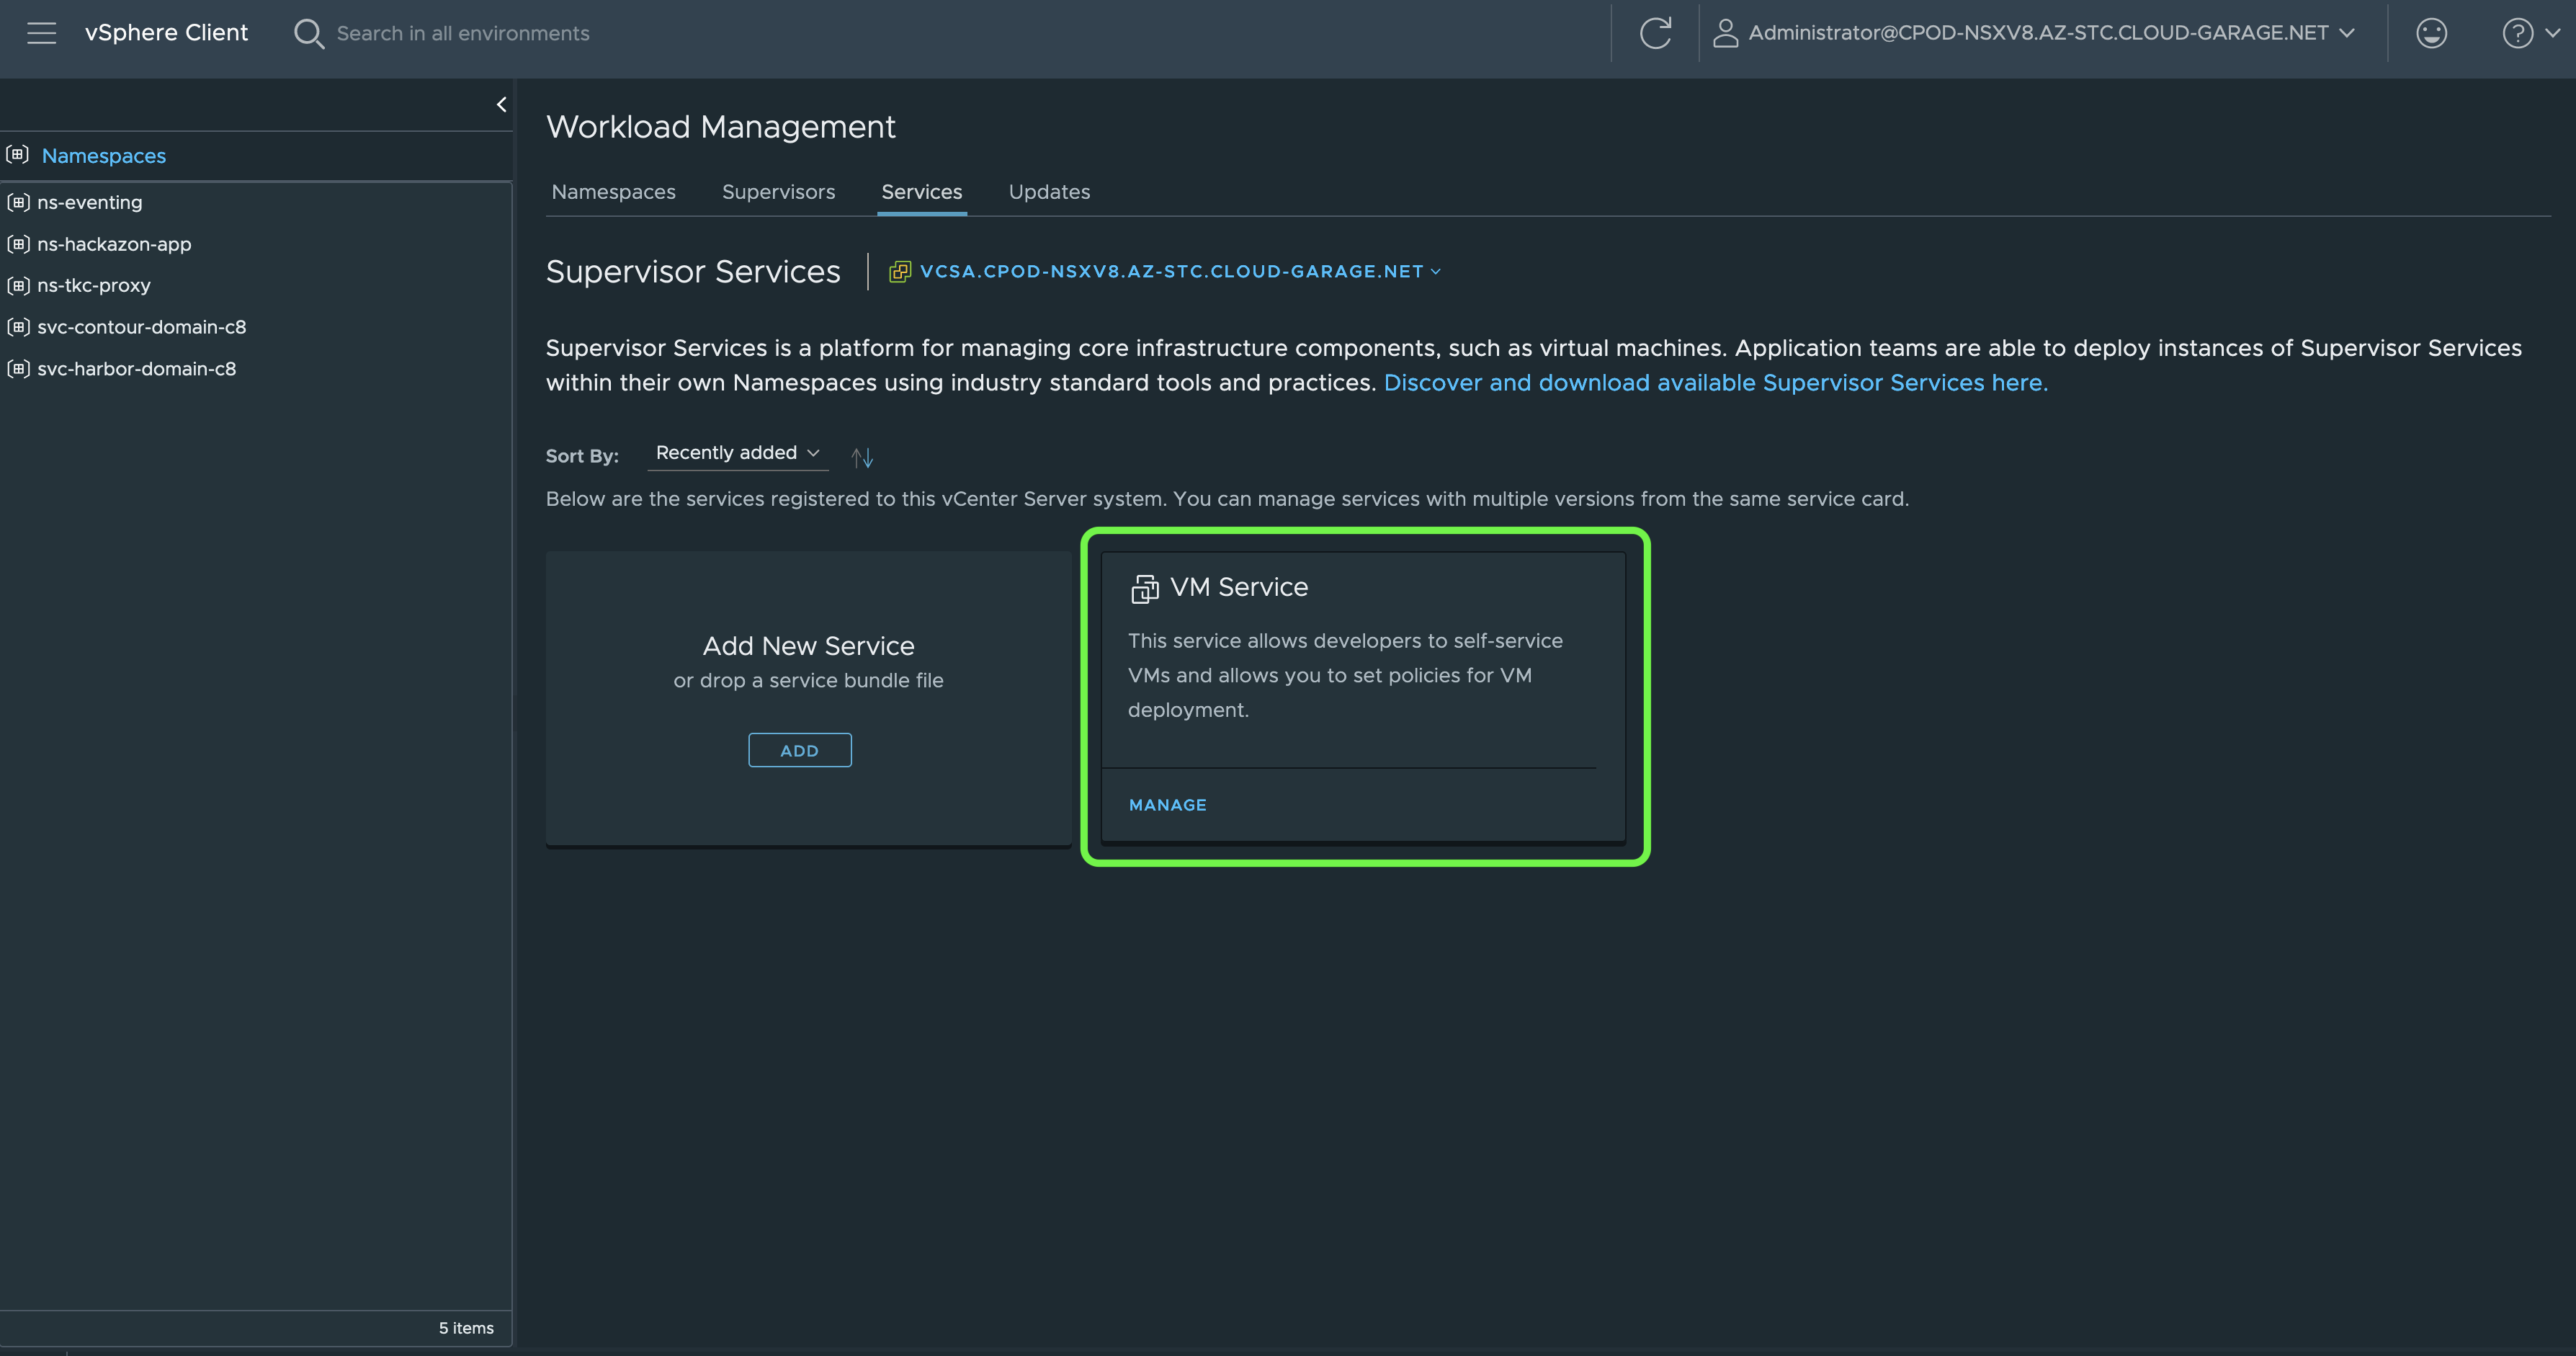
In the vSphere Client the following is stated:
Supervisor Services is a platform for managing core infrastructure components, such as virtual machines. Application teams are able to deploy instances of Supervisor Services within their own Namespaces using industry standard tools and practices.
The description is basically saying, that through the Supervisor Services, which are technically vSphere certified Kubernetes operators, it is possible to deploy resources to vSphere Namespaces using a declarative way via the exposed Kubernetes API (e.g. kubectl apply -f resource.yaml).
Such resources are e.g. Virtual Machines or Tanzu Kubernetes Clusters. The corresponding Supervisor Services for these resources are e.g. the VM Service and the Tanzu Kubernetes Grid Service.
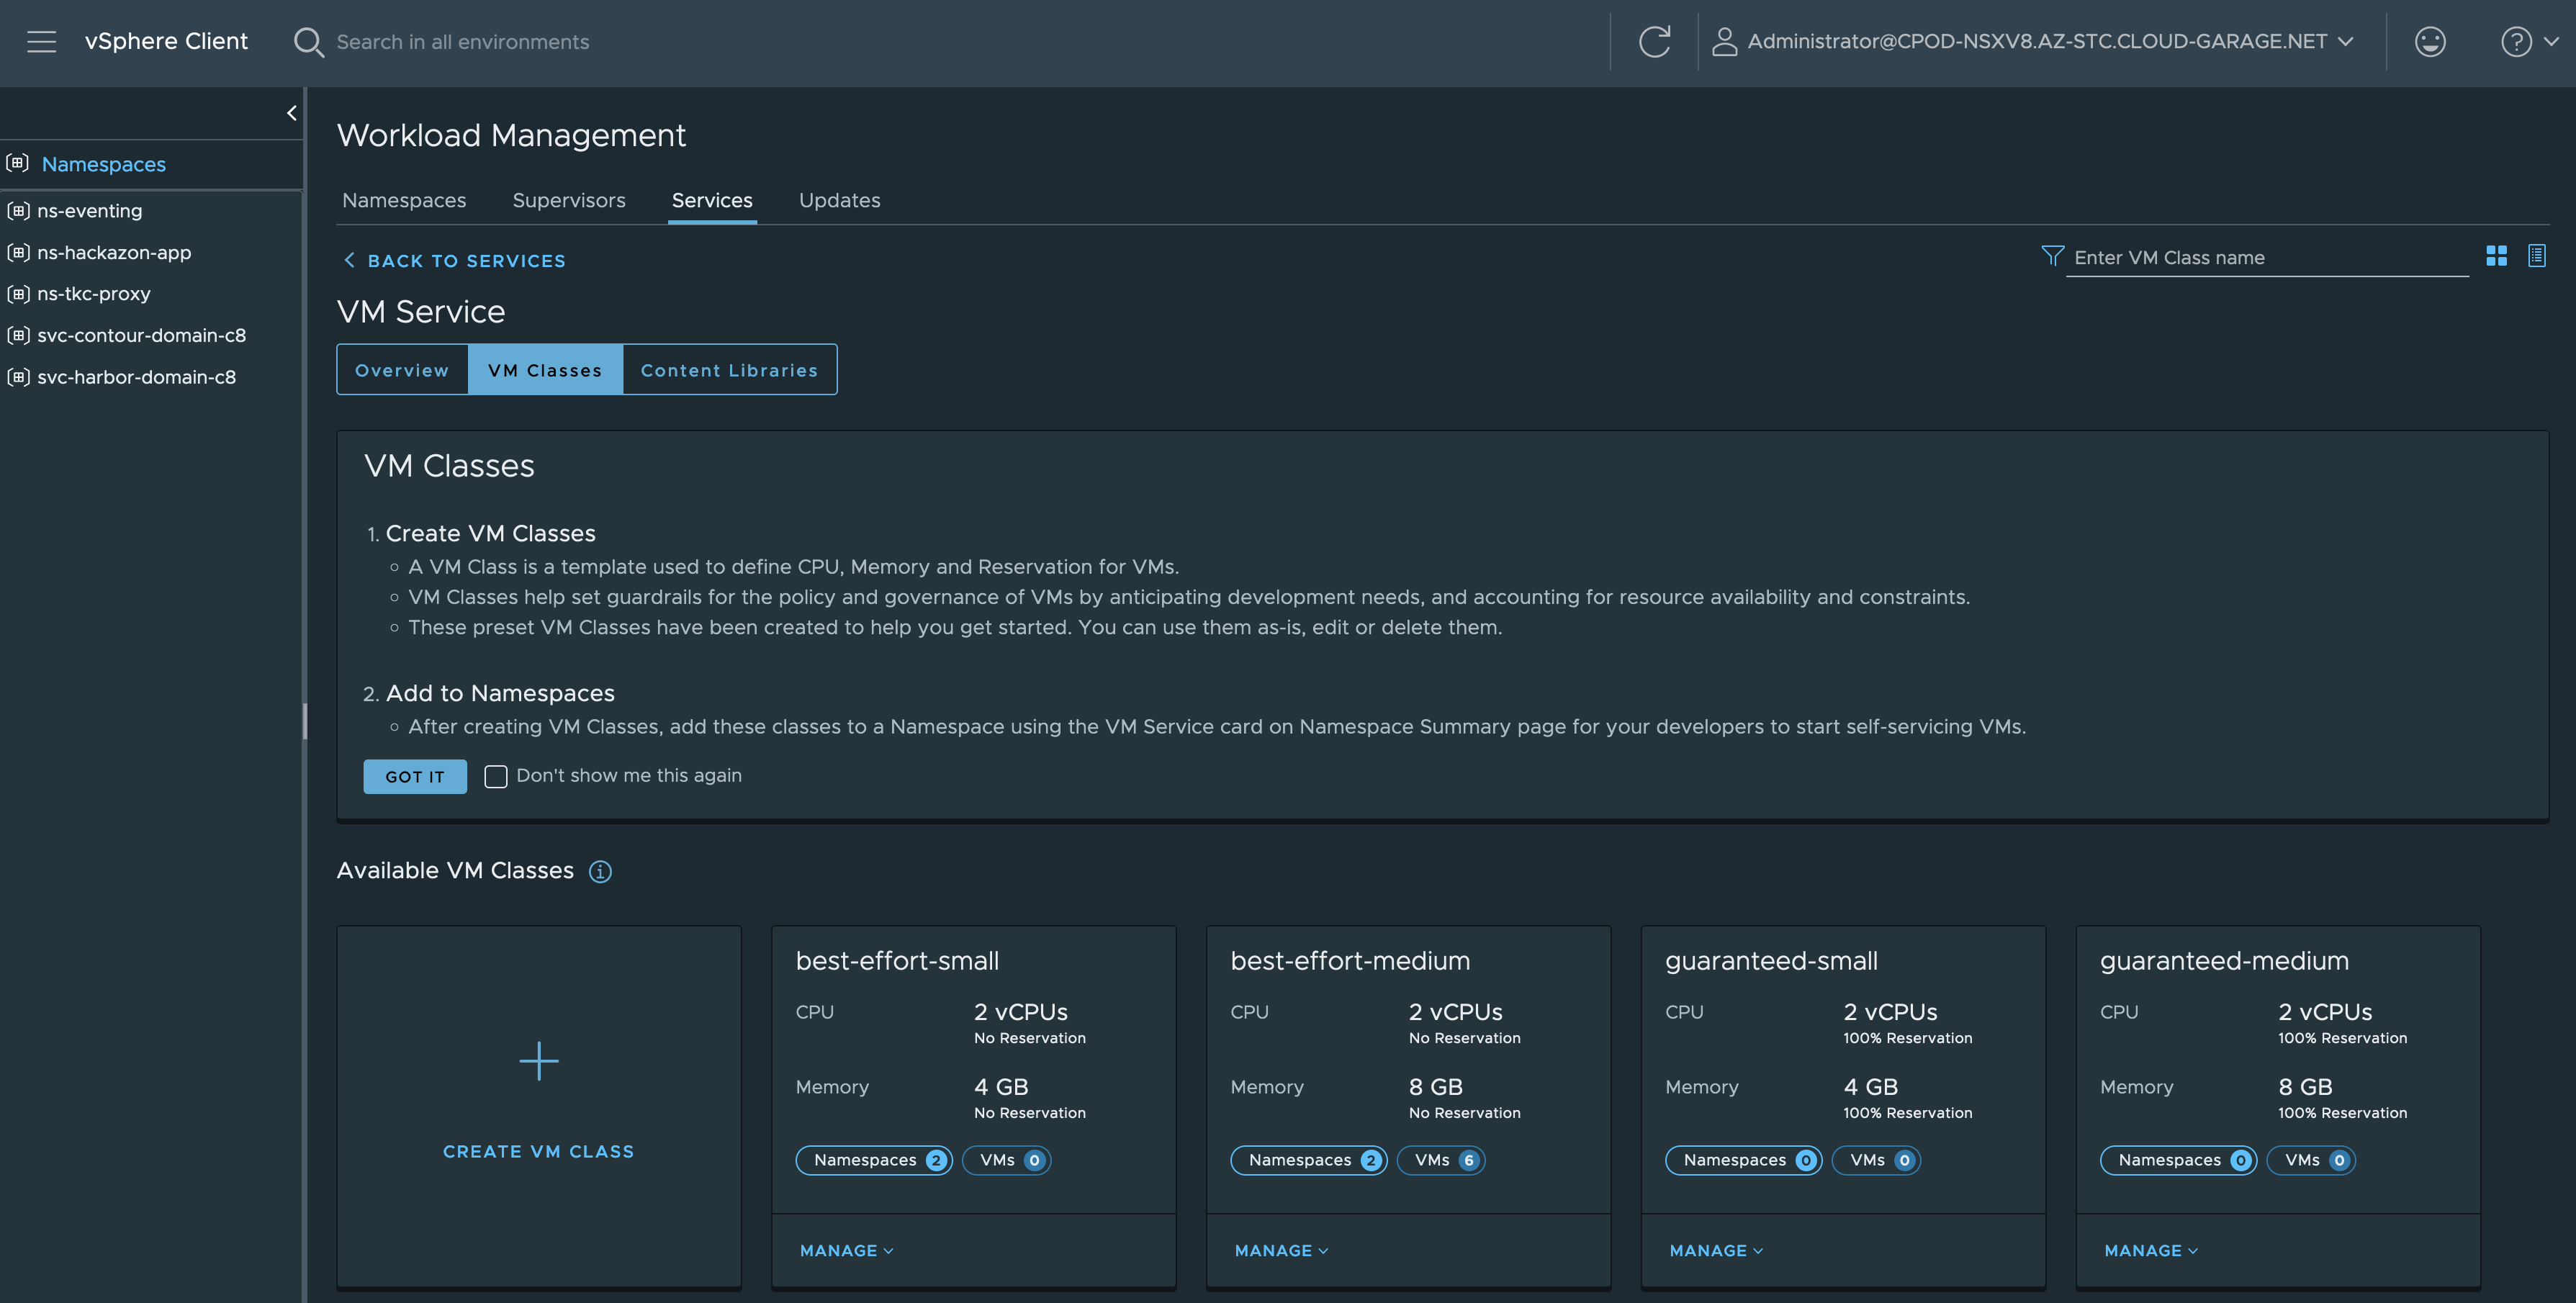
Figure III below shows the VM Service tile in the Workload Management section from where you can MANAGE your Virtual Machine Classes.
Hint: These Virtual Machine Classes exists as a Custom Resource on the Supervisor Cluster. Check with e.g. kubectl get virtualmachineclasses -A
From here you can create your own Virtual Machine Classes which e.g. could be equiped with some decent Nvidia GPUs.
See: Add PCI Devices to a VM Class in vSphere with Tanzu
But it’s even more. Supervisor Services are also tightly-integrated Independent Software Vendor (ISV) services, which can provide essential shared-services to your workloads. Shared-services like e.g. a Container Image Registry, a Backup & Recovery Service or an Object Store.
Supervisor Services Catalog
The Services mentioned last and others are available via the Supervisor Services Catalog repository.
Included are (March, 10th):
- vSAN Data Persistence Platform (vDPP) Services
- MinIO
- Cloudian
- Dell ObjectScale
- Backup & Recovery Services
- Velero
- Certificate Management Services
- Cert-Manager
- Cloud Native Registry Services
- Harbor
- Kubernetes Ingress Controller Services
- Contour
- Service Discovery Services
- External DNS
All the listed solutions are deployed as vSphere Pods. Using vSphere Pods provides greater security by isolating related workloads within a defined boundary. Therefore, it reduces the risk of cross-contamination of workloads. Furthermore, the ability to deploy and manage applications as a single entity (Pod) enhances efficiency, while the use of Distributed Resource Scheduling ensures that workloads are optimally placed across the cluster.
Ingress Controller Service - Contour
For the sake of this blog post, I’m going to describe first how to deploy the Ingress Controller Service Contour. There are several reasons for this. One is, that this Supervisor Service is required for the Cloud Native Registry Services - Harbor, which is definitely worth checking out and a deployment I’m going to describe following the Contour installation.
Hint: Both mentioned Supervisor Services are supported on vSphere 8.0 and later.
Another reason is, that I wanted to have Contour serving as an Ingress Controller my applications which are deployed and running as vSphere Pods natively on my vSphere cluster. Part II of this blog series is covering this use case.
Add New Service - Contour
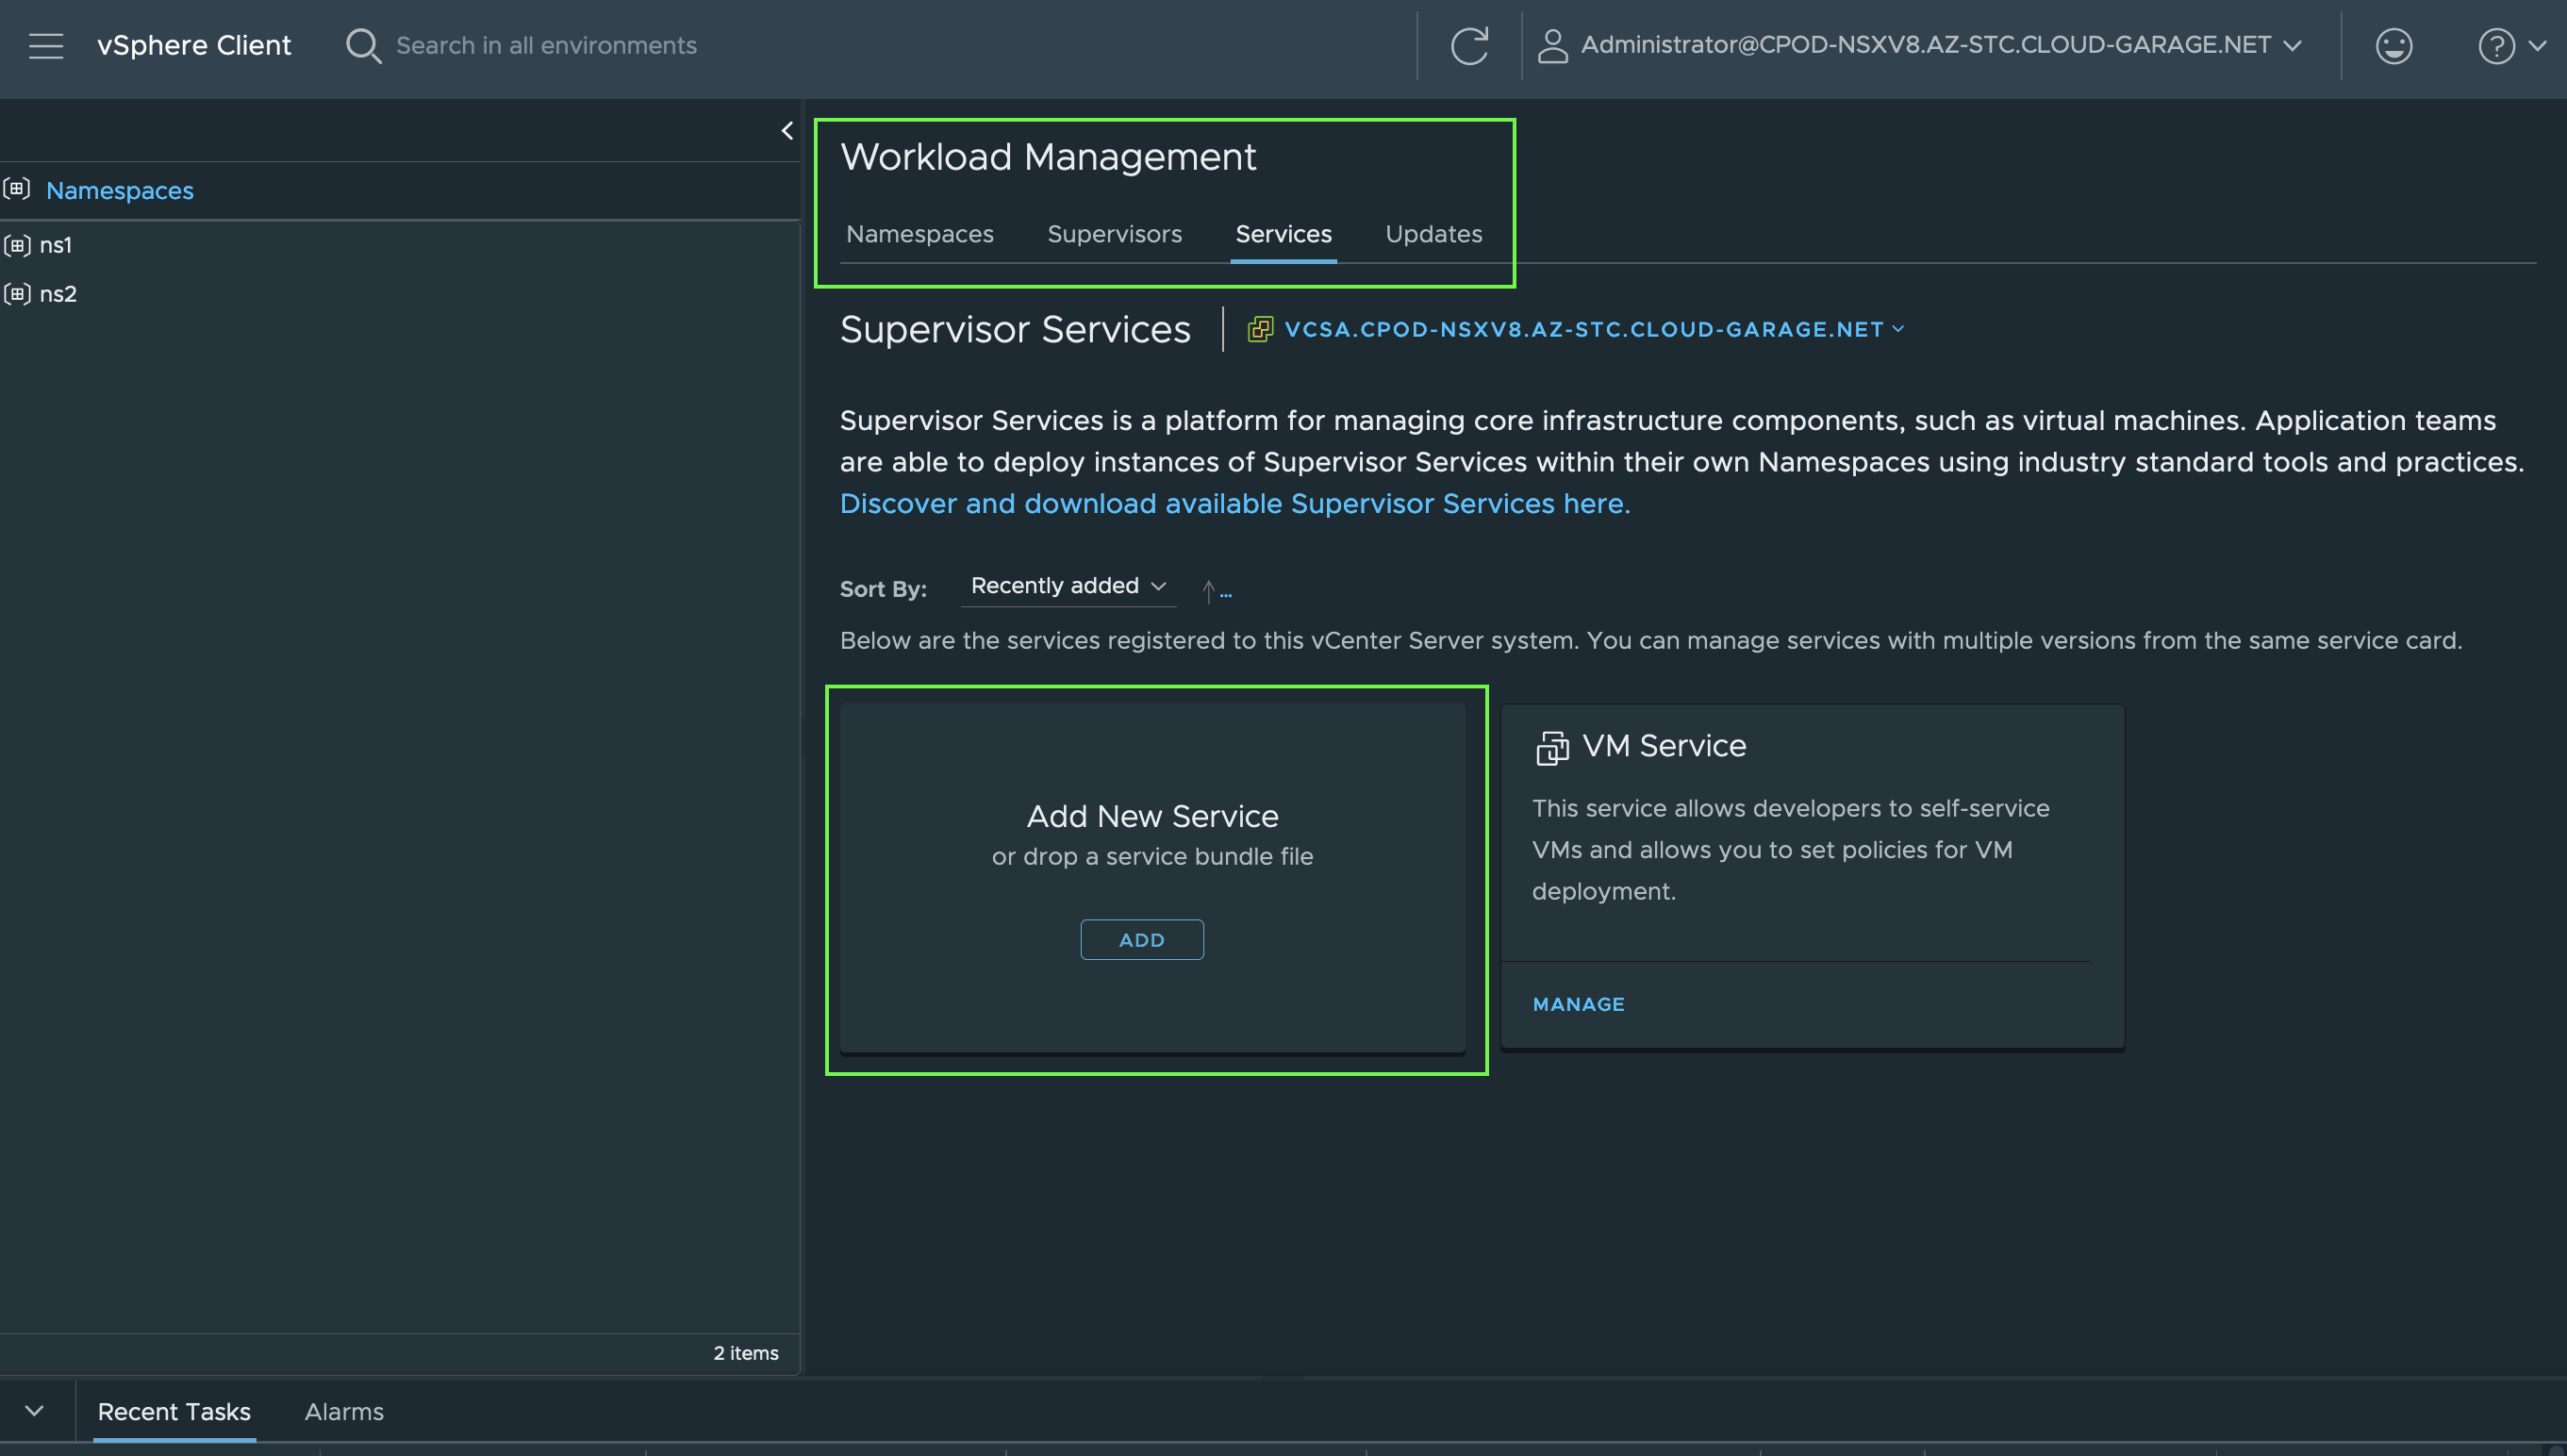
In order to add a new Supervisor Service, go to the Workload Management section and click ADD on the Add New Service tile.
To register a new service, the download of the Contour Package Manifest (contour.yml) file is necessary. Browse to the Supervisor Catalog till Kubernetes Ingress Controller and click on Download latest version. The download starts automatically.
Furthermore, download the Contour Sample values.yaml file for the desired version as well. The file contains Service/Application specific values. The data is needed for the final installation.
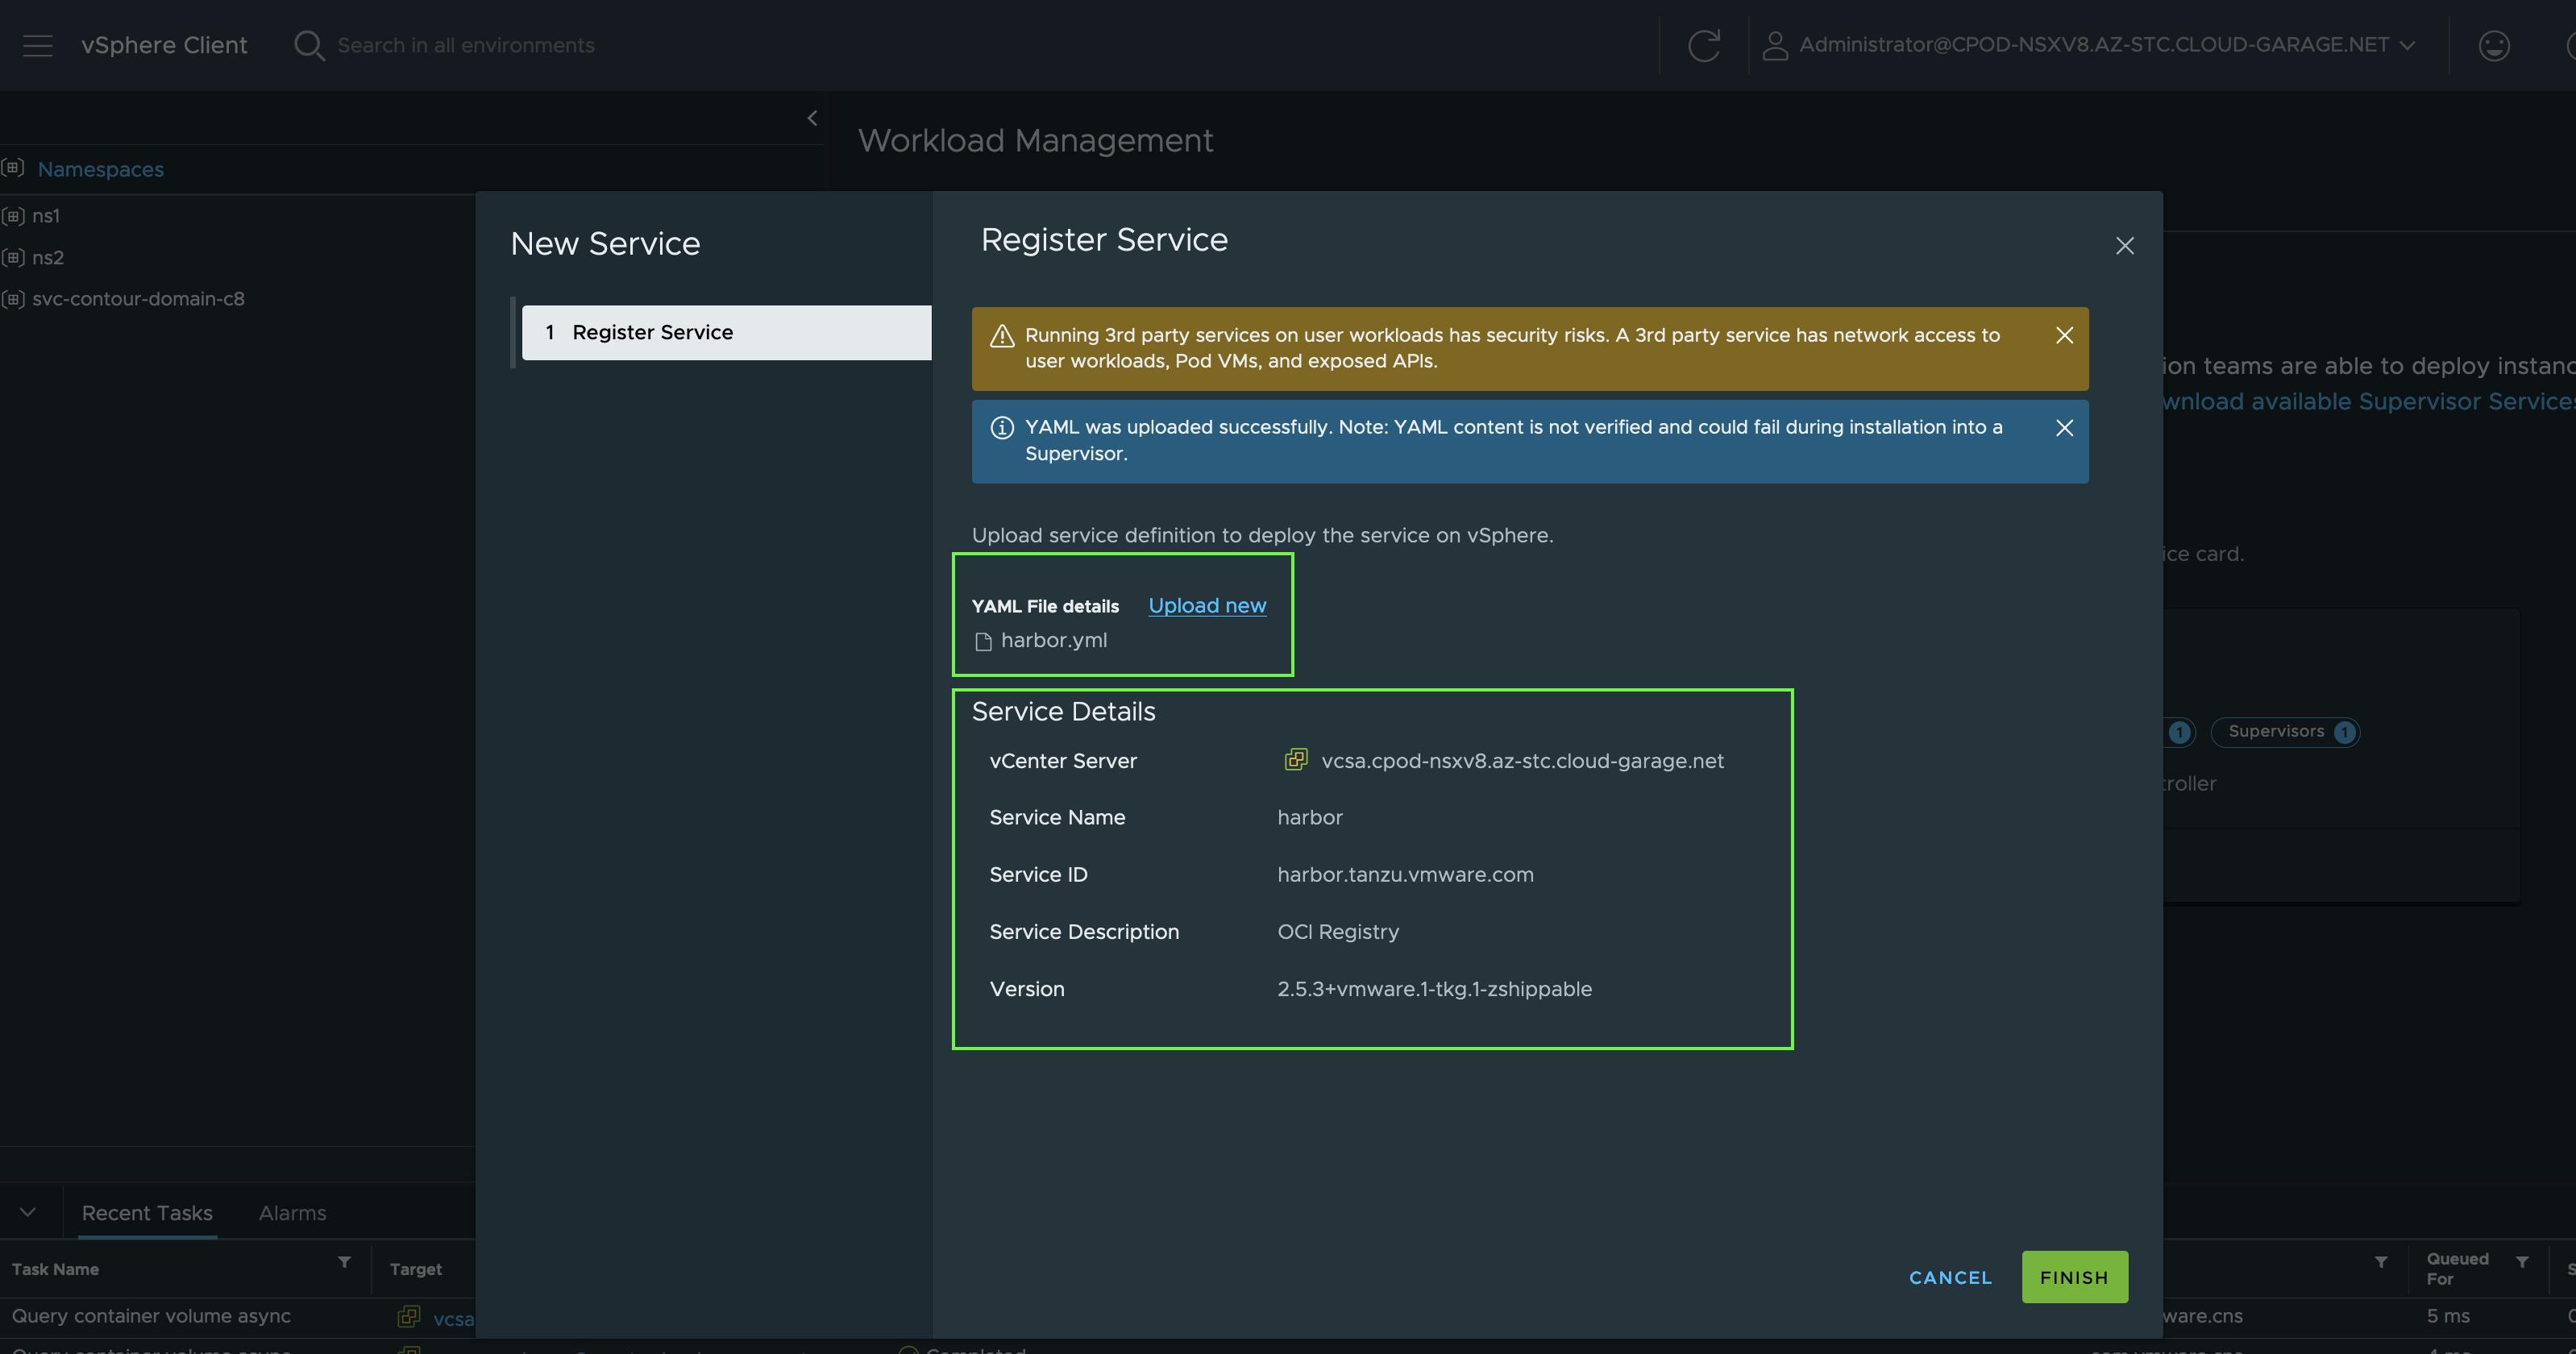
Next, click on the UPLOAD button and select the downloaded contour.yml.

A successful upload and a verification of the file and Package will be shown as a short summary.
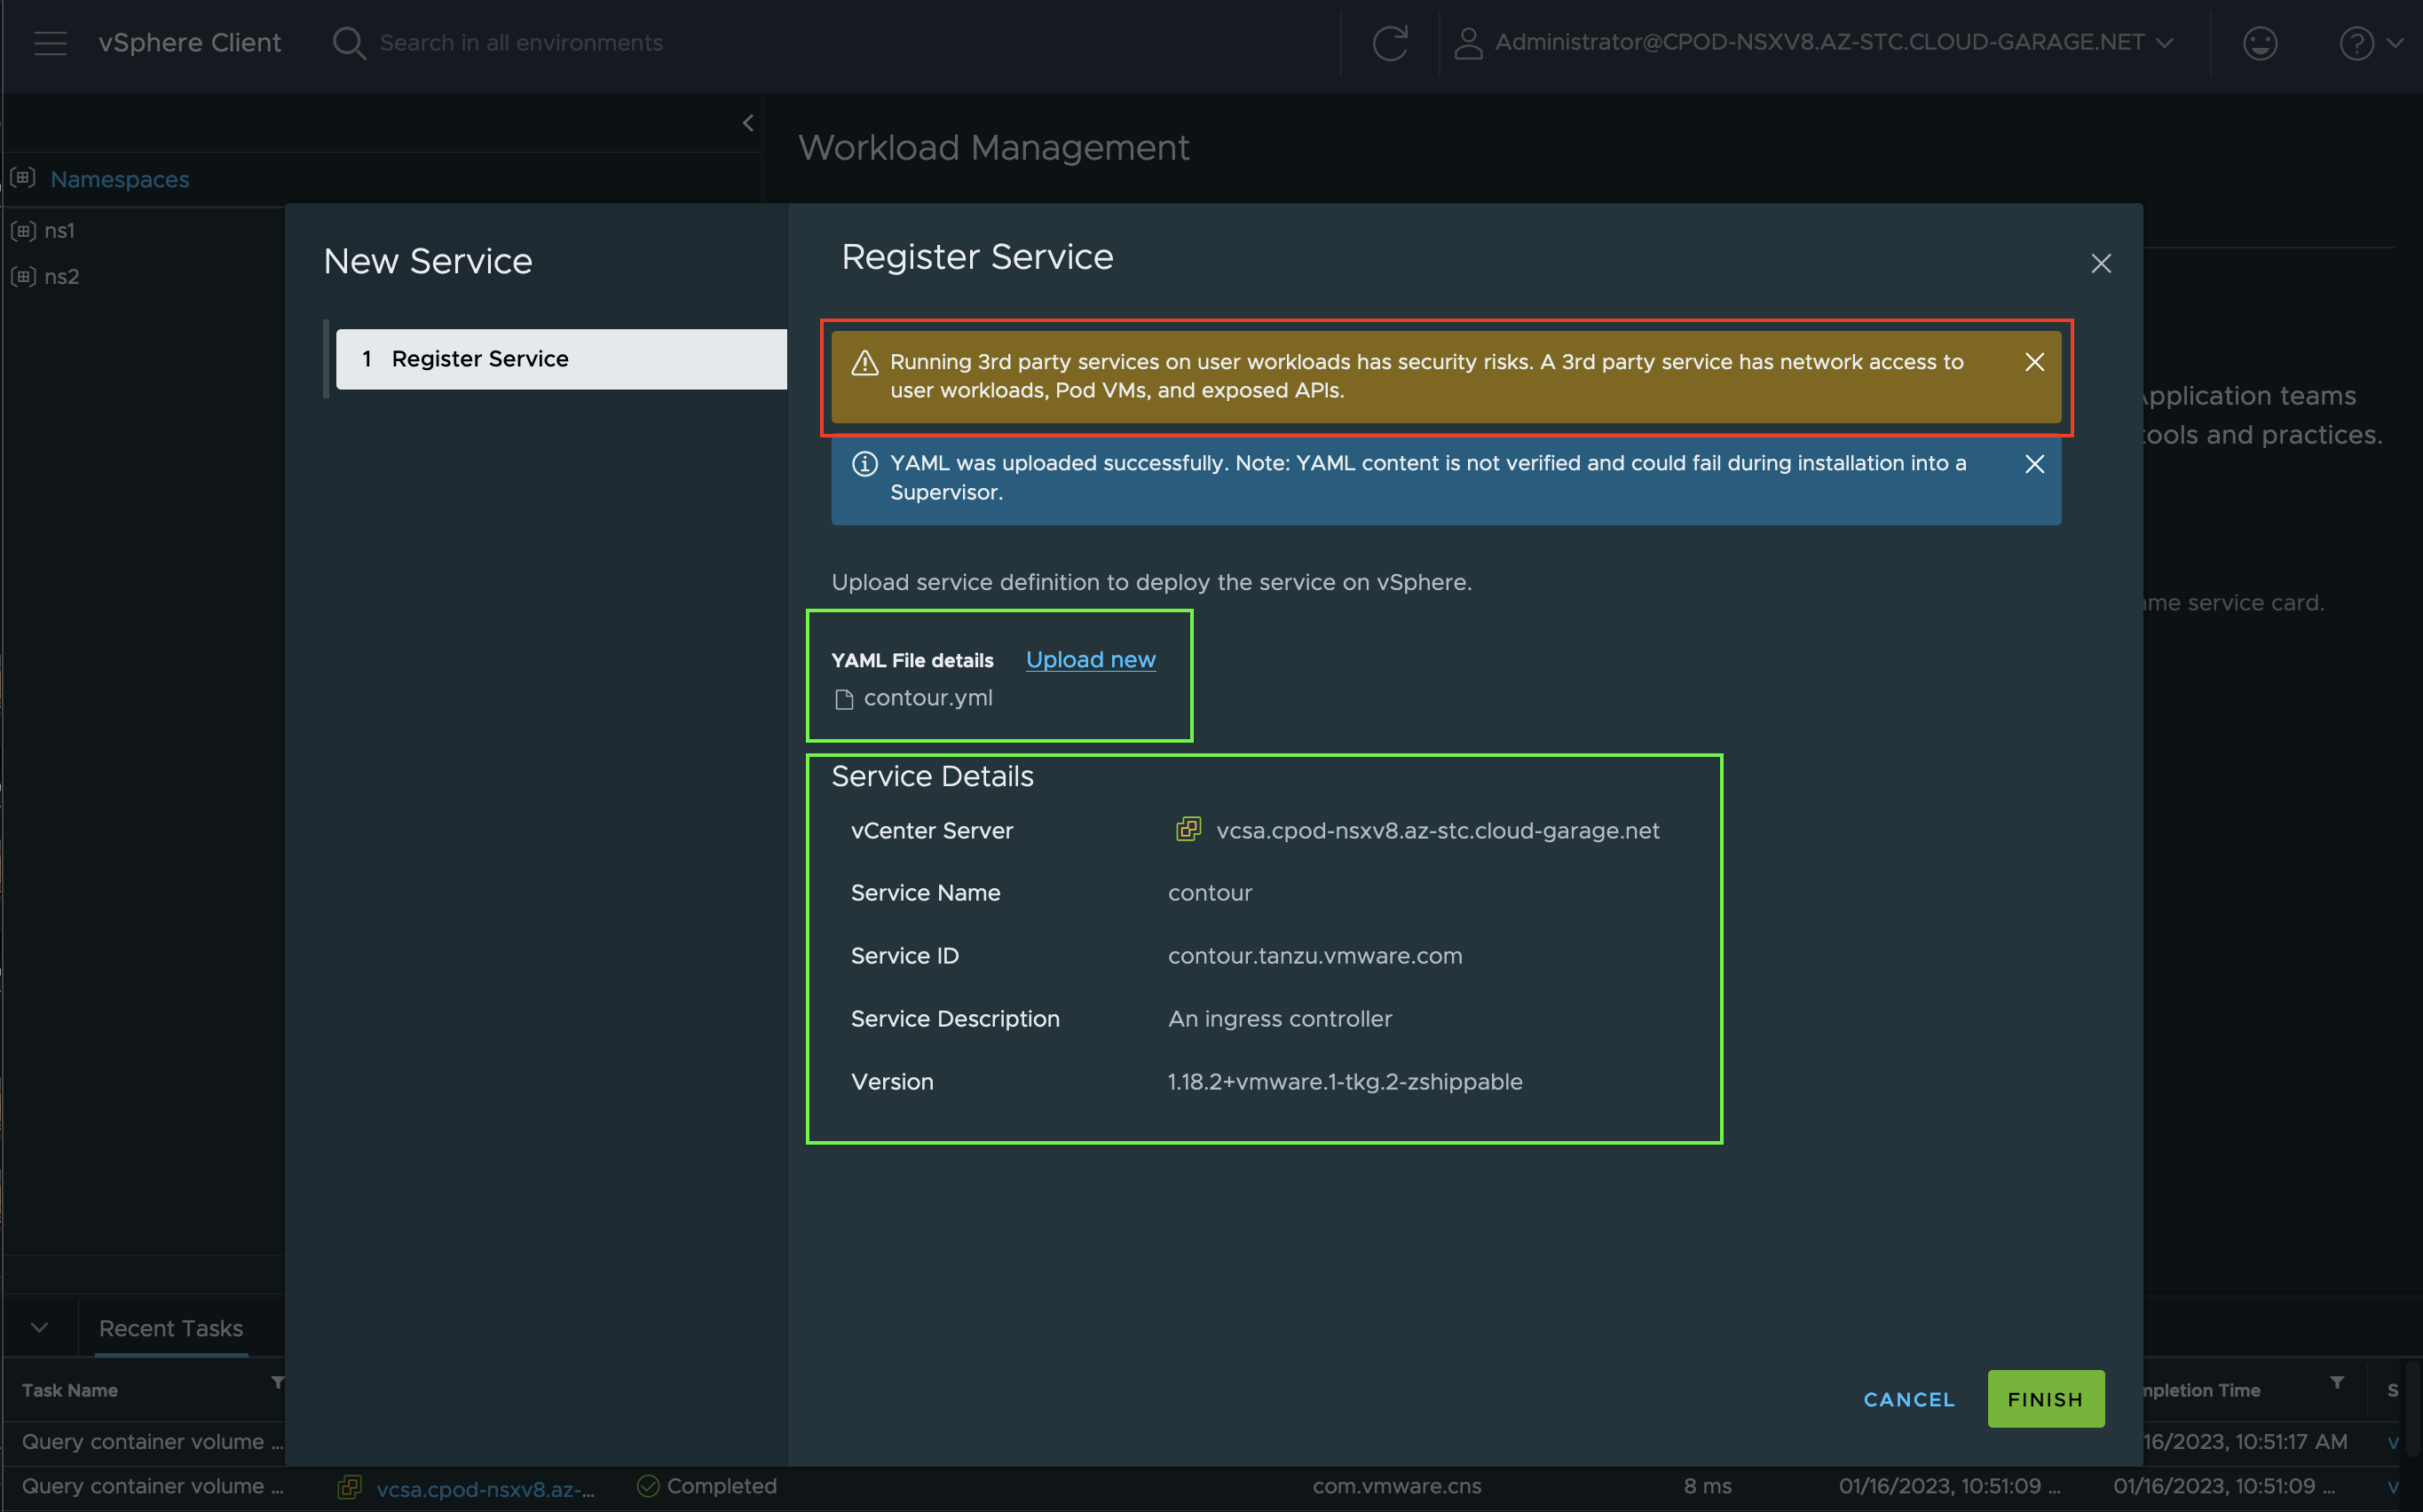
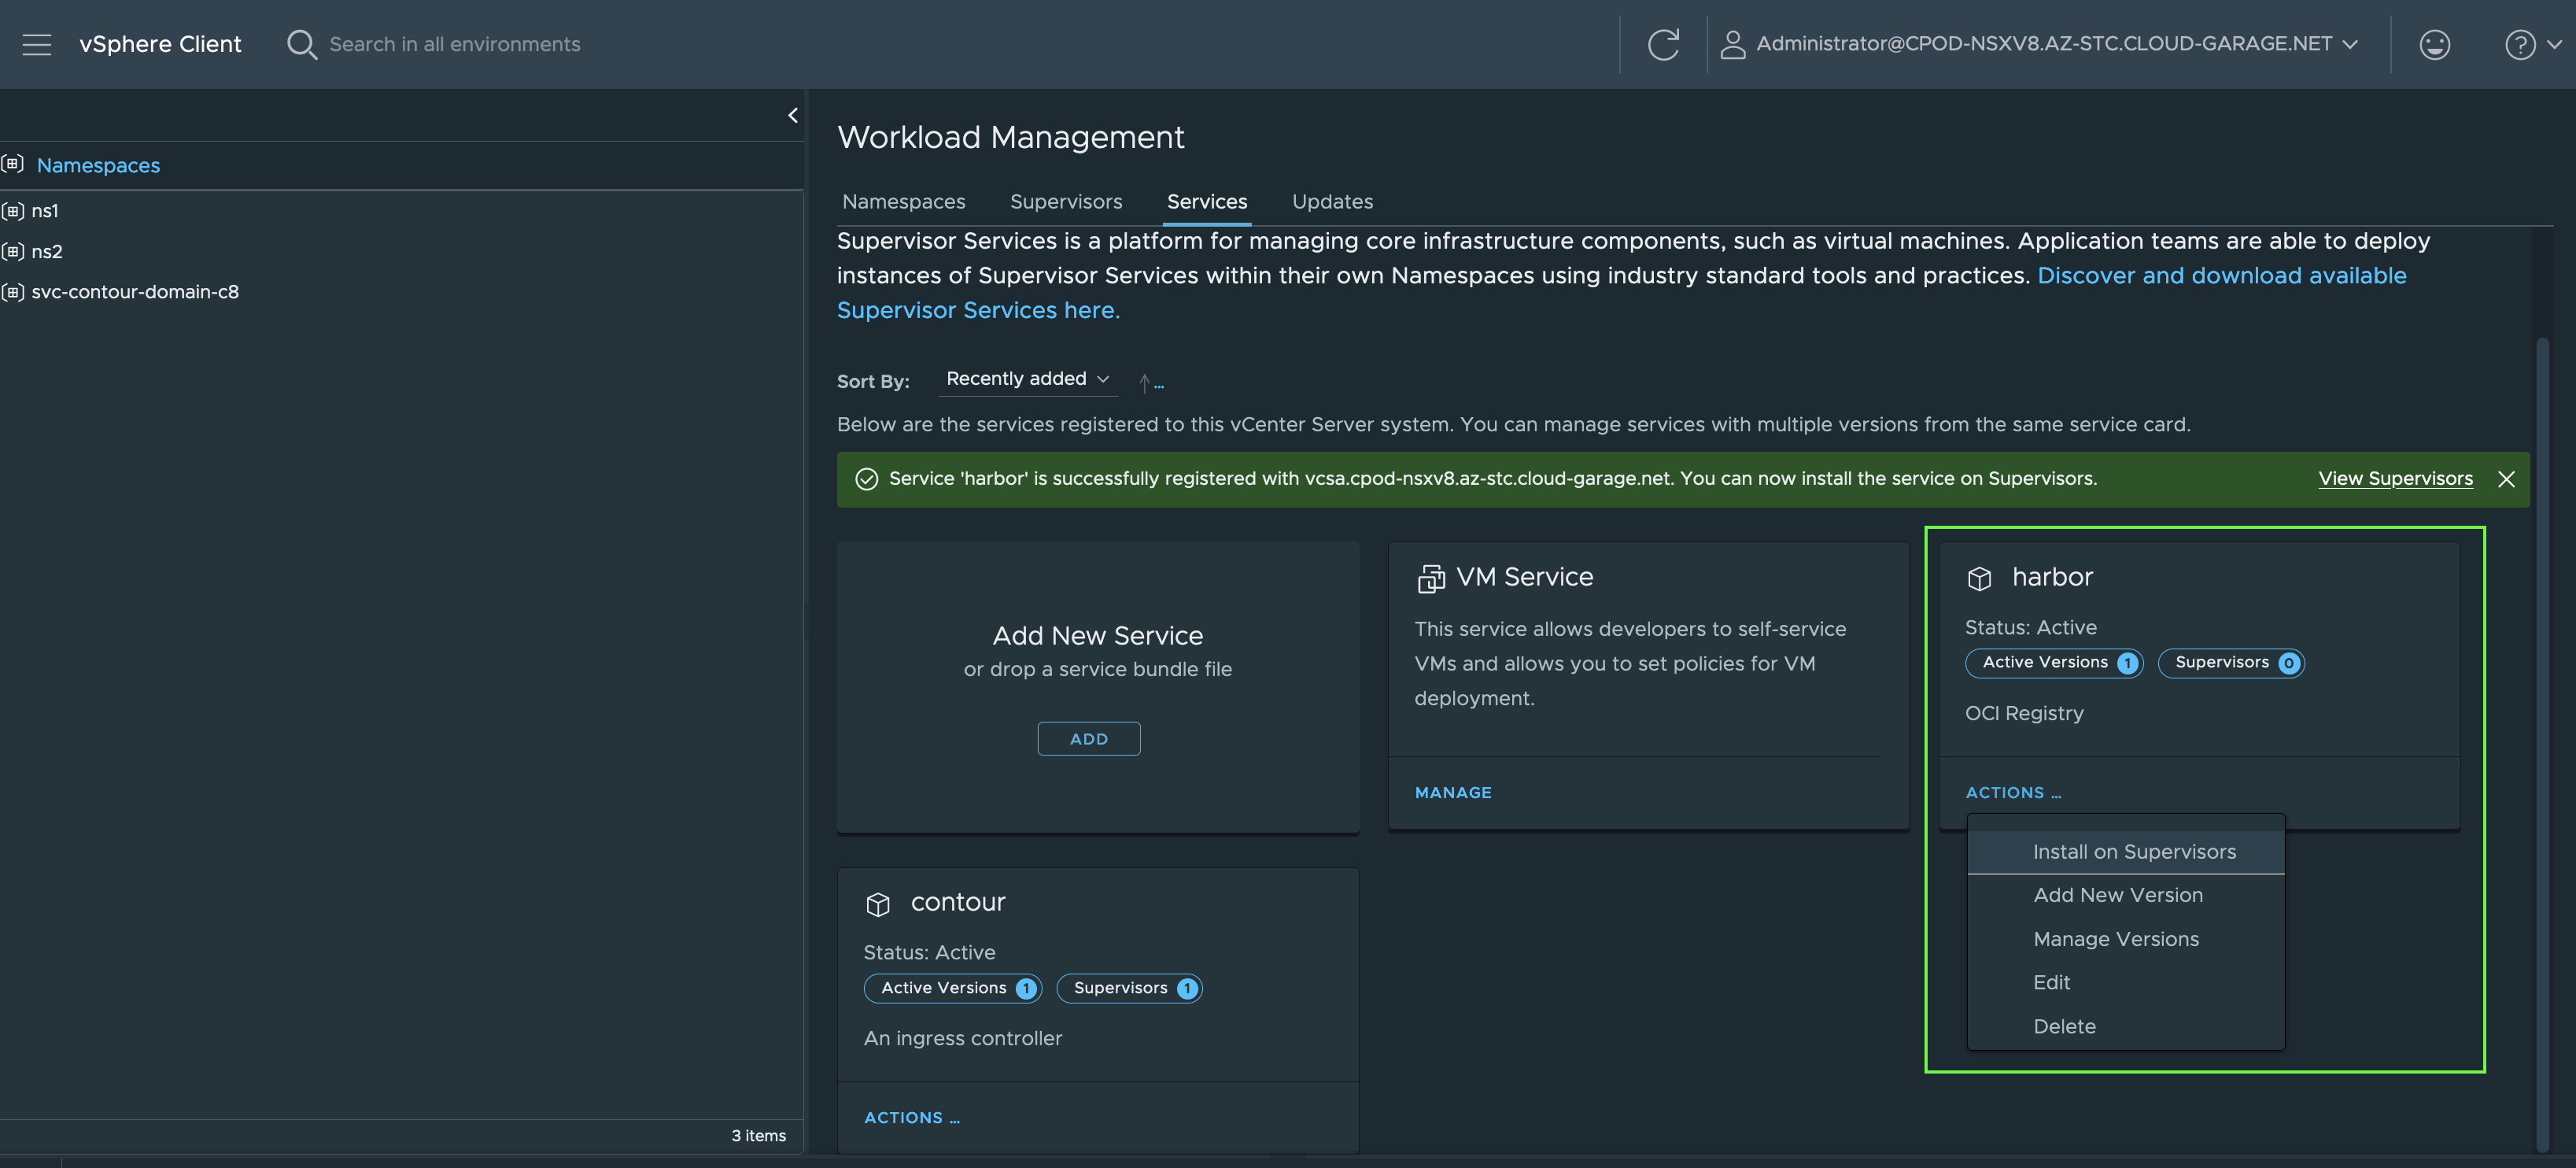
Click on FINISH to start the registration of the new Supervisor Service. A green banner will let you know that the registration on the vCenter Server was successfull.
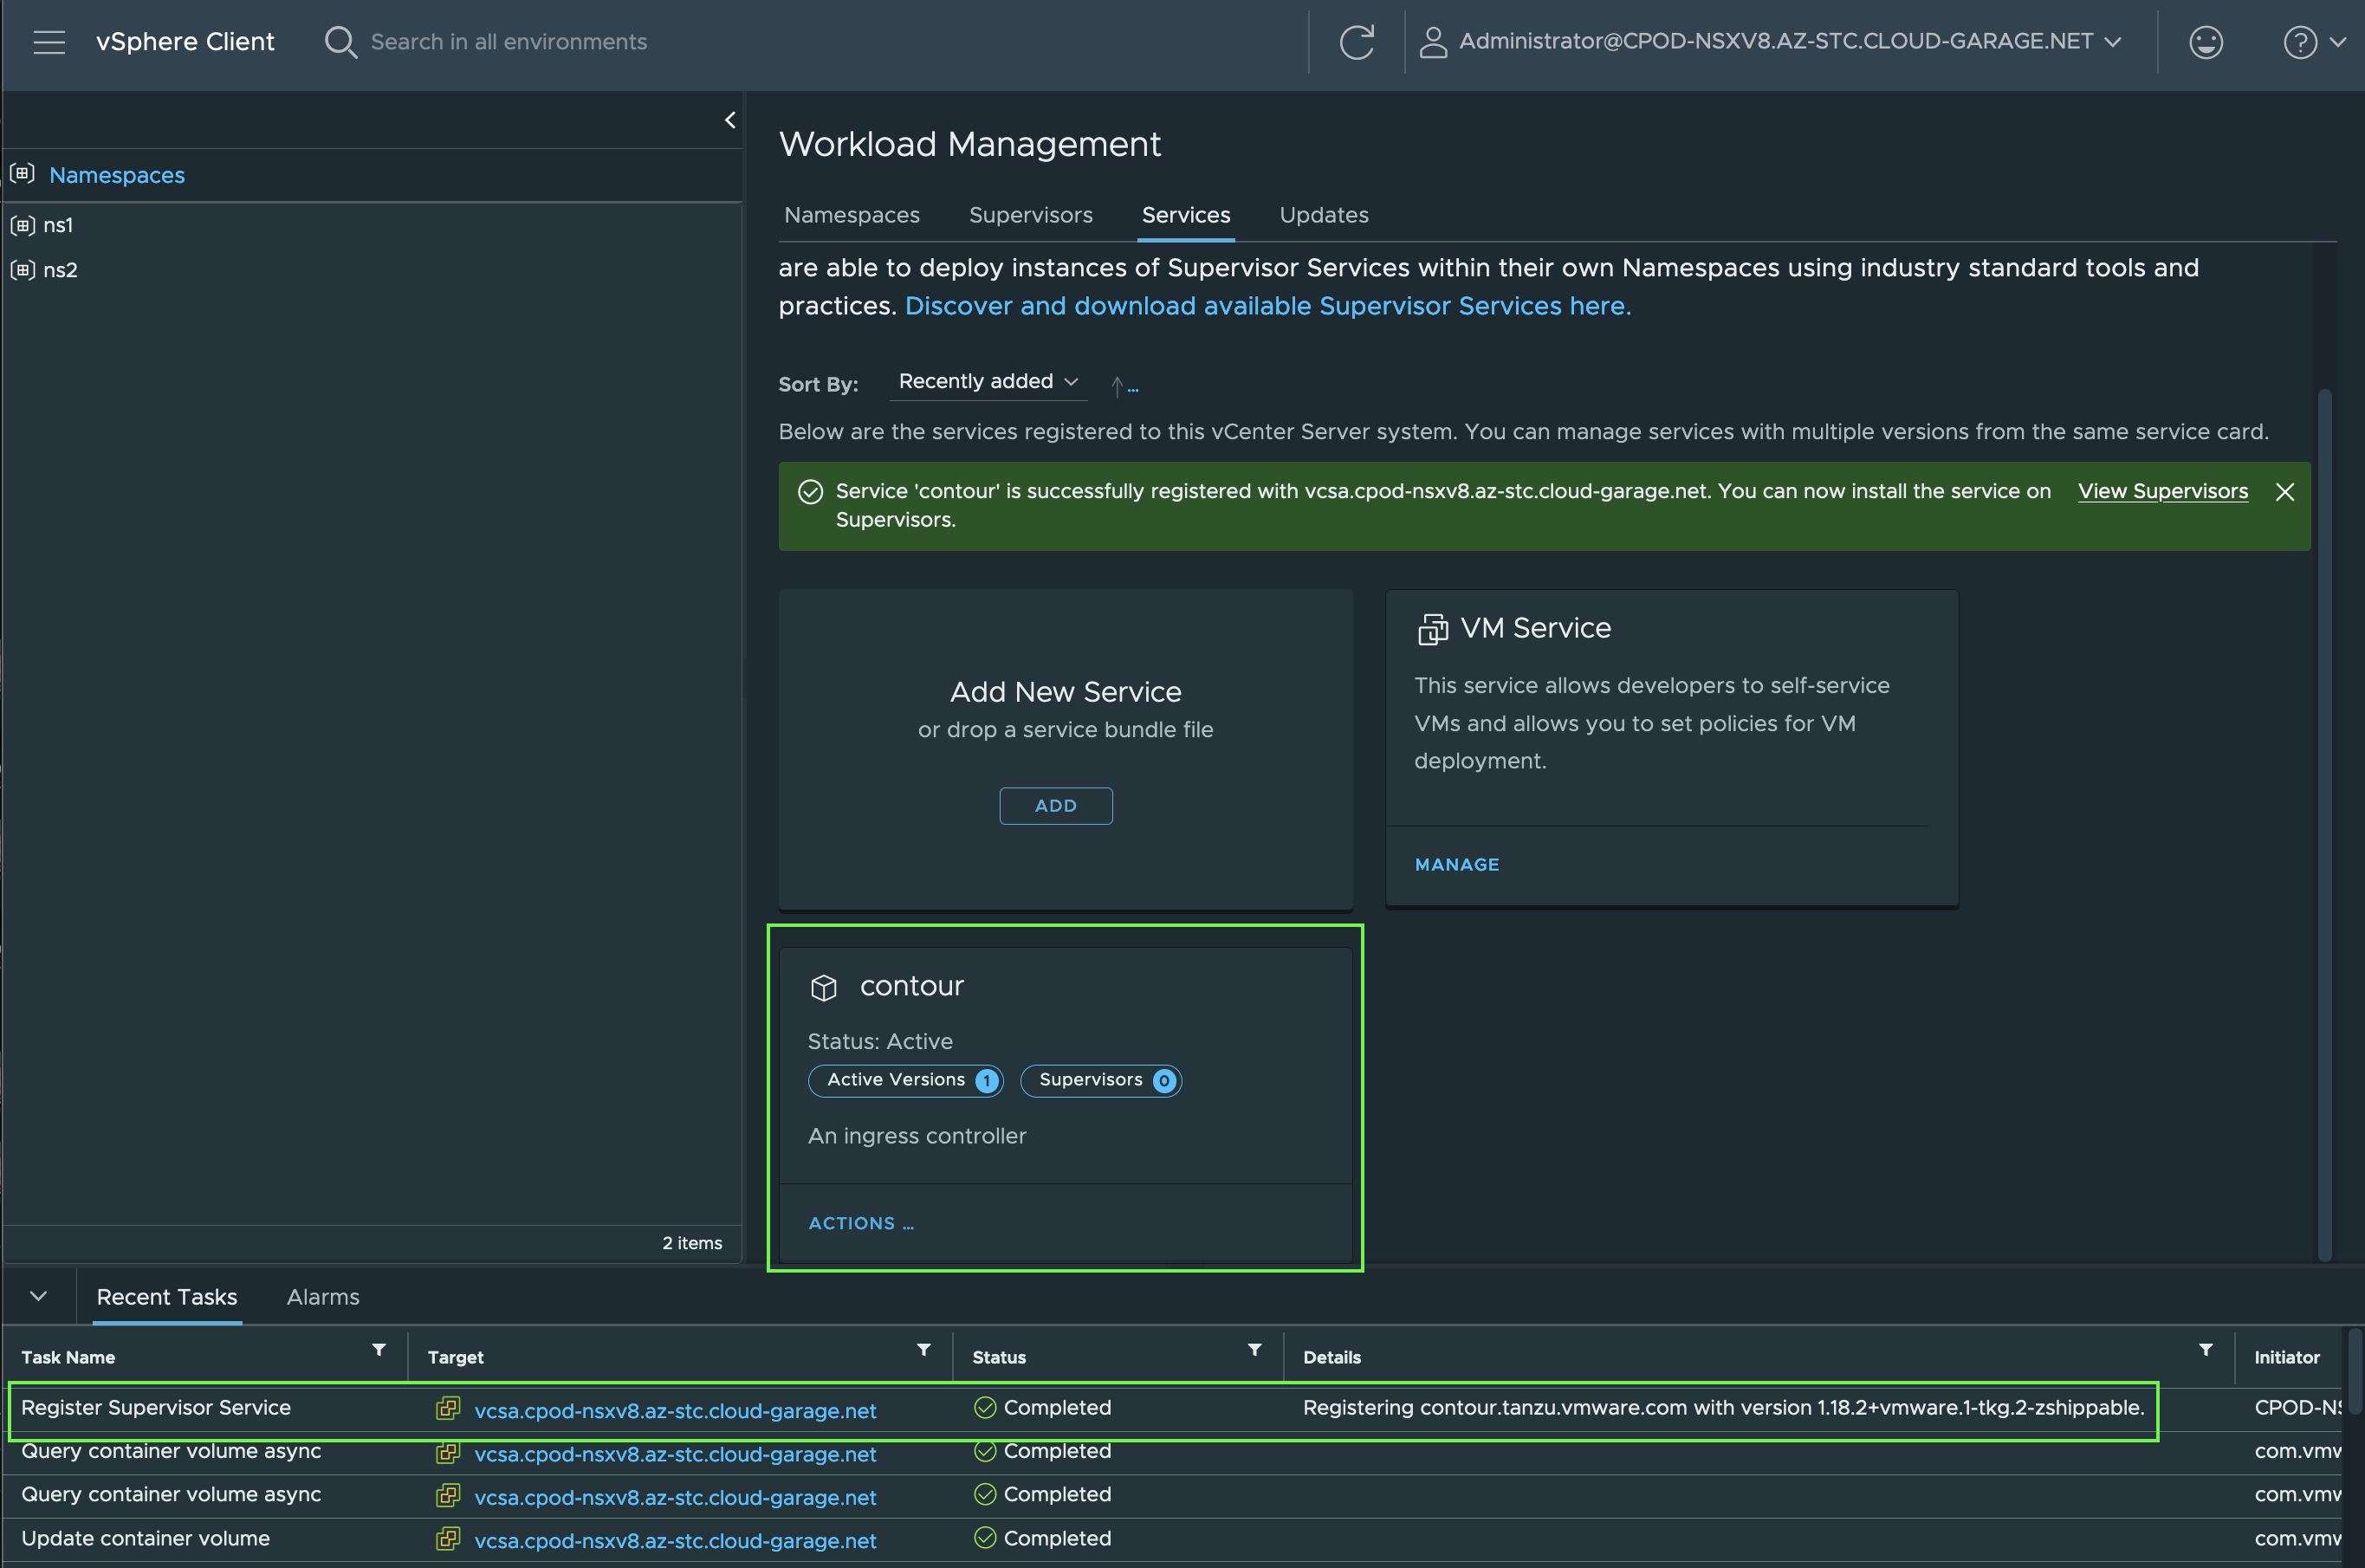
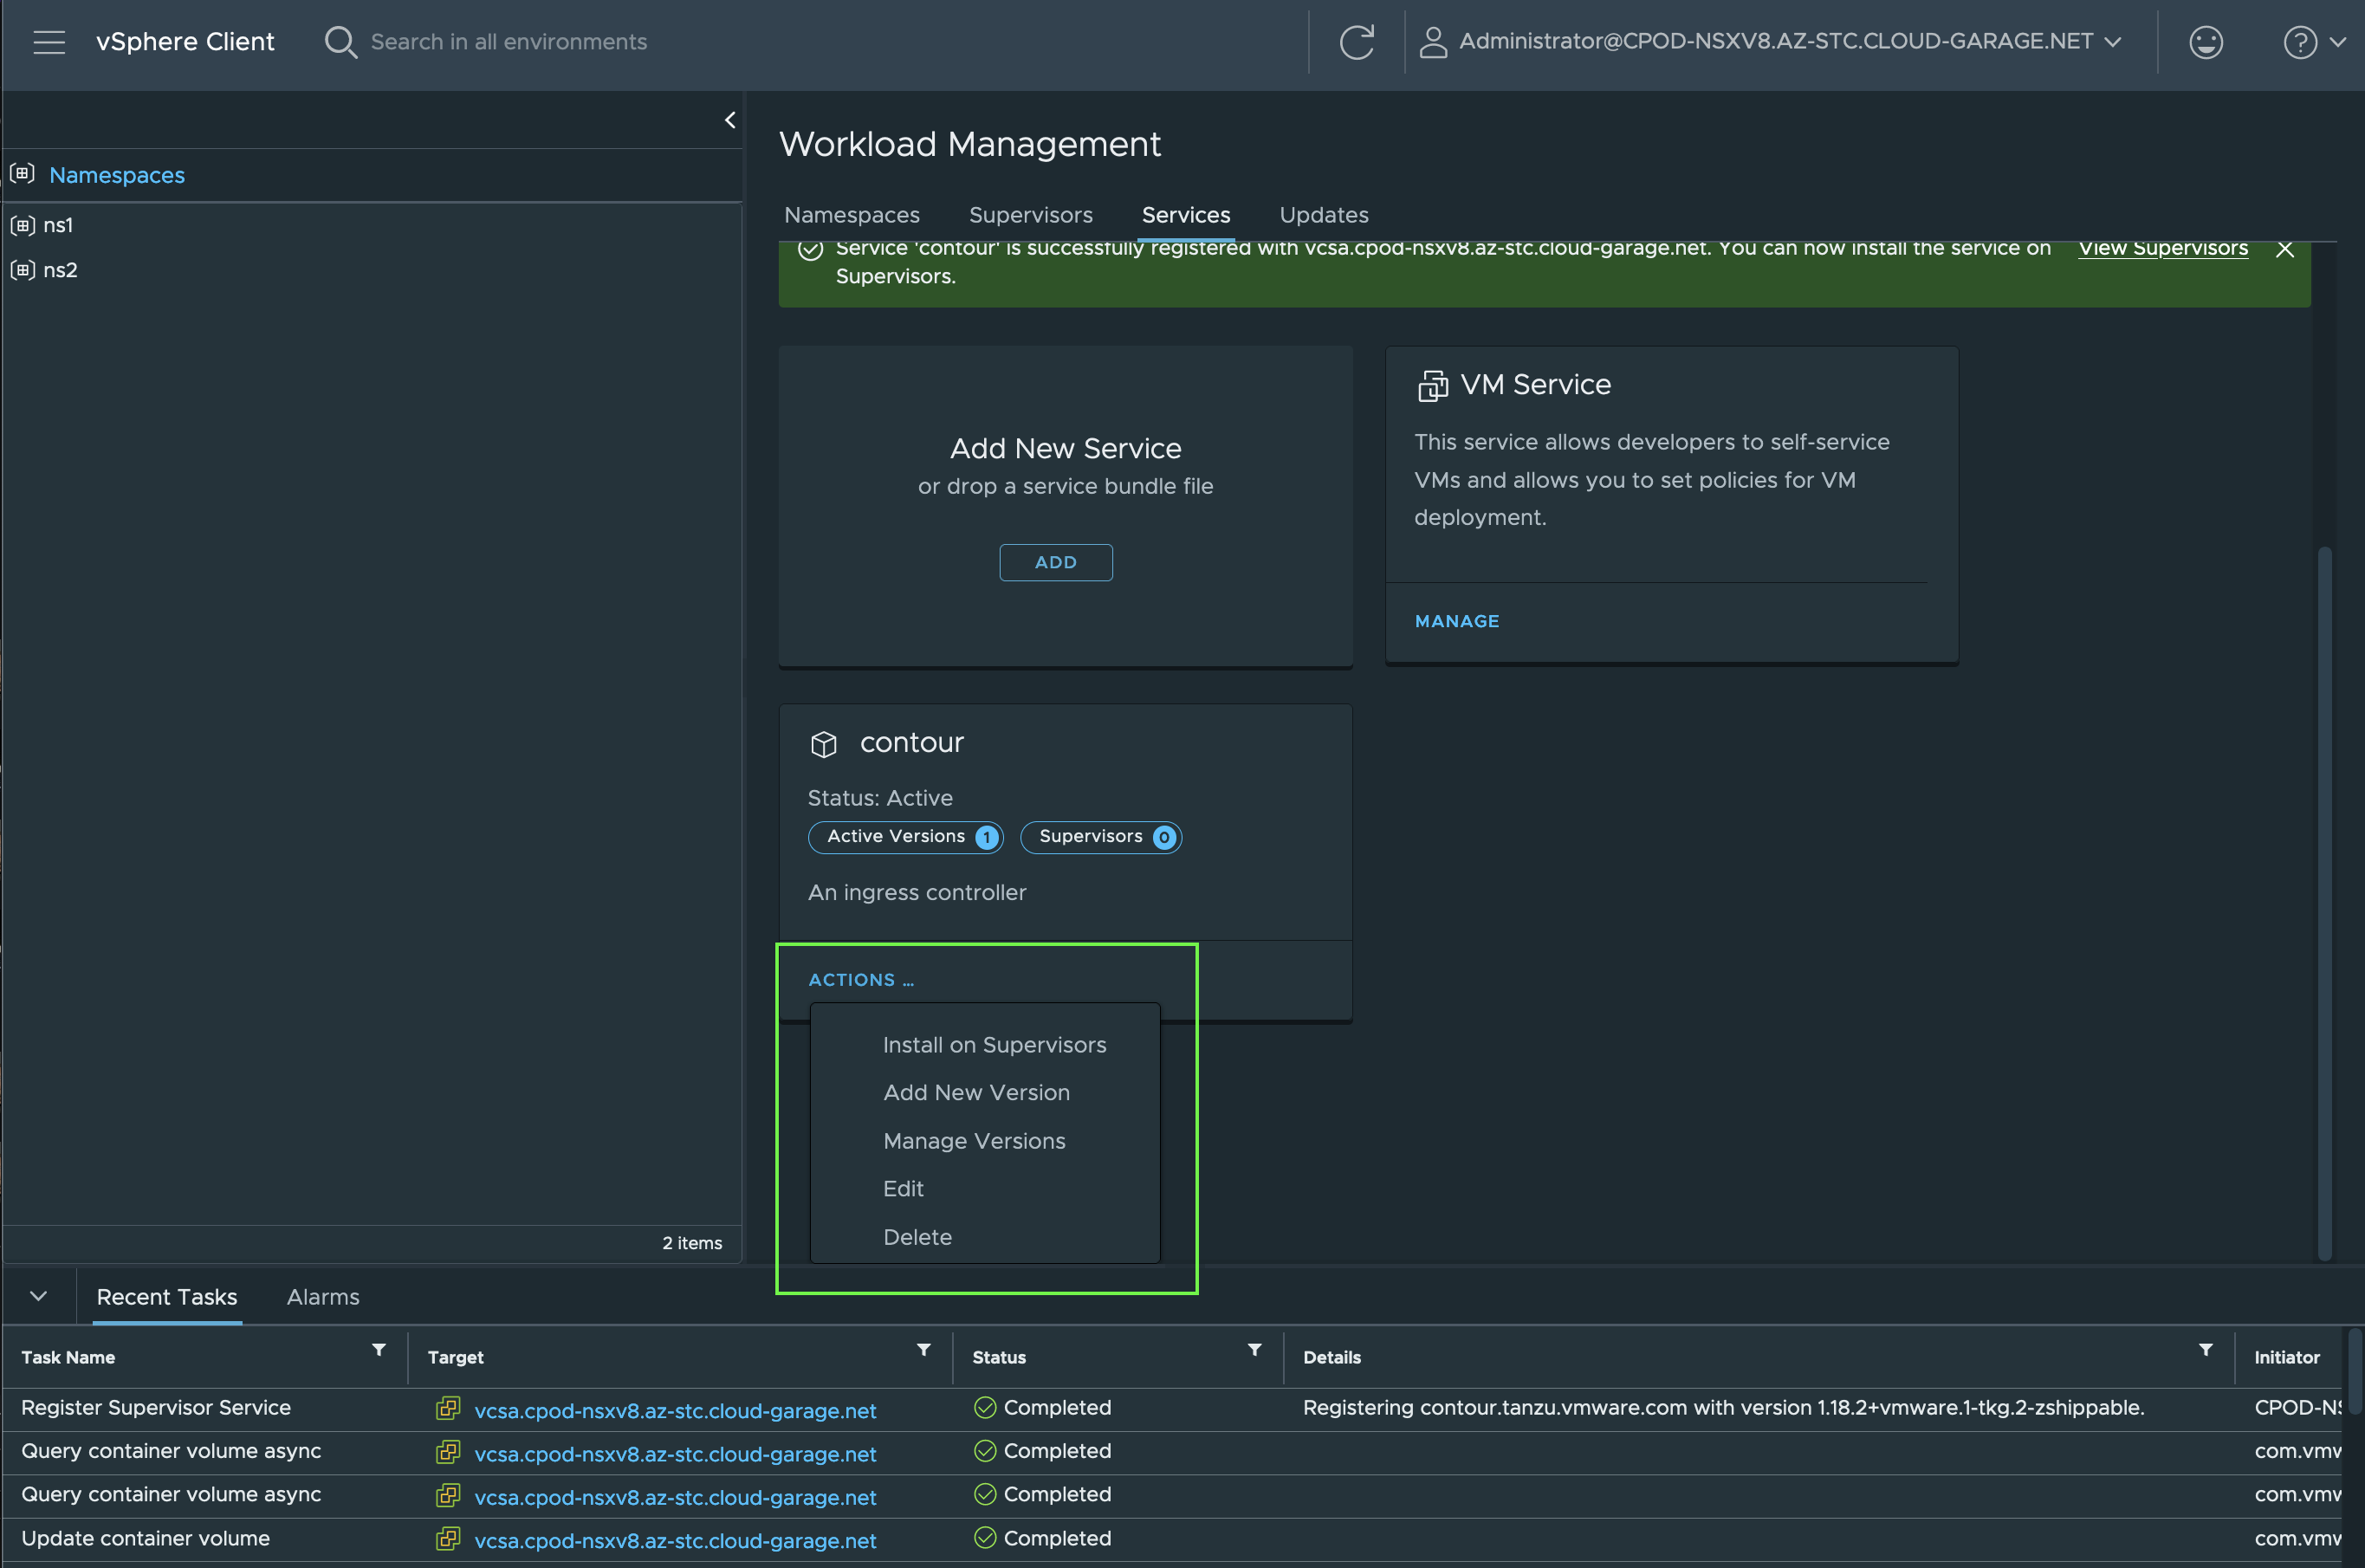
As a next step, the actual installation of the Contour Service on a Supervisor Cluster can be started. Bare in mind! A Supervisor Cluster is vSphere Cluster centric and therefore, multiple Supervisor Clusters can be selected for the installation of a new Supervisor Service.
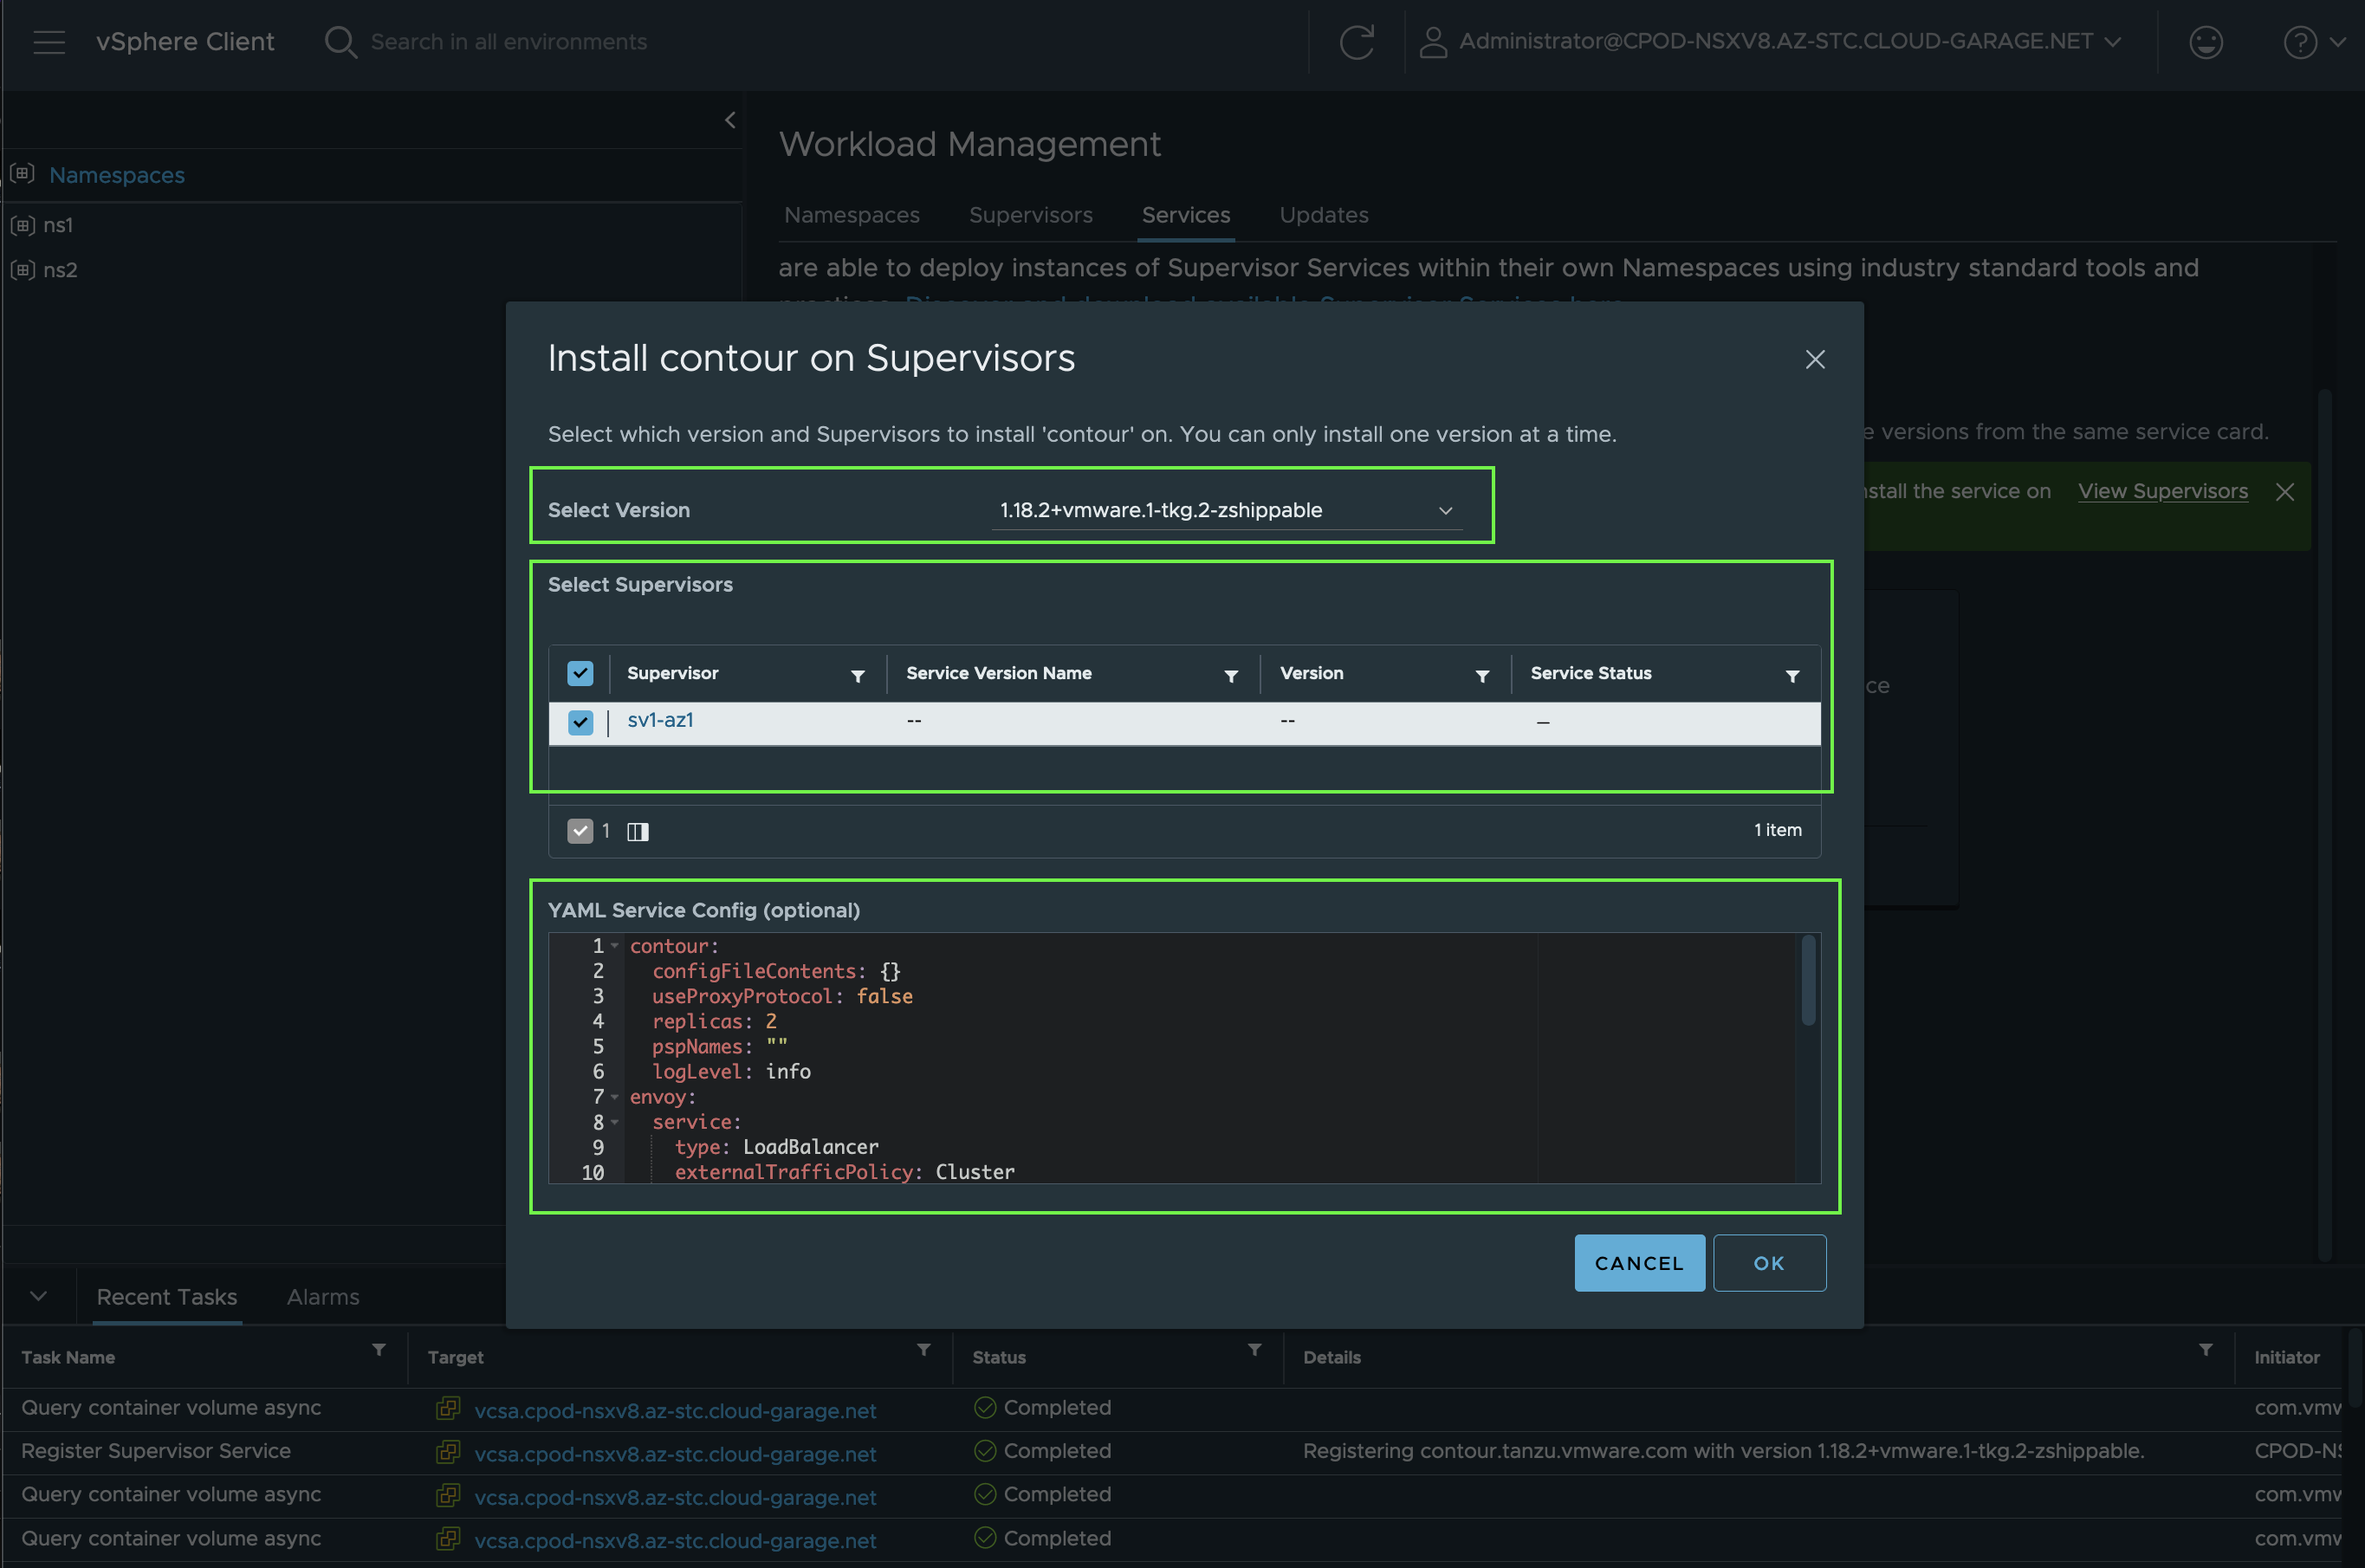
Clic on Install on Supervisors.
To ultimately kick off the installation, provide the data of the contour-data-values.yml file by copying it and pasting it in the YAML Service Config field (Figure X).
This is the content of the contour-data-values.yaml file:
contour:
  configFileContents: {}
  useProxyProtocol: false
  replicas: 2
  pspNames: ""
  logLevel: info
envoy:
  service:
    type: LoadBalancer
    externalTrafficPolicy: Cluster
    disableWait: false
  hostPorts:
    enable: false
    http: 80
    https: 443
  hostNetwork: false
  terminationGracePeriodSeconds: 300
  logLevel: info
  pspNames: ""
certificates:
  duration: 8760h
  renewBefore: 360h
Nothing fancy, only the basic configuration for Contour. In the Install Contour on Supervisor window, select the desired version, the Supervisor and validate the added values for the Service once again.
After pressing OK, you’ll notice the deployment of vSphere Pods in a dedicated vSphere Namespace named svc-contour-domain-c8 (Figure XI).
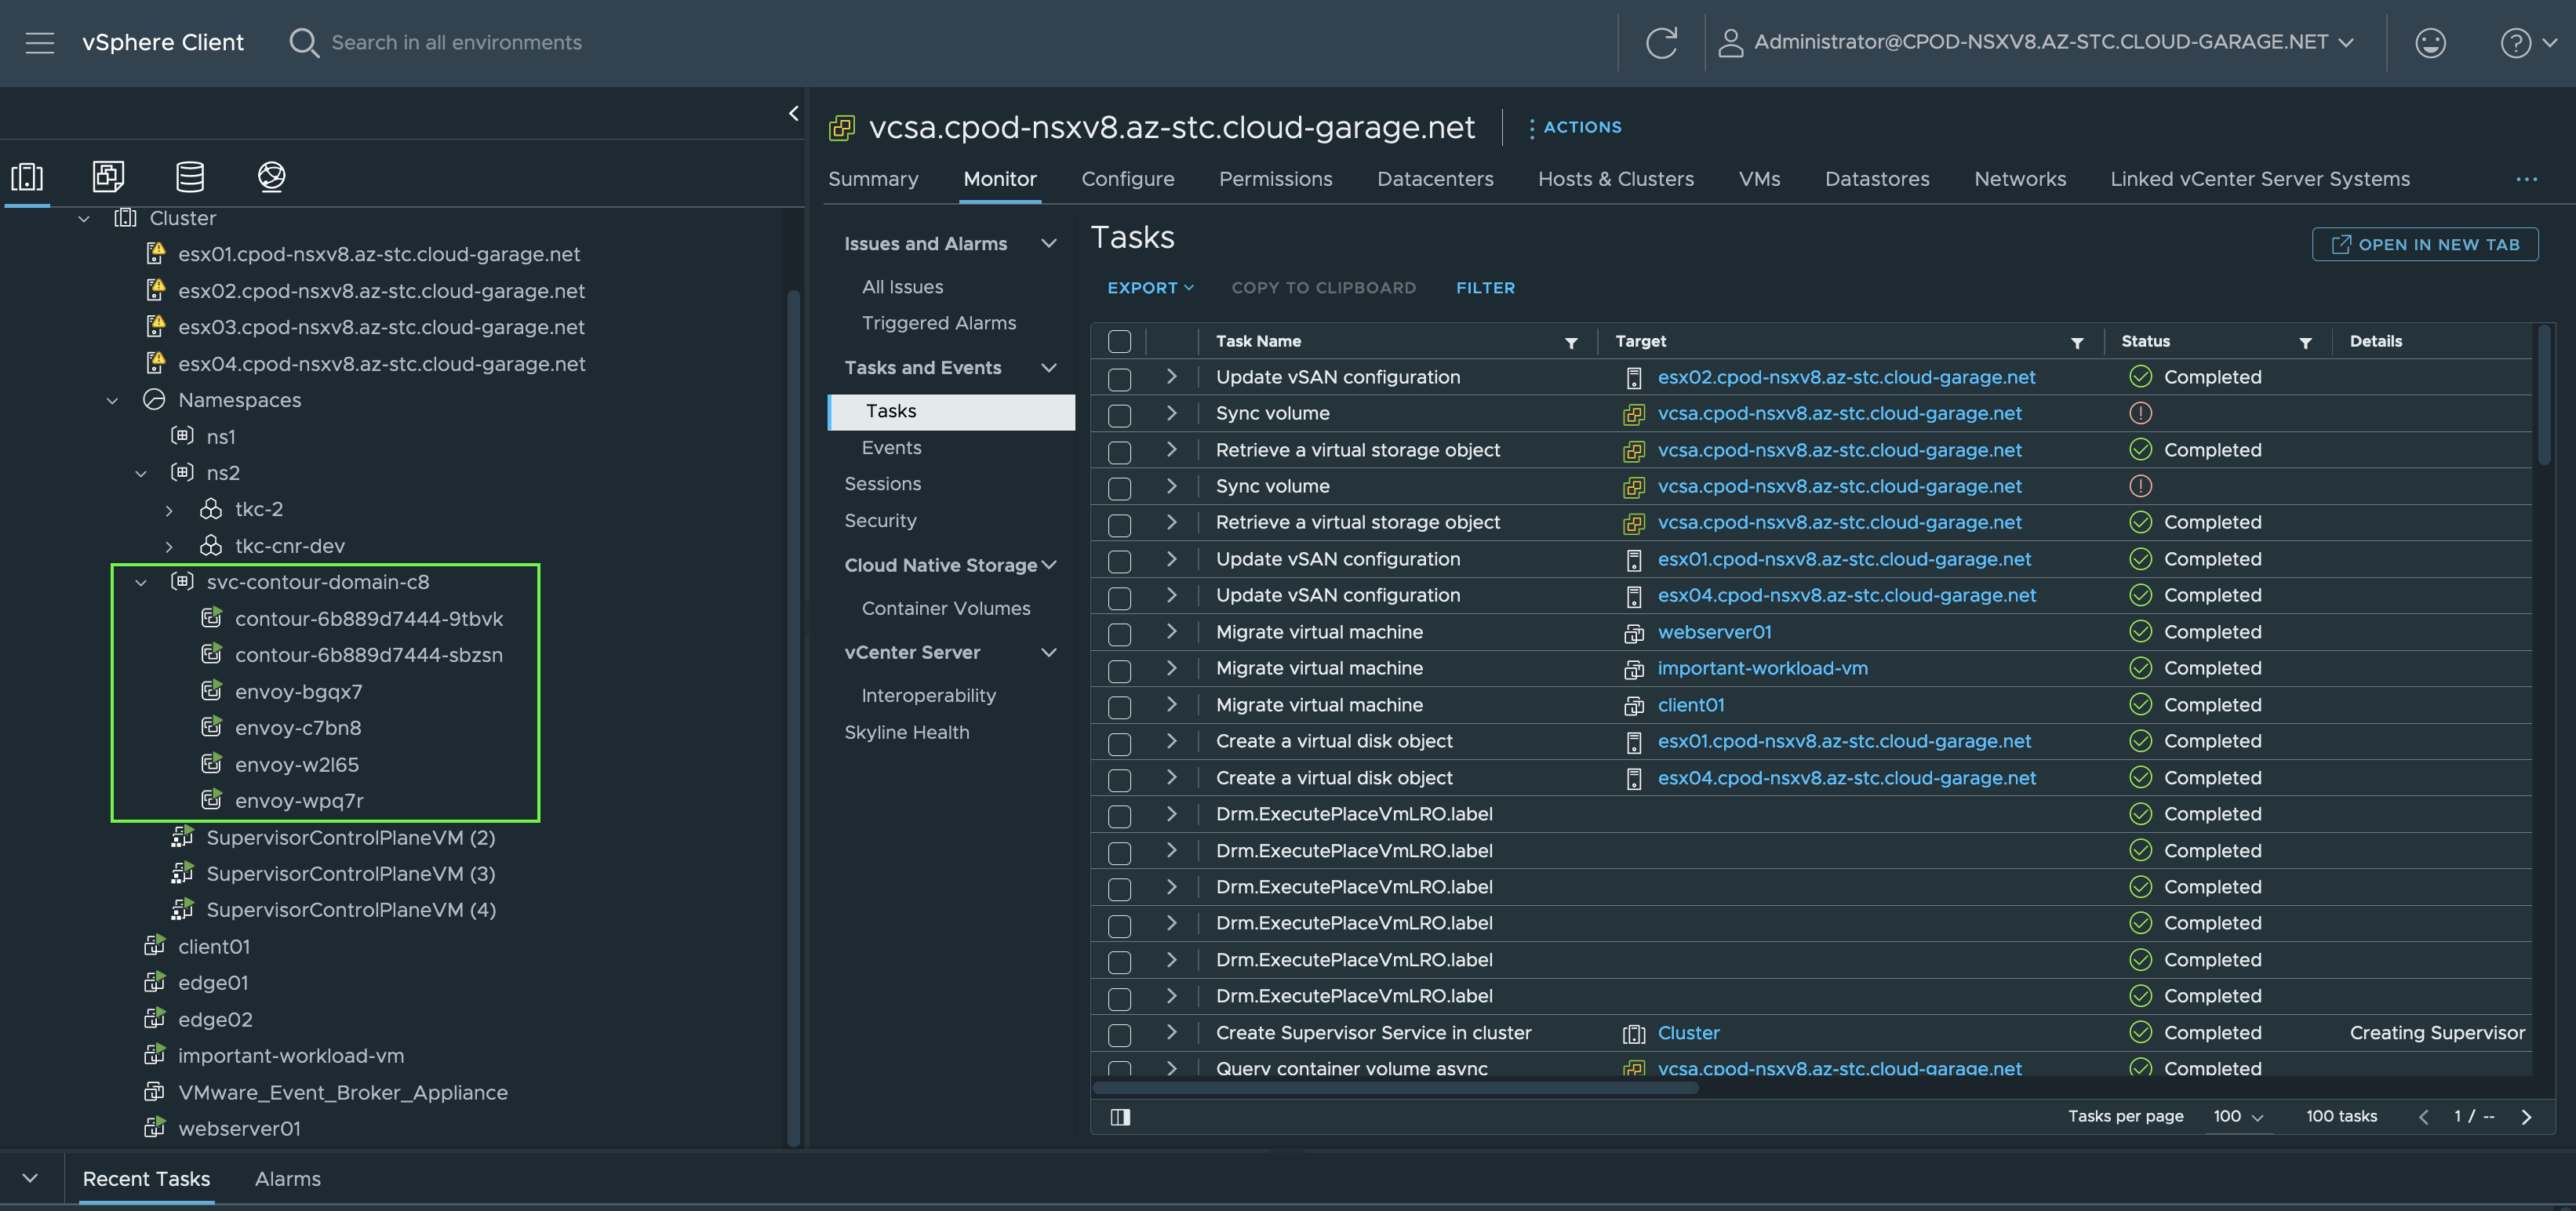
By browsing to the vSphere Namespace, a lot of valuable service/application deployment specific information can be picked up from here without having to interact with Kubernetes on the terminal (kubectl get [...]).
Information such as the requested and by the NSX Load Balancer assigned L4 Load Balancer IP address for the Envoy Service (Figure XII).
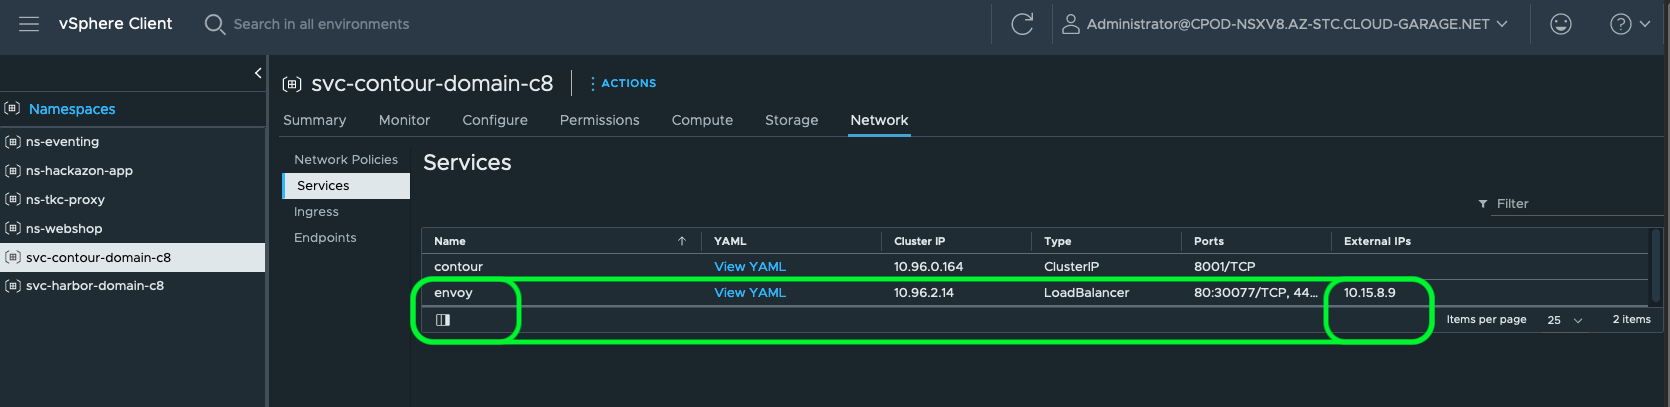
This IP address will be used for creating your application DNS A-Records like e.g. shown in Table I.
| Name | Data |
|---|---|
| app1.mydomain.com | 10.15.8.9 |
| app2.mydomain.com | 10.15.8.9 |
| app3.mydomain.com | 10.15.8.9 |
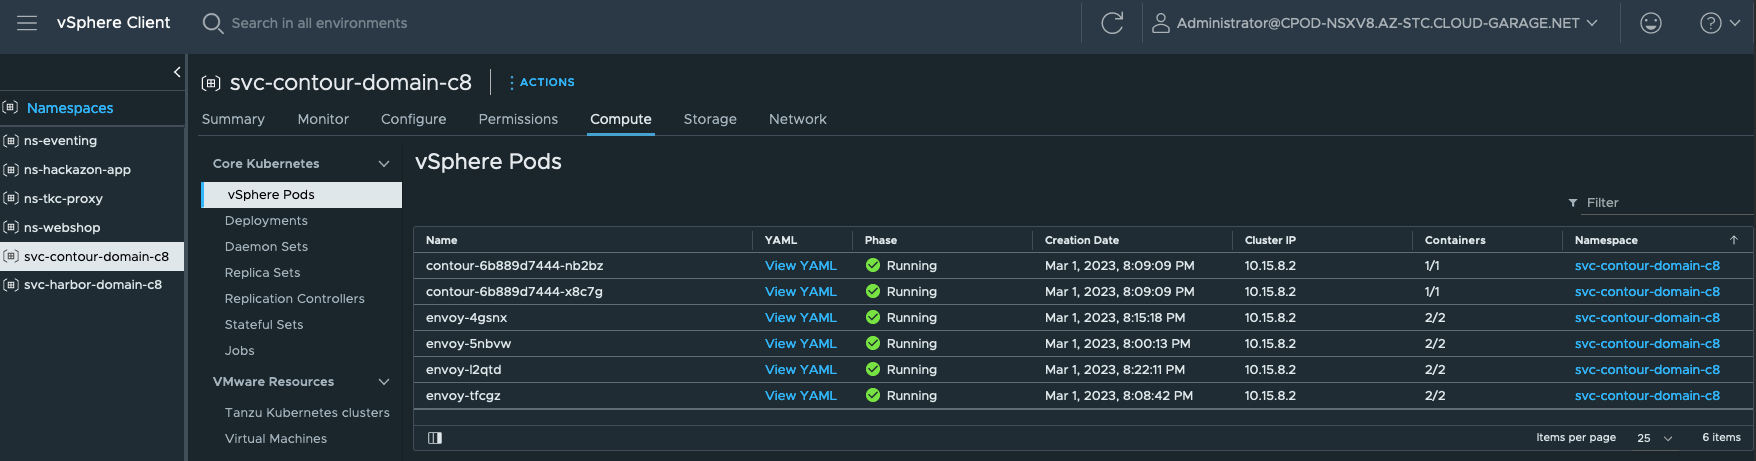
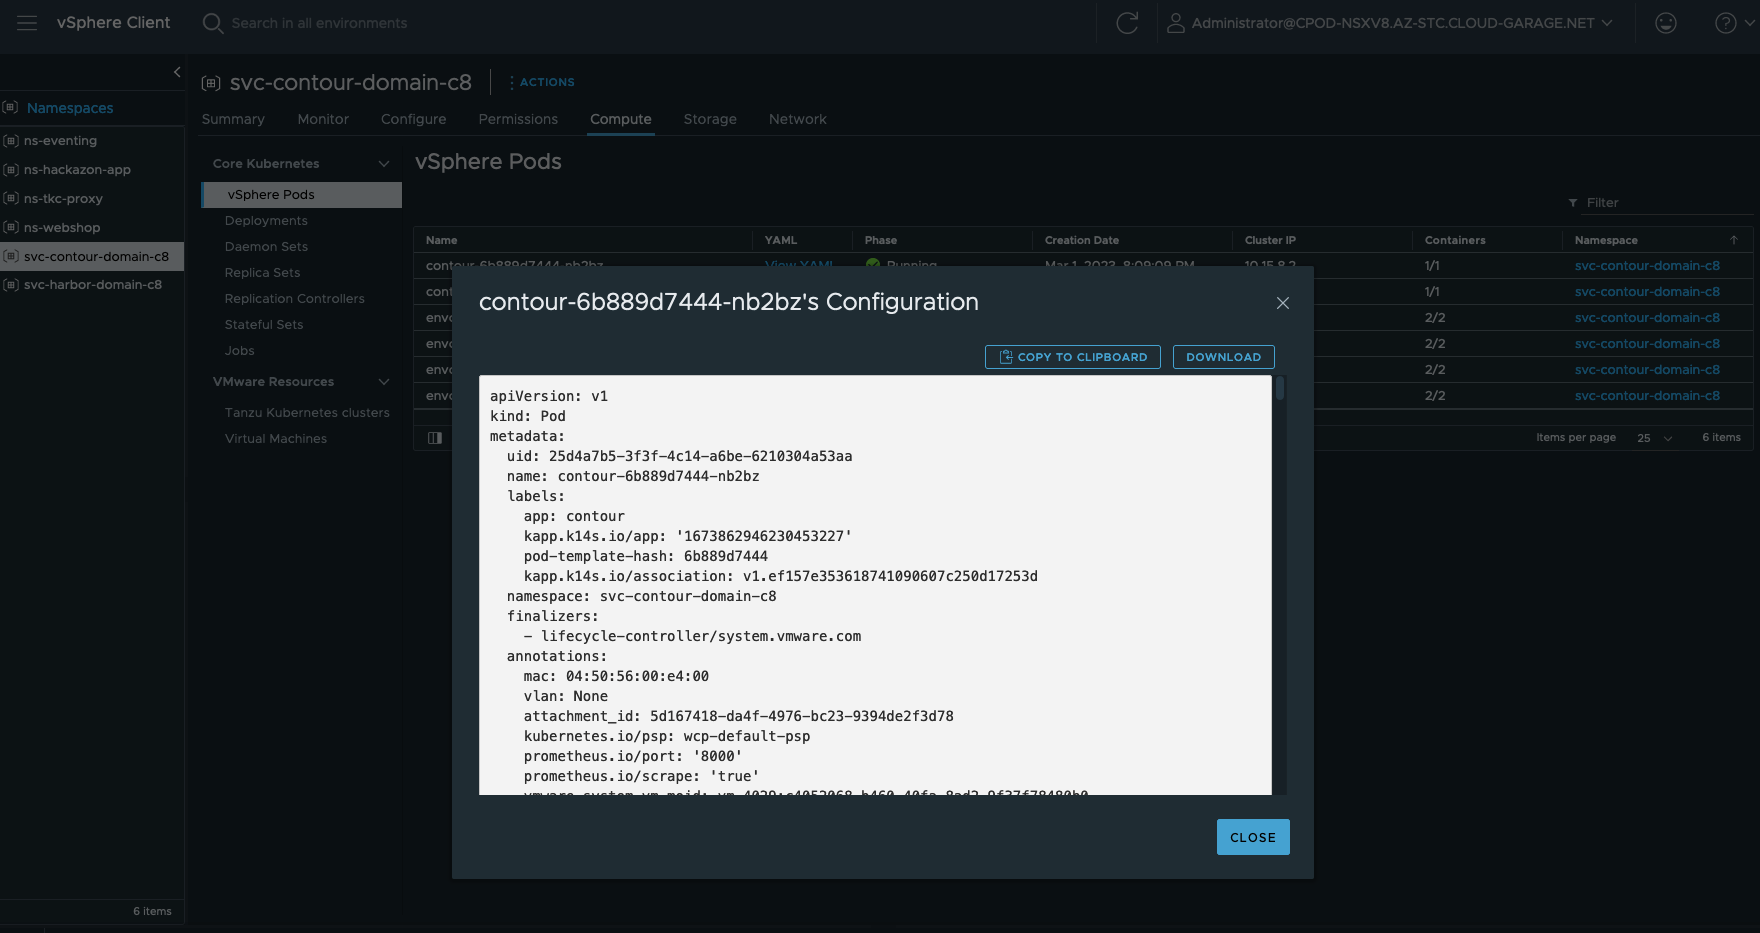
Further deployment specific information can be gathered at the vSphere Namespace as well. For example, if you need to know if any Persistent Volume Claims exists, go to the Storage section. If you need to know if Network Policies are created or which Endpoints exists, go to Network. If you are interested about vSphere Pods, Deployments, Daemon Sets, Stateful Sets, etc. go to Compute and select the specific category (Figure XIII & Figure XIV).
Of course, you can also check the installation the Kubernetes-way via the exposed Kubernetes API of the Supervisor.
Login with the SSO Domain Administrator credentials using the kubectl vsphere login command.
kubectl vsphere login --insecure-skip-tls-verify --vsphere-username administrator@cpod-nsxv8.az-stc.cloud-garage.net --server=sv1-az1.cpod-nsxv8.az-stc.cloud-garage.net
Verify the deployment:
kubectl -n svc-contour-domain-c8 get deploy,po,ds,svc

NAME                      READY   UP-TO-DATE   AVAILABLE   AGE
deployment.apps/contour   2/2     2            2           53d

NAME                           READY   STATUS    RESTARTS       AGE
pod/contour-6b889d7444-nb2bz   1/1     Running   1              8d
pod/contour-6b889d7444-x8c7g   1/1     Running   1              8d
pod/envoy-4gsnx                2/2     Running   0              8d
pod/envoy-5nbvw                2/2     Running   0              8d
pod/envoy-l2qtd                2/2     Running   0              8d
pod/envoy-tfcgz                2/2     Running   0              8d

NAME                   DESIRED   CURRENT   READY   UP-TO-DATE   AVAILABLE   NODE SELECTOR   AGE
daemonset.apps/envoy   4         4         4       4            4           <none>          53d

NAME              TYPE           CLUSTER-IP    EXTERNAL-IP   PORT(S)                      AGE
service/contour   ClusterIP      10.96.0.164   <none>        8001/TCP                     53d
service/envoy     LoadBalancer   10.96.2.14    10.15.8.9     80:30077/TCP,443:32173/TCP   53d
The state as well as Day-2 operations of a Service, like e.g. updating or deleting a service, will be done via the Service tile by clicking on Actions (Figure XV).
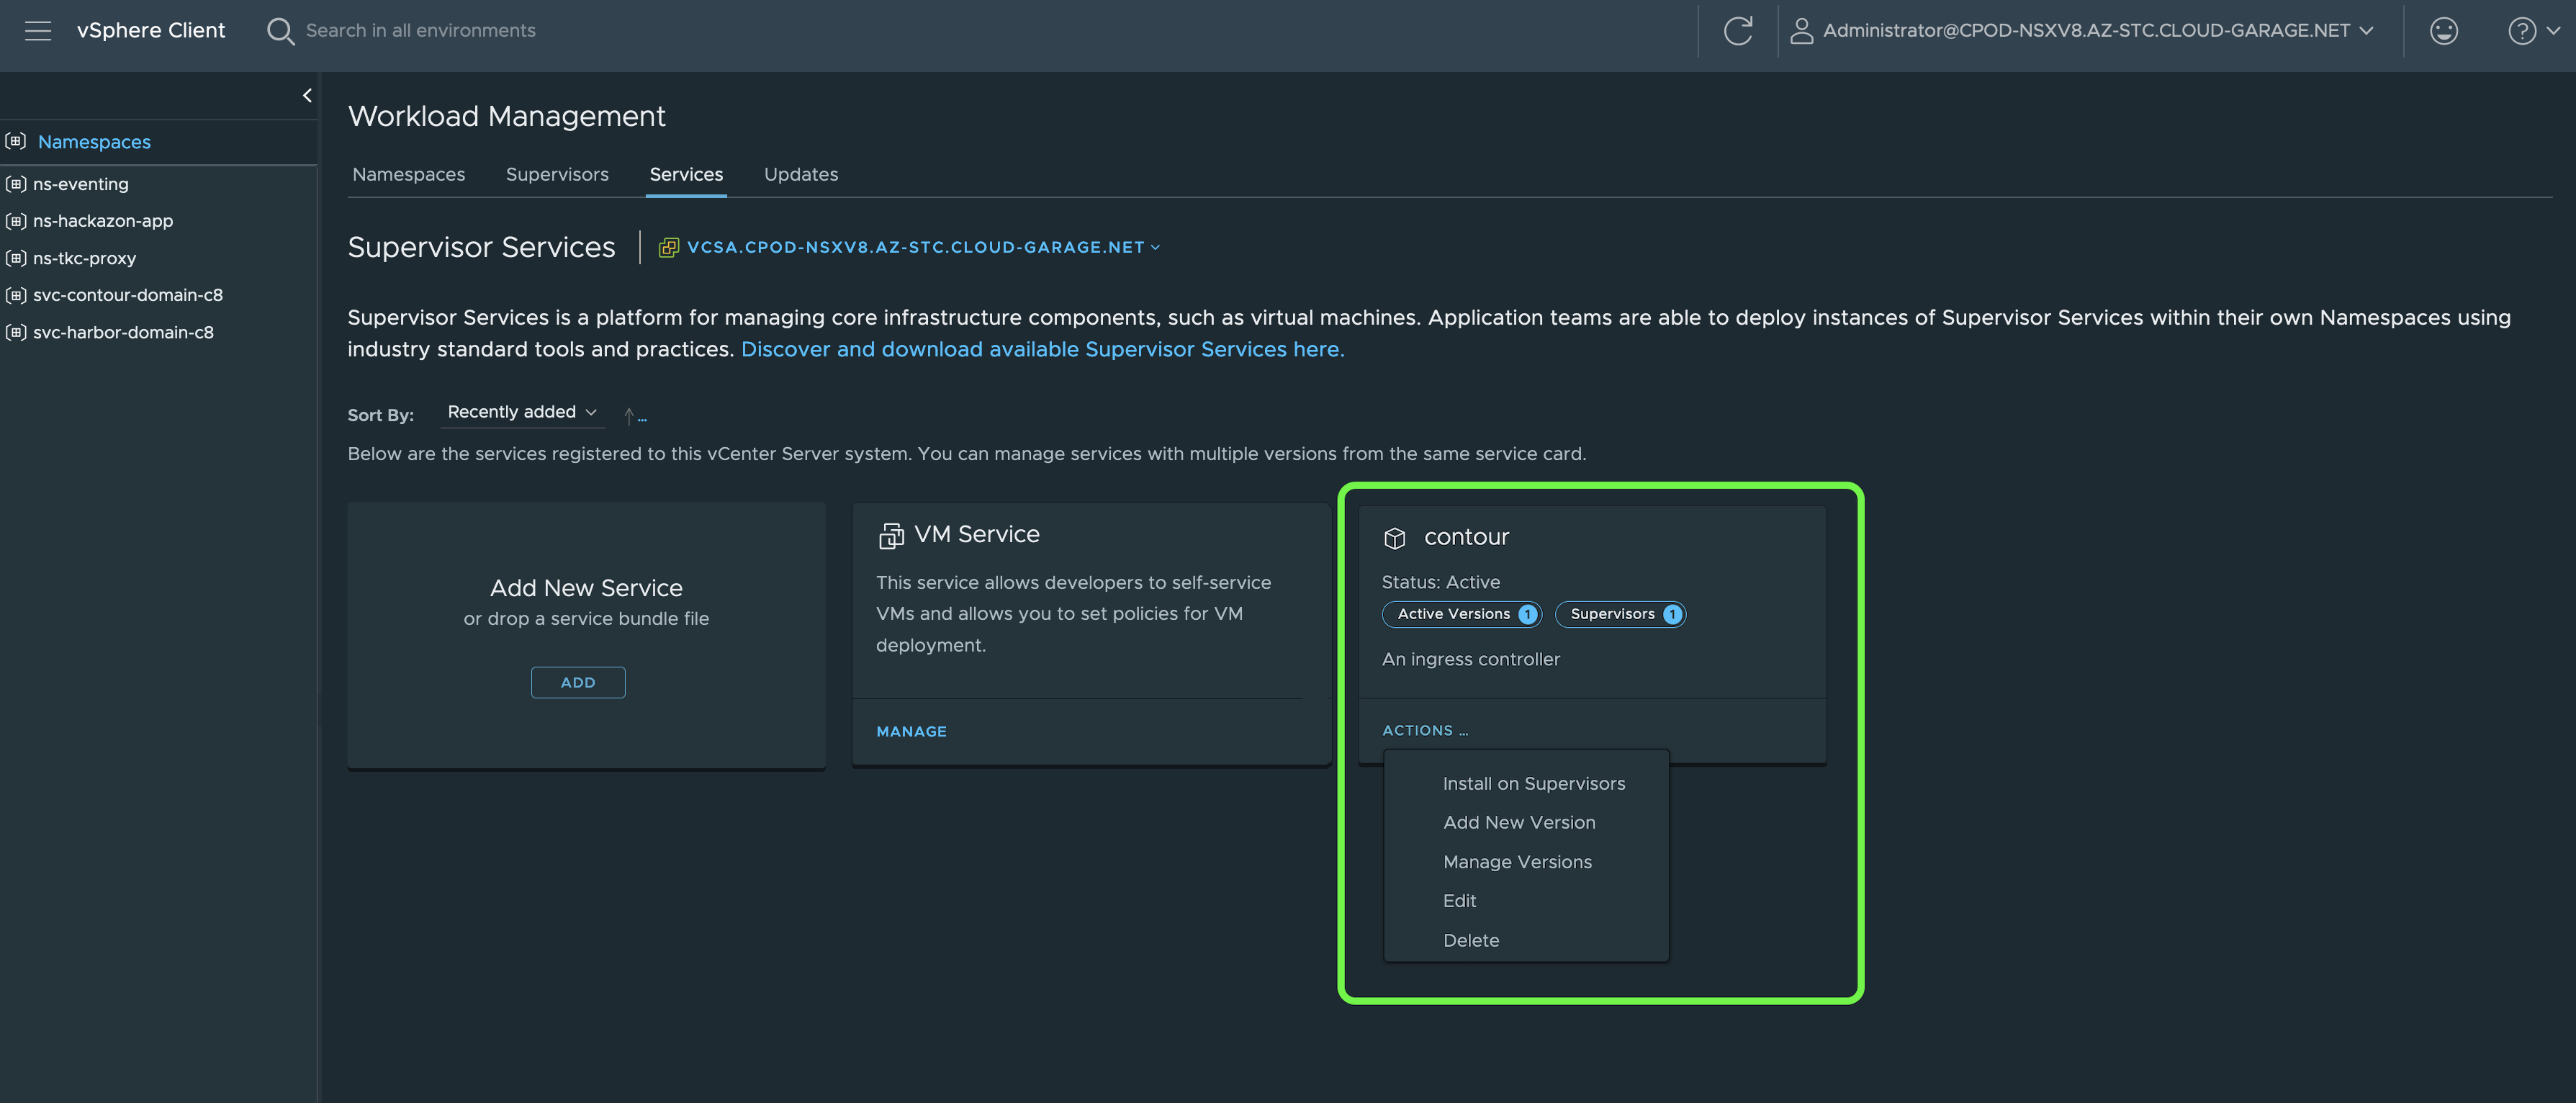
Cloud Native Registry Service - Harbor
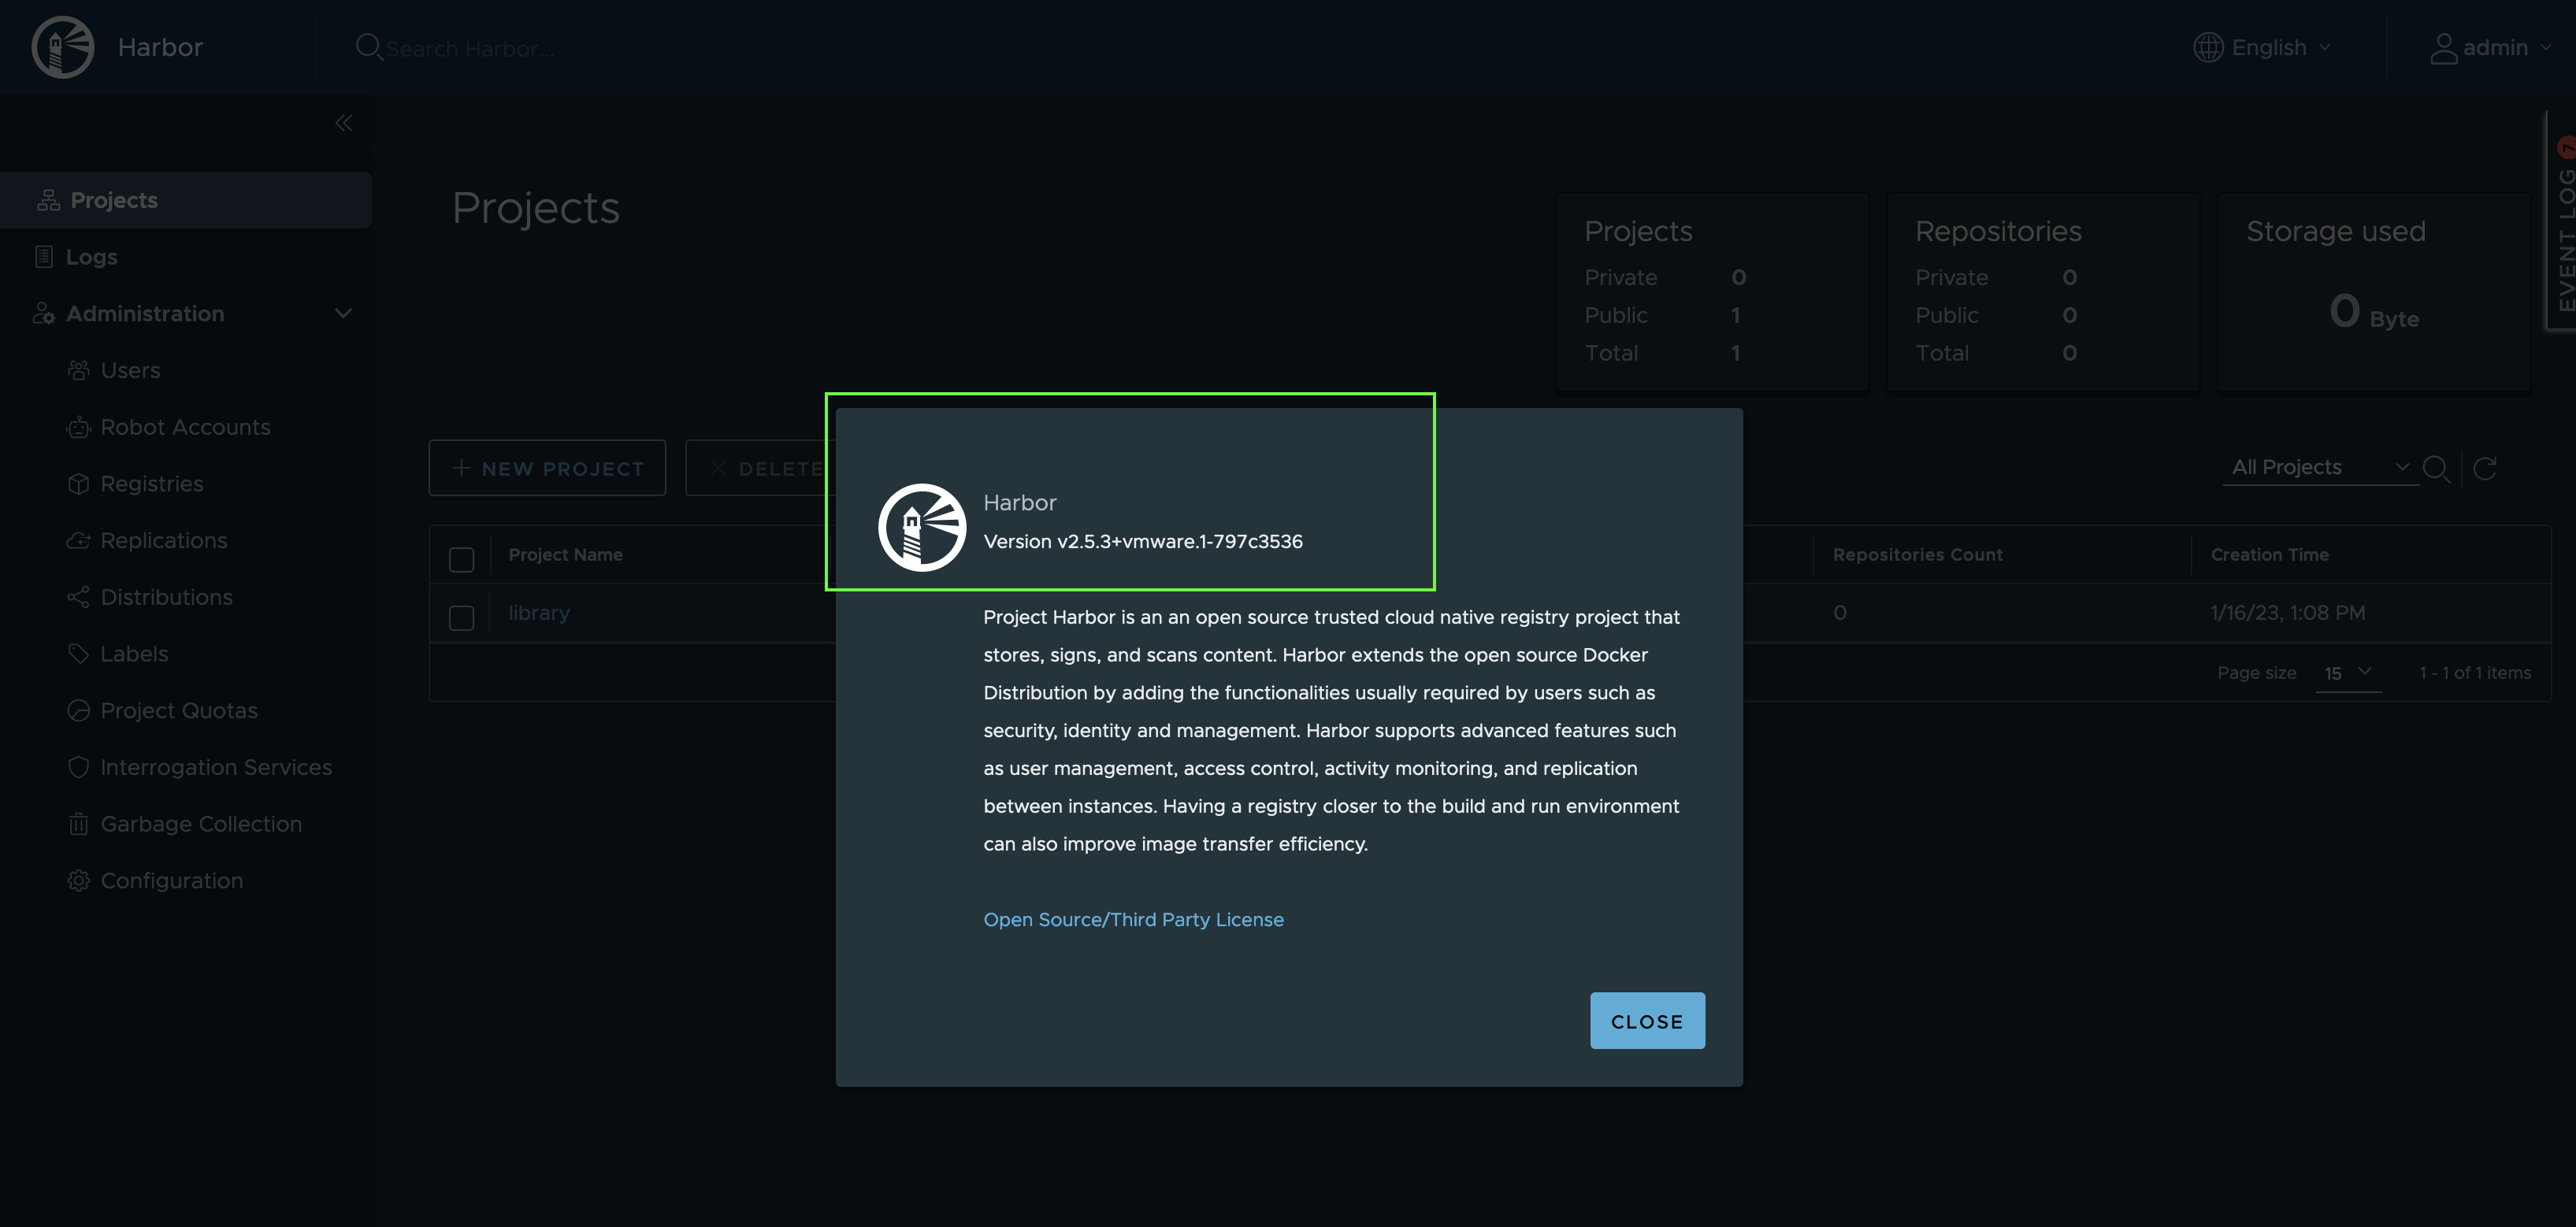
The availability of this Supervisor Service exited me the most. Now, with having Harbor provided via the Supervisor Service Catalog (provided and maintained by VMware!), there’s really NO easier way of getting Harbor installed and lifecycled.
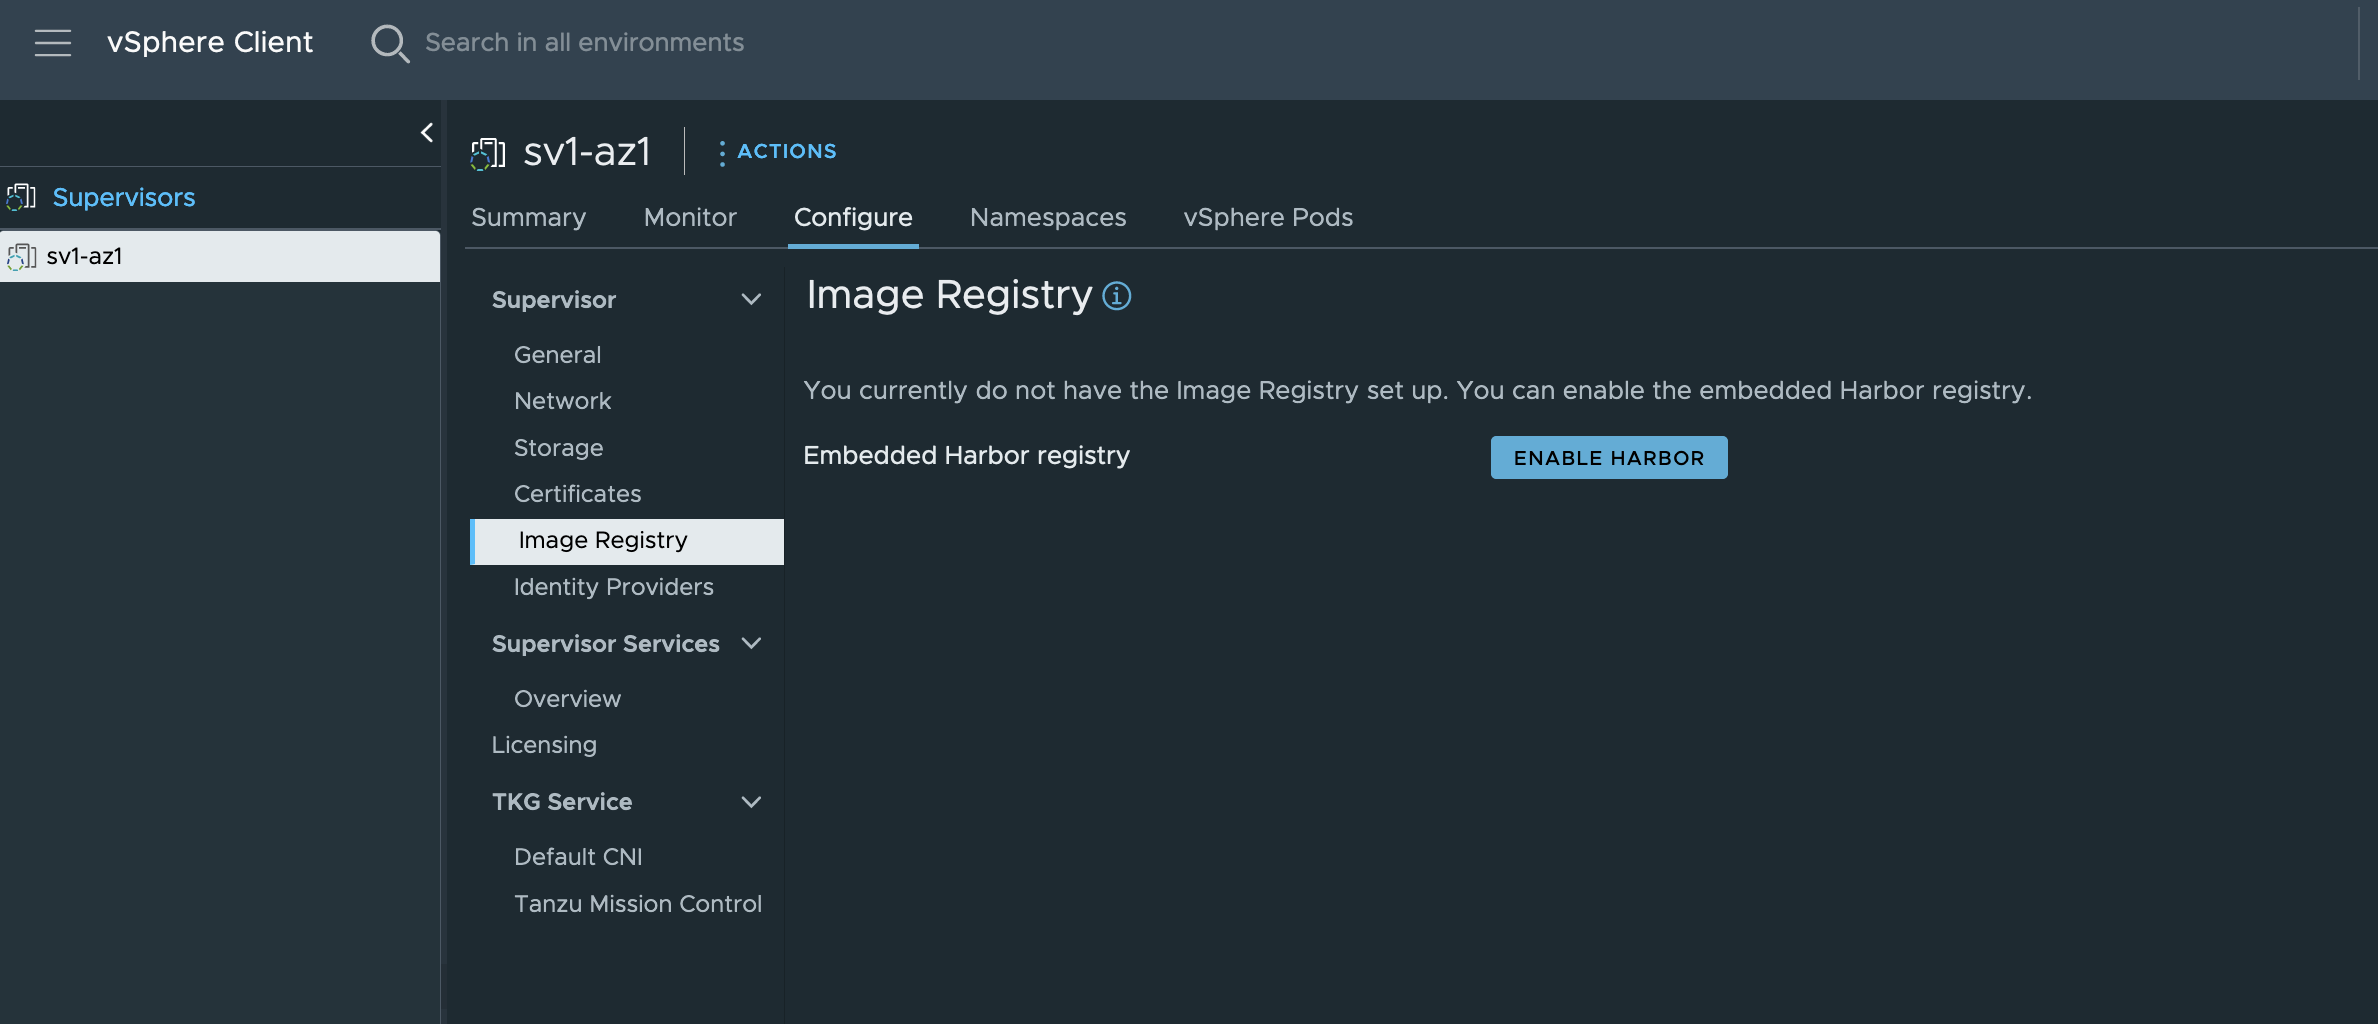
Yes, one can say that installing Harbor via the Embedded Harbor registry feature (Figure XVI) is still the easiest way, but due to the lack of features in this particular Harbor version as well as the differences in terms of Day-2 operations, it’s not comparable at all. I’d almost say, it’s obsolete!
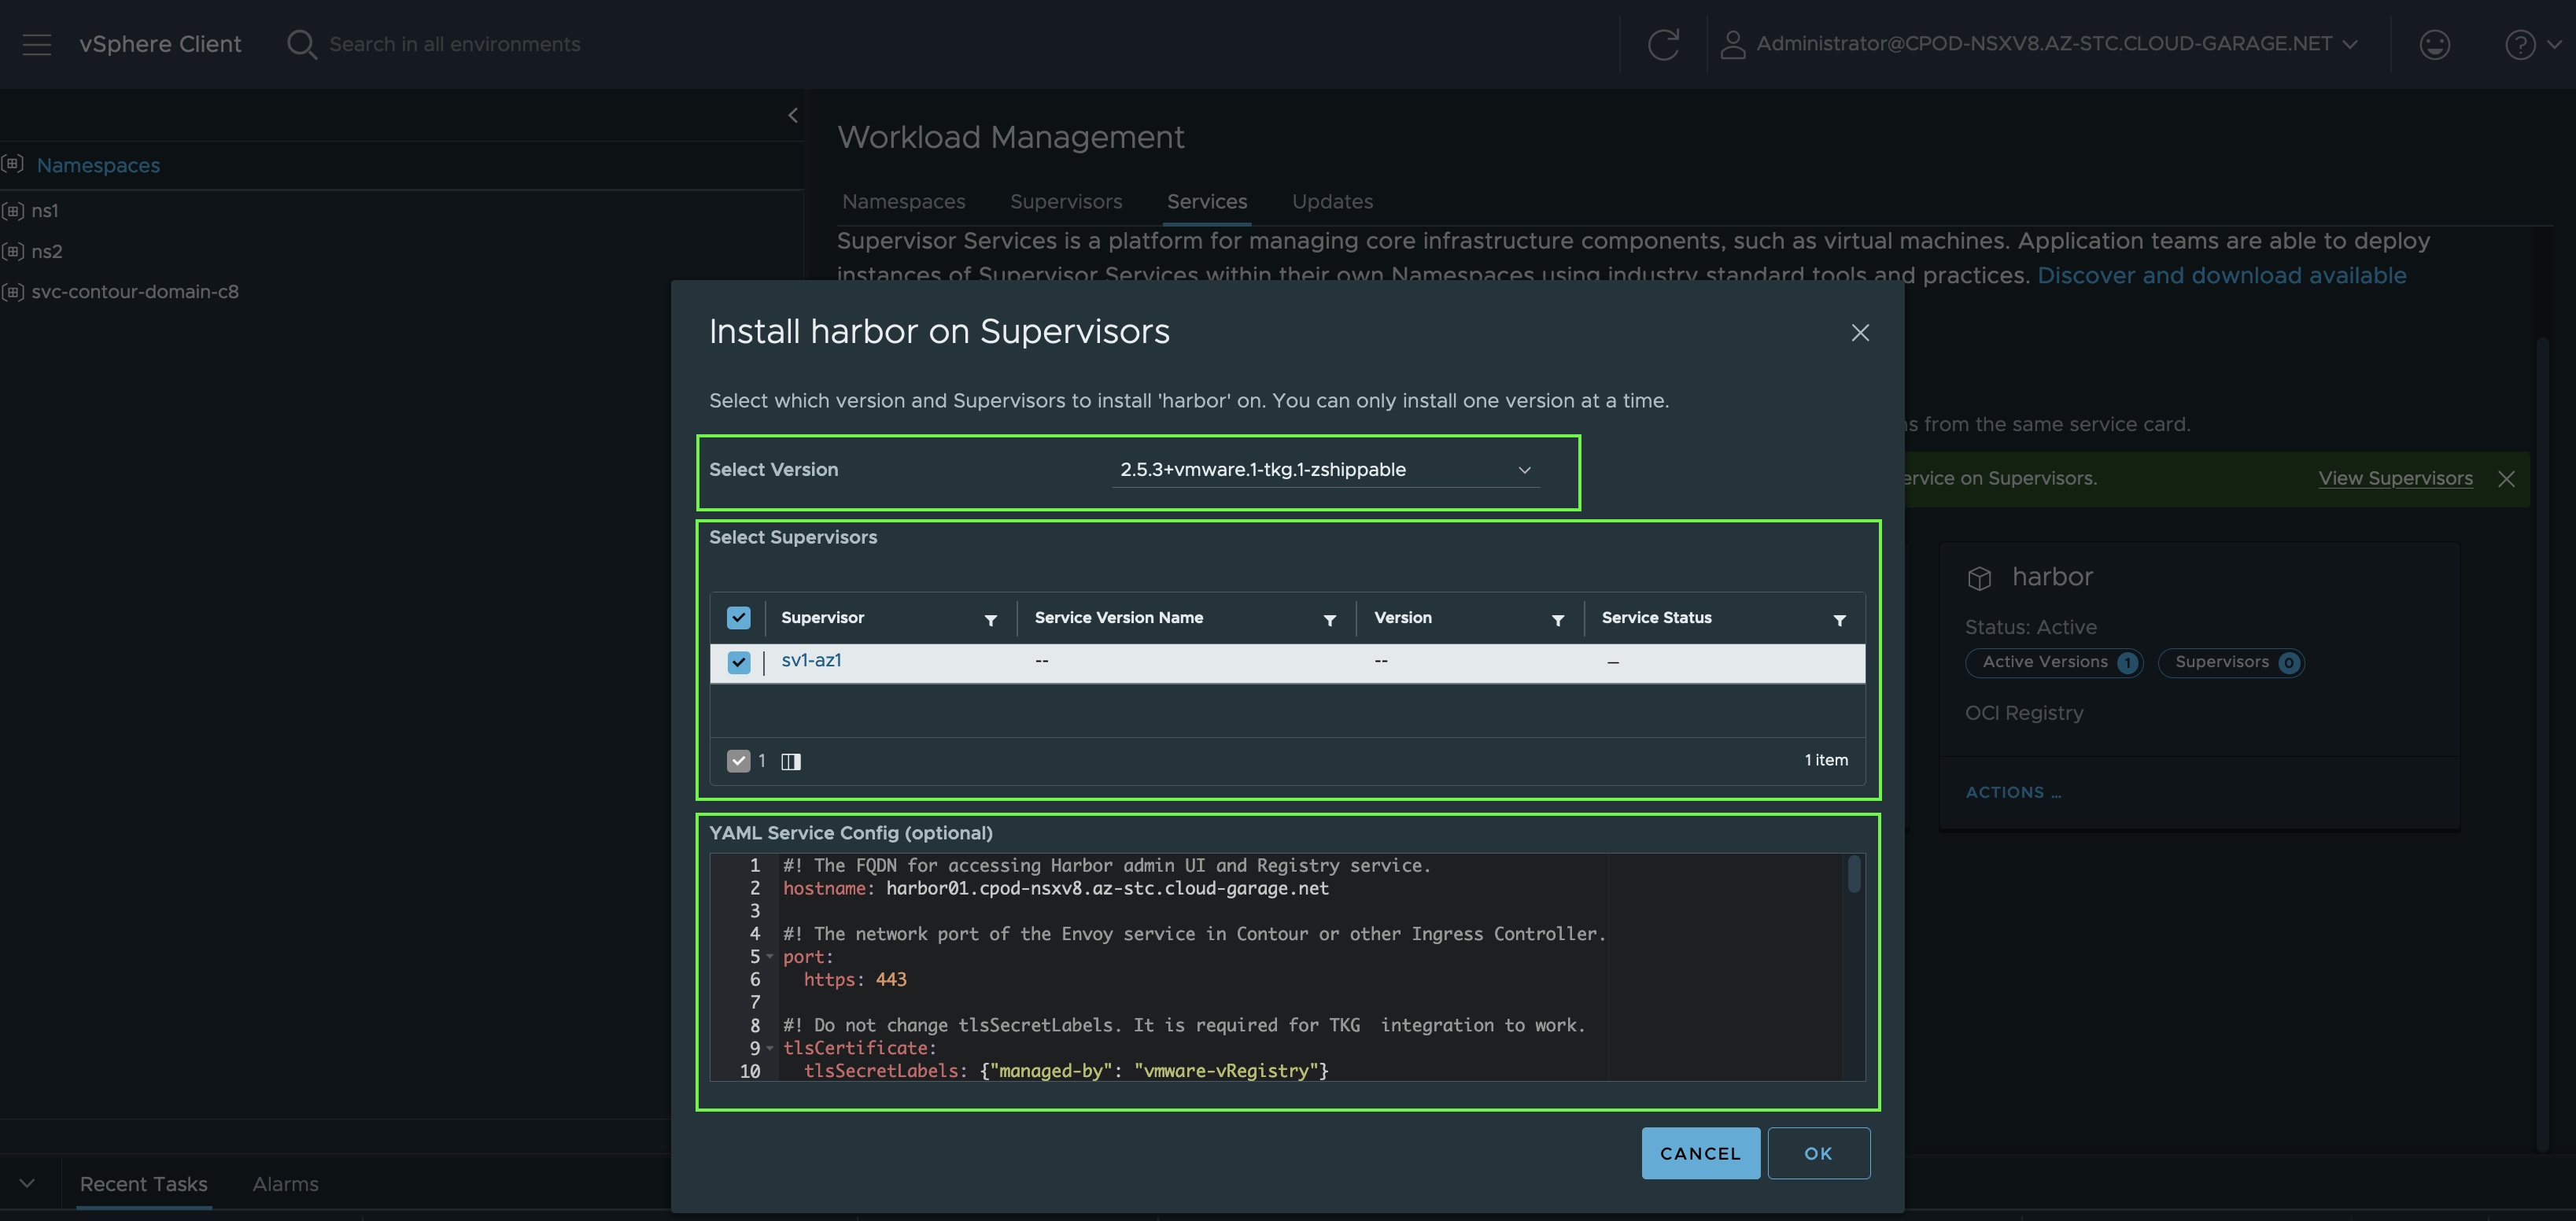
Add New Service - Harbor
Installing the Harbor Supervisor Service is done by exactly the same way as it is for Contour.
Reminder: The Supervisor Service Contour is required for the Harbor Service.
Download the Package manifest file harbor.yml and the harbor-data-values.yml also via the Supervisor Catalog repository. Upload the harbor.yml to start with the Service registration.
Open the harbor-data-values.yml in your preferred editor and adjust the values properly with your data. Copy the data and provide it in the next window after clicking on Install on Supervisors.
If you know both platforms well, vSphere and Kubernetes, following the deployment process and to imagine what happens under the hood is quite exiting, IMO.
Kubernetes Pods - Virtual Machines, Persistent Volumes - VMDKs, Pod Networking - NSX, exposed Services - NSX… :nerd:
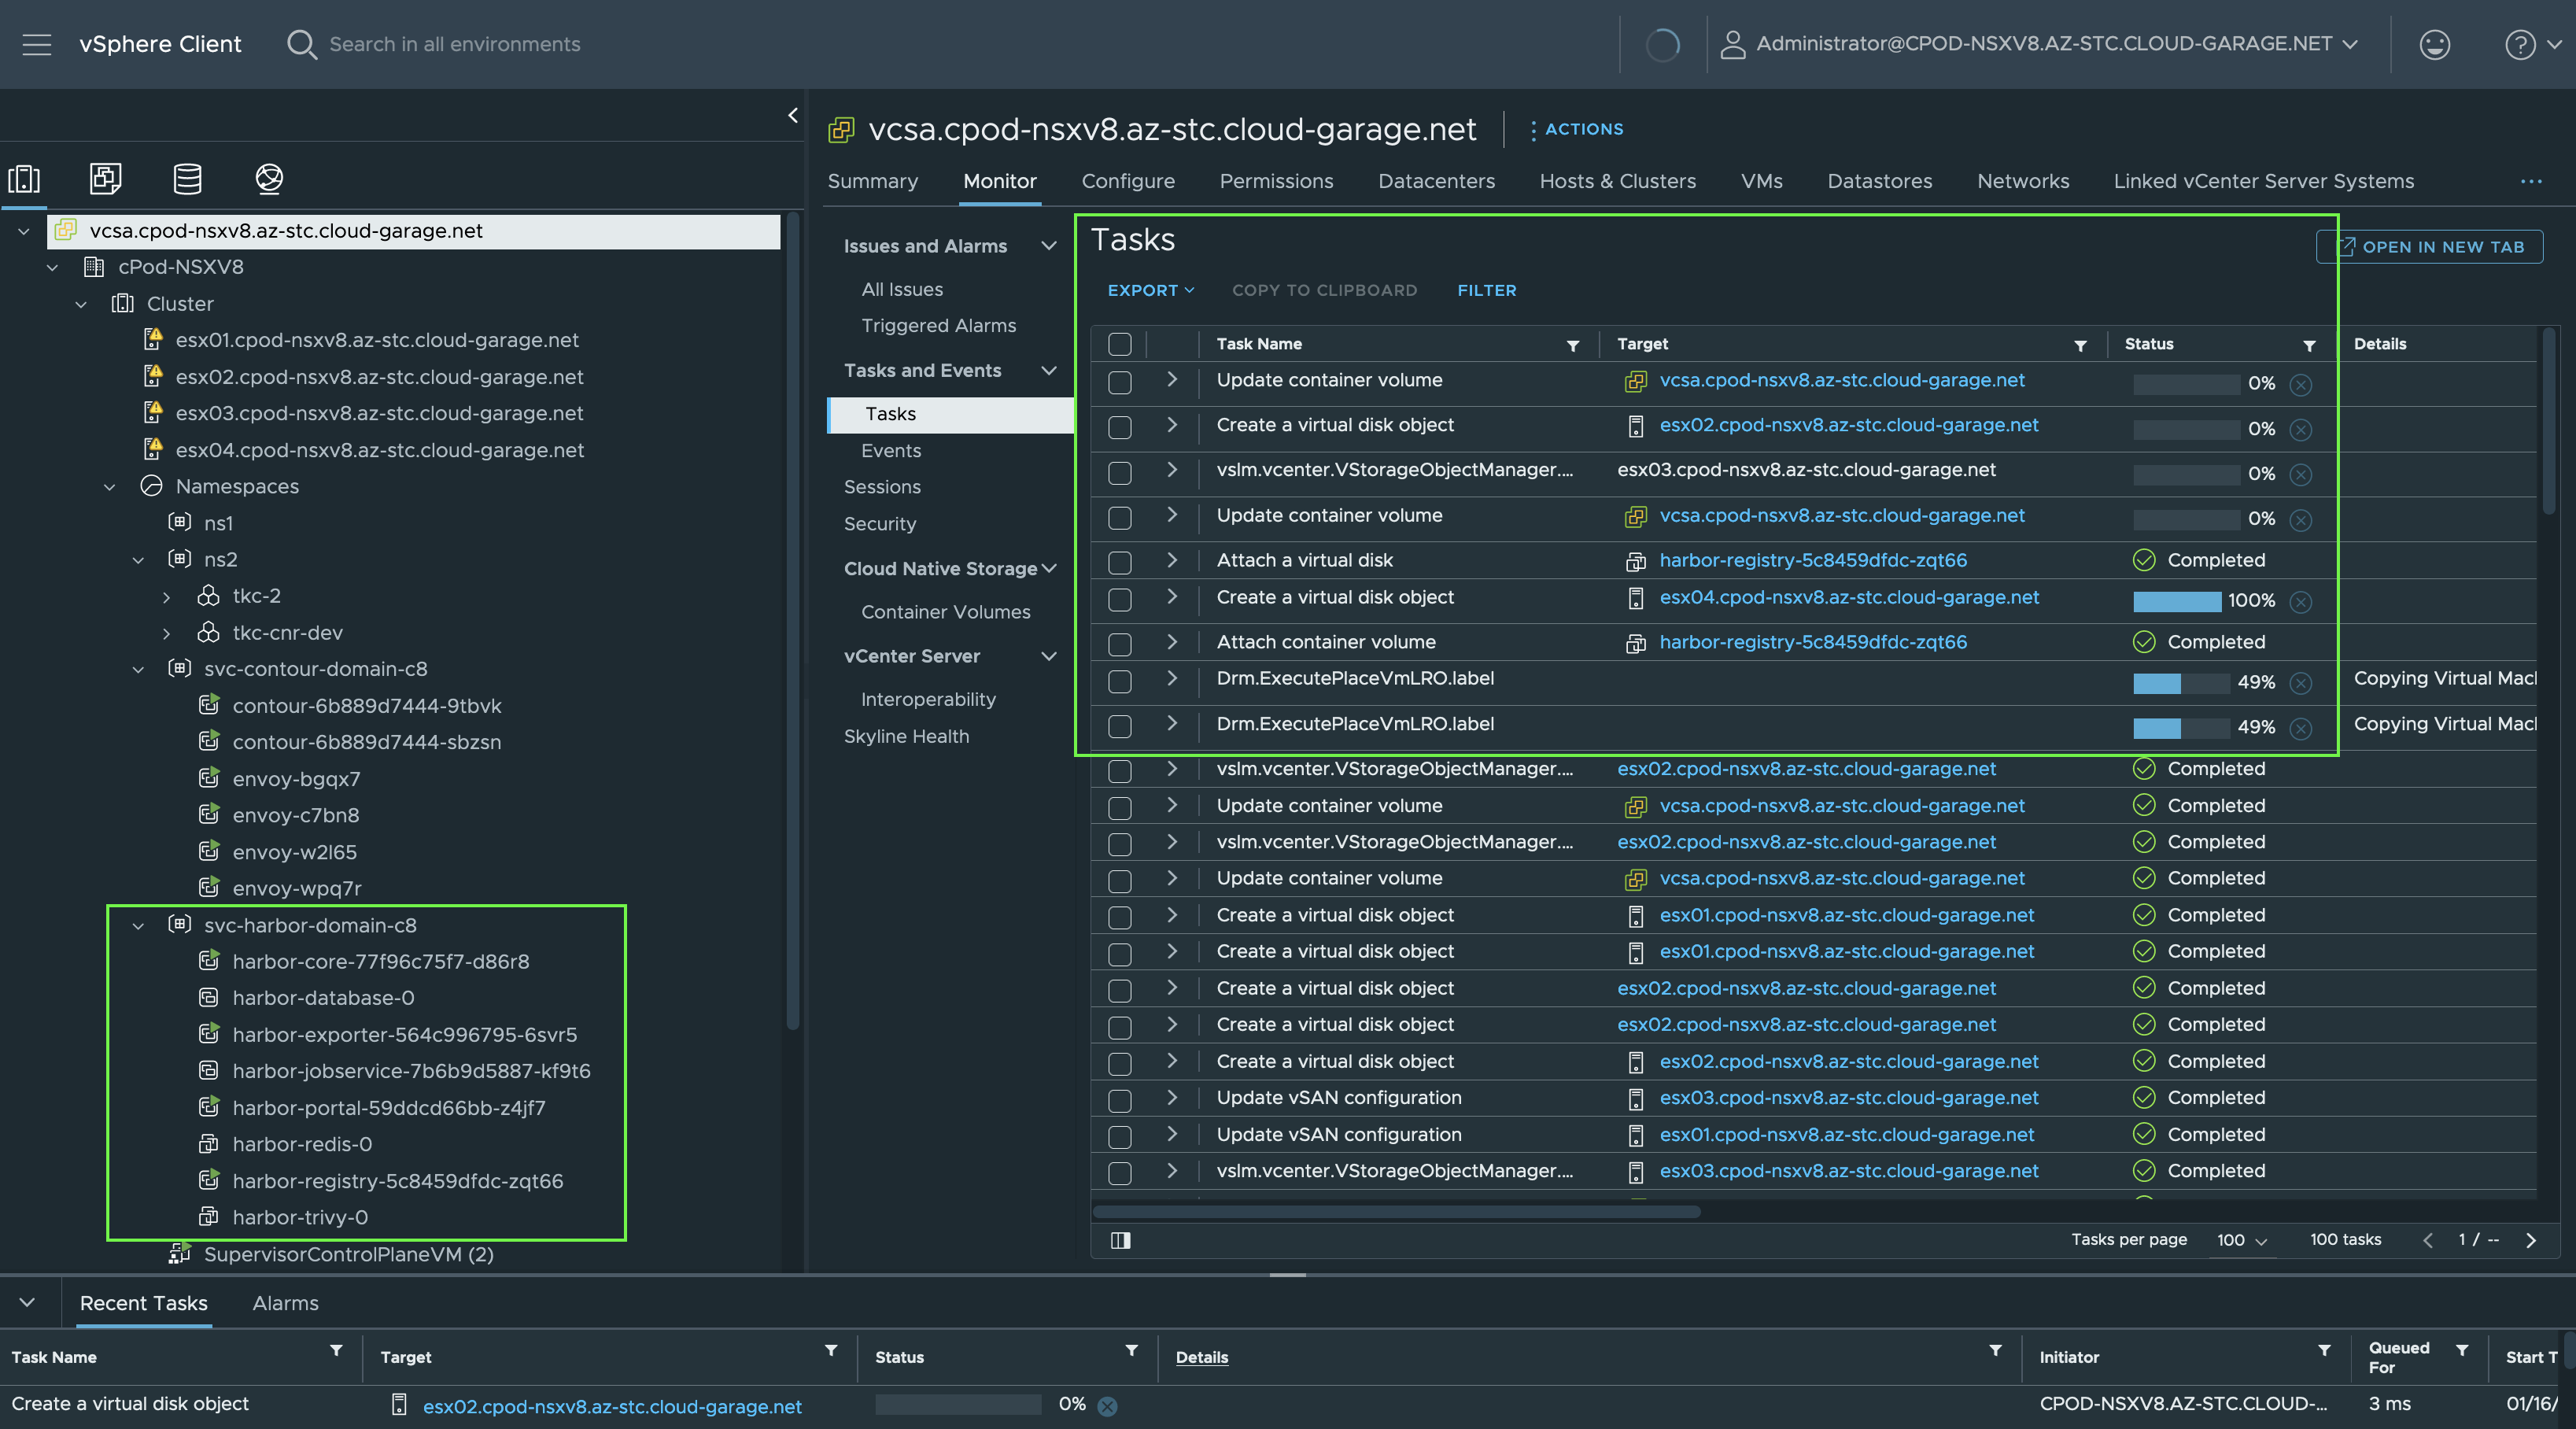
After a short period, Harbor is deployed and ready to serve your DevOps and AppDev teams with a centralized Container Image Registry (Supervisor) Service.
Ultimately, you’d like to establish trust with the new Harbor instance in order to enable Kubernetes clusters pulling container images from Harbor. See: Establishing Trust with the Harbor Supervisor Service
Conclusion Supervisor Services
In conclusion, the Supervisor Services in vSphere with Tanzu (TKGS) offering a multitude of benefits by e.g. providing a simple and opinionated way to deploy central services to DevOps and AppDev teams. These teams can consume these services using common tools and approaches, and deploy instances of these services in their own vSphere Namespaces.
Resources
- vSphere with Tanzu
- vSphere (Native) Pods
- What Is a vSphere Pod?
- INITIAL PLACEMENT OF A VSPHERE POD
- SCHEDULING VSPHERE PODS
- vSphere Pod: Deep Dive into Use Case Patterns — Part-1
- Managing Supervisor Services with vSphere with Tanzu
- Supervisor Services Catalog
- Establishing Trust with the Harbor Supervisor Service
- vSphere with Tanzu Supervisor Services Part II - Ingress with Contour for vSphere Pod based Applications
Credits
Big THANKS to Andreas Marqvardsen for reviewing this article 🙏