vSphere with Tanzu Supervisor Services Part III - Lifecycle Management of Supervisor Services
Recap and Intro
In Part I and II of my blog series on the Supervisor Services in vSphere with Tanzu (TKG with Supervisor Model), I covered the topics from registering and installing a new service on a Supervisor Cluster until how to leverage a service for functionalities like e.g. hosting container images (Registry Service) or handling incoming traffic (Ingress Service) for vSphere Pod based applications.
Through this part, I’d like to bring you the lifecycle of a Supervisor Service a bit closer. I’m going to touch on how to handle a reconfiguration, a version update and an uninstallation of an existing Supervisor Service.
Lifecycle Management Operations
Before I start with the first topic, the reconfiguration of an already existing Supervisor Service, I will briefly touch on DON’TS based on an experience I just recently made with my existing Registry Service (Harbor). Installation covered in part I HERE.
DO’S and DON’TS
What happened? 🤔 I was right in the middle of working on a new blog post series (stay tuned) and one task which had to be documented is the relocation (copying a bundle from one registry to another) of a heavy-weight image bundle.
This operation failed right in the middle of the image bundle relocation with the following error:
This meaningful message is indicating that there’s no space left on my Harbor instance. Since everything is declared via the harbor-data-values.yml file, I thought that simply adjusting the data for the respective storage value should be fine.
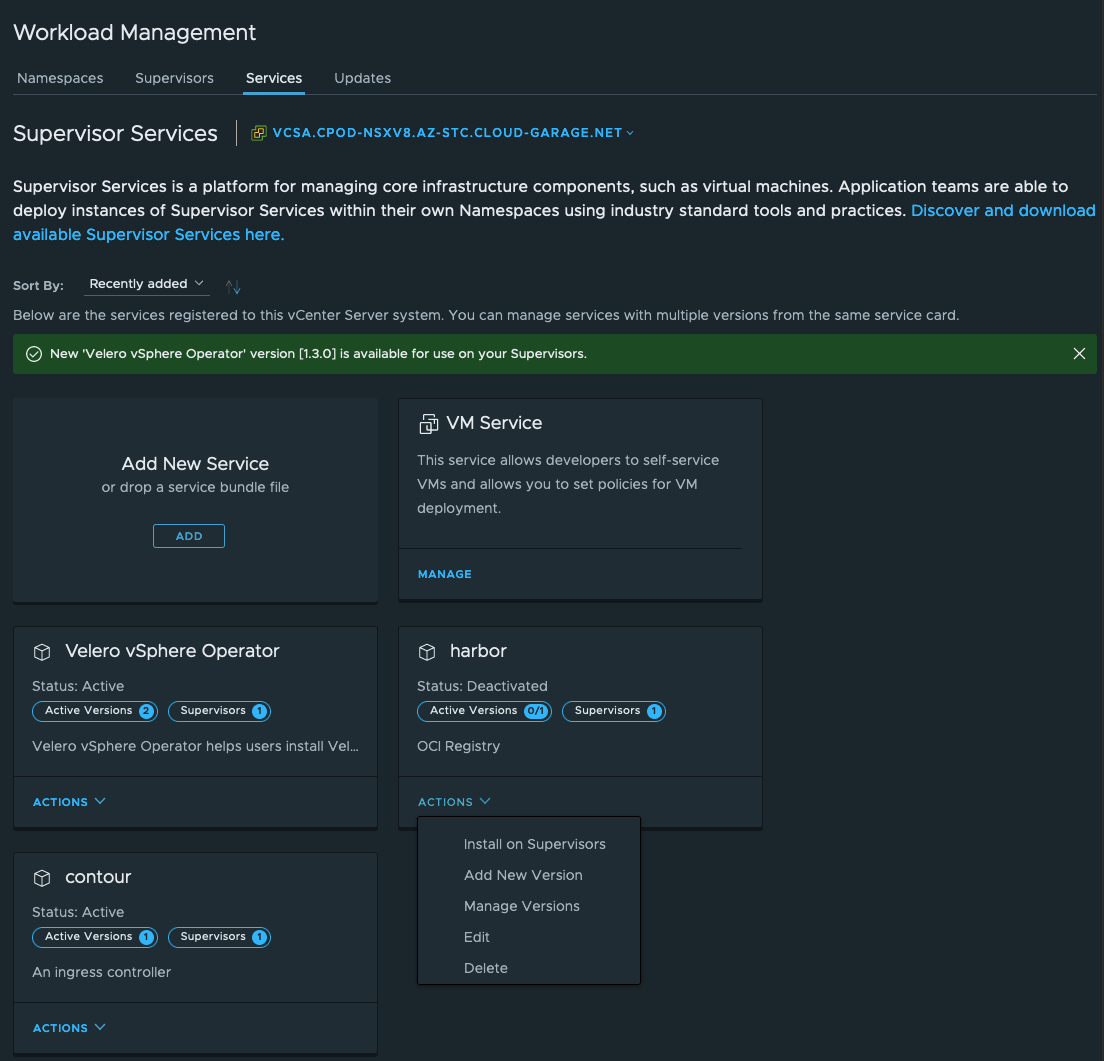
Unfortunately, it wasn’t obvious to me how to reconfigure an already deployed service via the vSphere Client. I checked the possibilities at the Workload Management/Services section but none of the available actions provided me what I was looking for. Also not the Edit action.
I looked into our docs to find information related, but couldn’t find anything. So, I continued…☠️
Me thinking: I will figure out a solution on my own, won’t I? 😬 👍
Taking my full self-confidence, I connected to the Supervisor Cluster (kubectl vsphere login...) and edited the PersistentVolumeClaim for the harbor-registry service:
k -n svc-harbor-domain-c8 edit pvc harbor-registry

[...]
spec:
  accessModes:
  - ReadWriteOnce
  resources:
    requests:
      storage: 50Gi
  storageClassName: ftt0-r0
  volumeMode: Filesystem
  volumeName: pvc-fecf7048-55ab-41b5-9f63-dfc8f307ff39
[...]
I simply increased the capacity as it suited me (10GB –> 50GB). After saving the configuration ( :wq) the extension of the container volume happened automagically in vSphere and voilà, I was able to relocate my heavy image bundle successfully.
Of course I had to pay the bill shortly afterwards.
I already had my concerns when I did the adjustment directly to the pvc but this self-destructive curiosity overcame me once again 🤓 💻
I knew that kapp-controller is being used on the Supervisor cluster to handle such Supervisor Service (Package) installations. Consequently, a reconciliation must happen at some point in time.
Oh boy! What now? Decreasing an already increased volume (vmdk)? No chance! Validated it. Ergo…uninstalling (covered further down) and reinstalling the whole Service. 🤦 Think twice before you do such operations!
Reconfiguring a Supervisor Service
Having explained the DON’TS let me introduce the DO’S on how to reconfigure an existing Supervisor Service.
When I reinstalled Harbor, I configured the storage for the harbor-registry service with 55GB (Figure II)

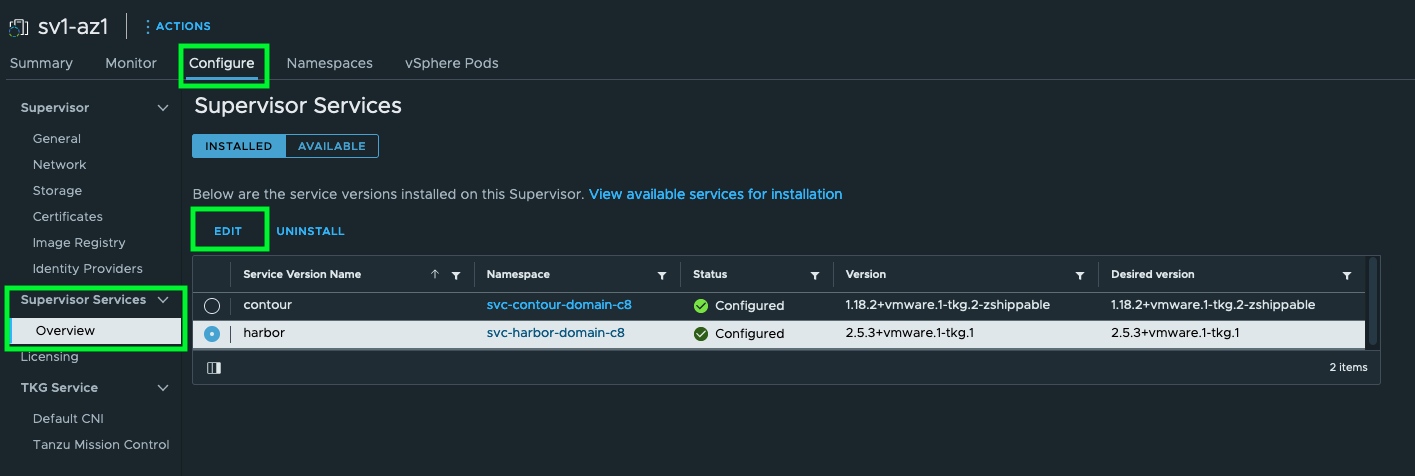
Let’s increase the value to 60GB and observe on both sites (vSphere and Kubernetes) what happens. In the Workload Management section, select Supervisors. Click on the name (hyperlink) of your Supervisor cluster which hosts the service. I only have one deployed in my environment.
Next, go to Configure and Supervisor Services/Overview. Select the Service and click on Edit (Figure III).
The YAML Service Config editor will open which we have to use to adjust values. As mentioned, I’m going to increase the storage value to 60GB (Figure IV).
[...]
    registry:
      accessMode: ReadWriteOnce
      size: 60Gi
      storageClass: ftt0-r0
      subPath: ""
[...]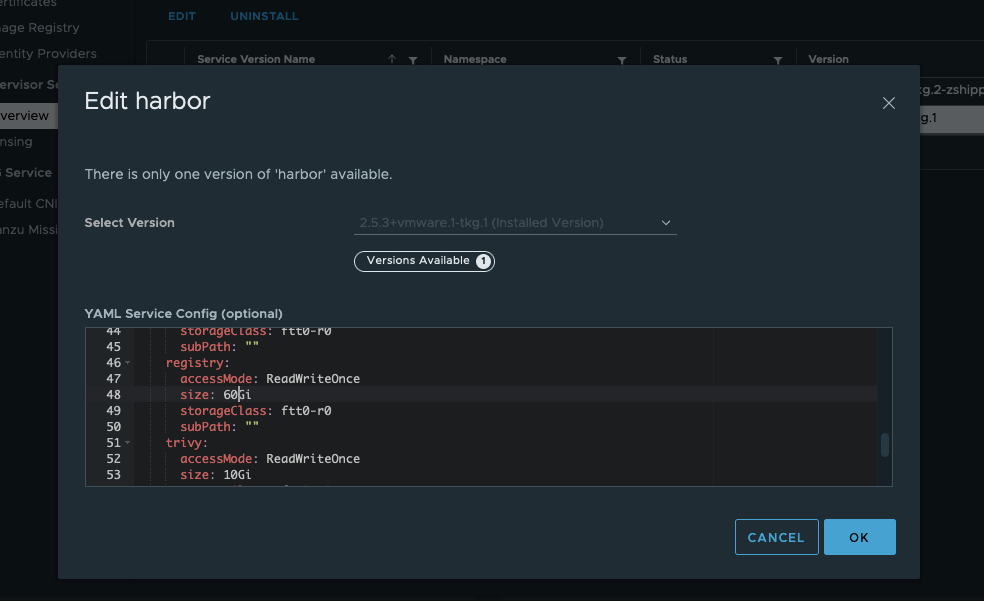
Adjustments will take place after clicking OK
Let’s check what happens in vSphere. Multiple sections are helpful and providing valuable information. Obviously All Tasks on the vCenter level but also the Events on the appropriate vSphere Namespace.
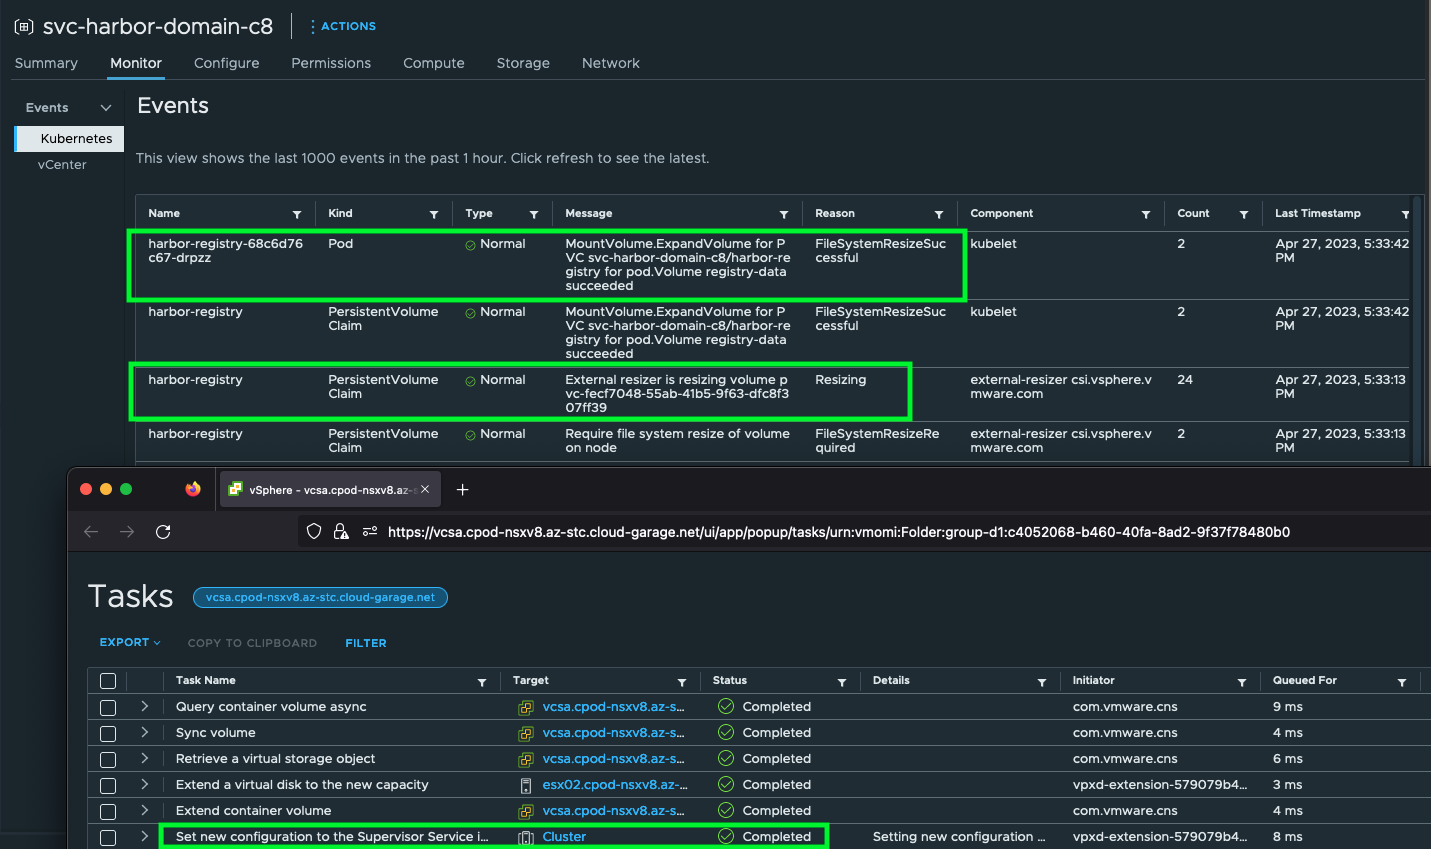
Events created by Kubernetes (Supervisor Cluster) can be queried as well by using kubectl.
k -n svc-harbor-domain-c8 events

LAST SEEN              TYPE      REASON                       OBJECT                                  MESSAGE
6m53s (x24 over 27h)   Normal    Resizing                     PersistentVolumeClaim/harbor-registry   External resizer is resizing volume pvc-fecf7048-55ab-41b5-9f63-dfc8f307ff39
6m53s (x2 over 27h)    Normal    FileSystemResizeRequired     PersistentVolumeClaim/harbor-registry   Require file system resize of volume on node
6m24s (x2 over 27h)    Normal    FileSystemResizeSuccessful   Pod/harbor-registry-68c6d76c67-drpzz    MountVolume.ExpandVolume for PVC svc-harbor-domain-c8/harbor-registry for pod.Volume registry-data succeeded
6m24s (x2 over 27h)    Normal    FileSystemResizeSuccessful   PersistentVolumeClaim/harbor-registry   MountVolume.ExpandVolume for PVC svc-harbor-domain-c8/harbor-registry for pod.Volume registry-data succeeded
Checking the results on both platforms:

k -n svc-harbor-domain-c8 get pvc | grep 'harbor-registry'

harbor-registry                   Bound    pvc-fecf7048-55ab-41b5-9f63-dfc8f307ff39   60Gi       RWO            ftt0-r0        31h
Done the right way ✅
Updating a Supervisor Service
As of now, new versions for a Supervisor Service will be provided via the Supervisor Services Catalog on . I have no information if this is going to change in the future. Drop me a comment if you think it would make sense to have the versions shared via the VMware Marketplace.
I installed version v1.2.0 of the Supervisor Service for Backup & Recovery on my existing Supervisor cluster, which is going to install the Velero vSphere Operator on the Supervisor Control Plane Nodes(!). I’m explicitly mentioning this detail, because one would expect that vSphere Pods are showing up in the vSphere client when installing this service.
In order to update to a newer version, you have to download the updated SupervisorServiceDefinition yaml file for Velero first. Go to Workload Management/Services, click on ACTIONS on the appropriate service tile and select Add New Version (Figure VII).
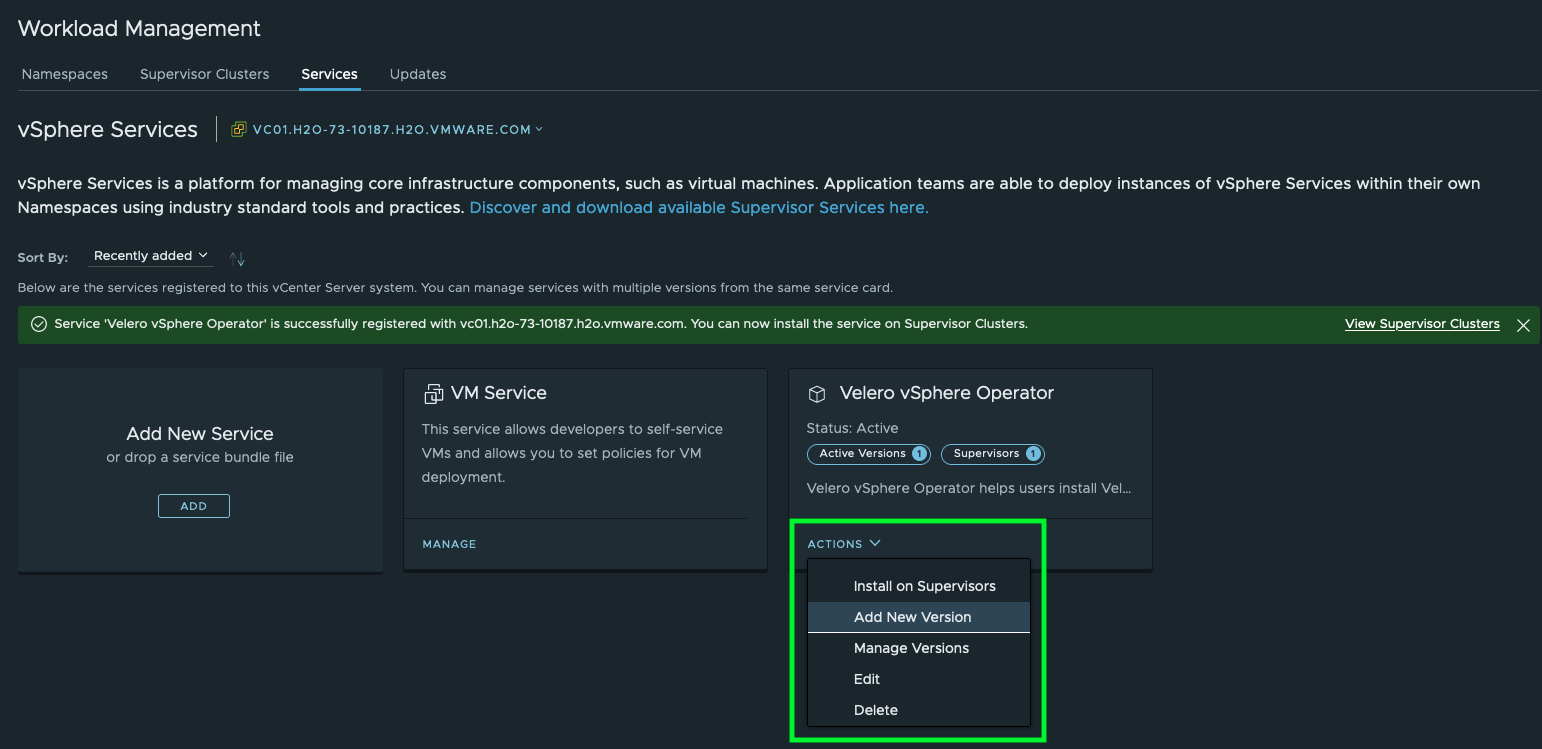
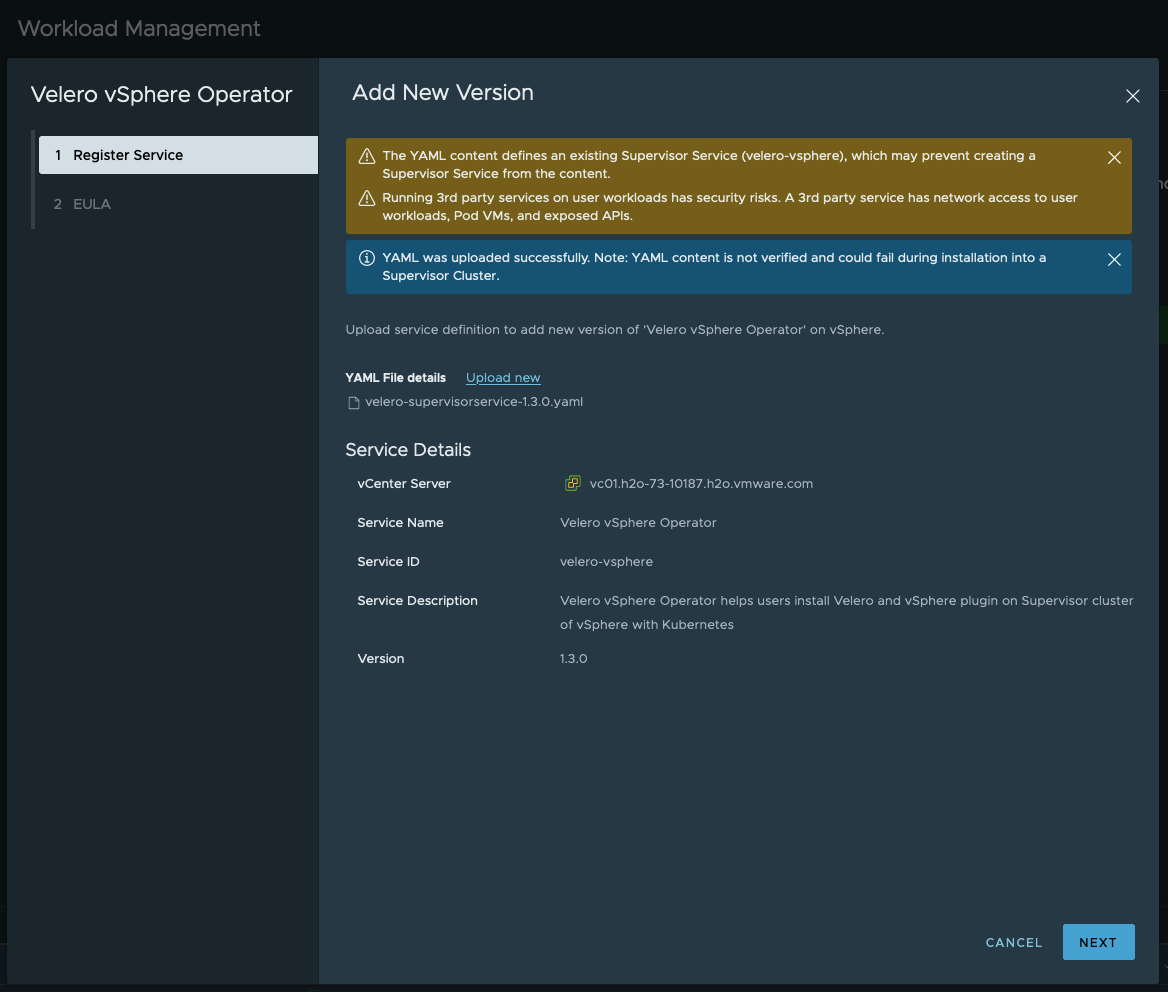
Upload the desired SupervisorServiceDefinition yaml file and validate the provided version information.
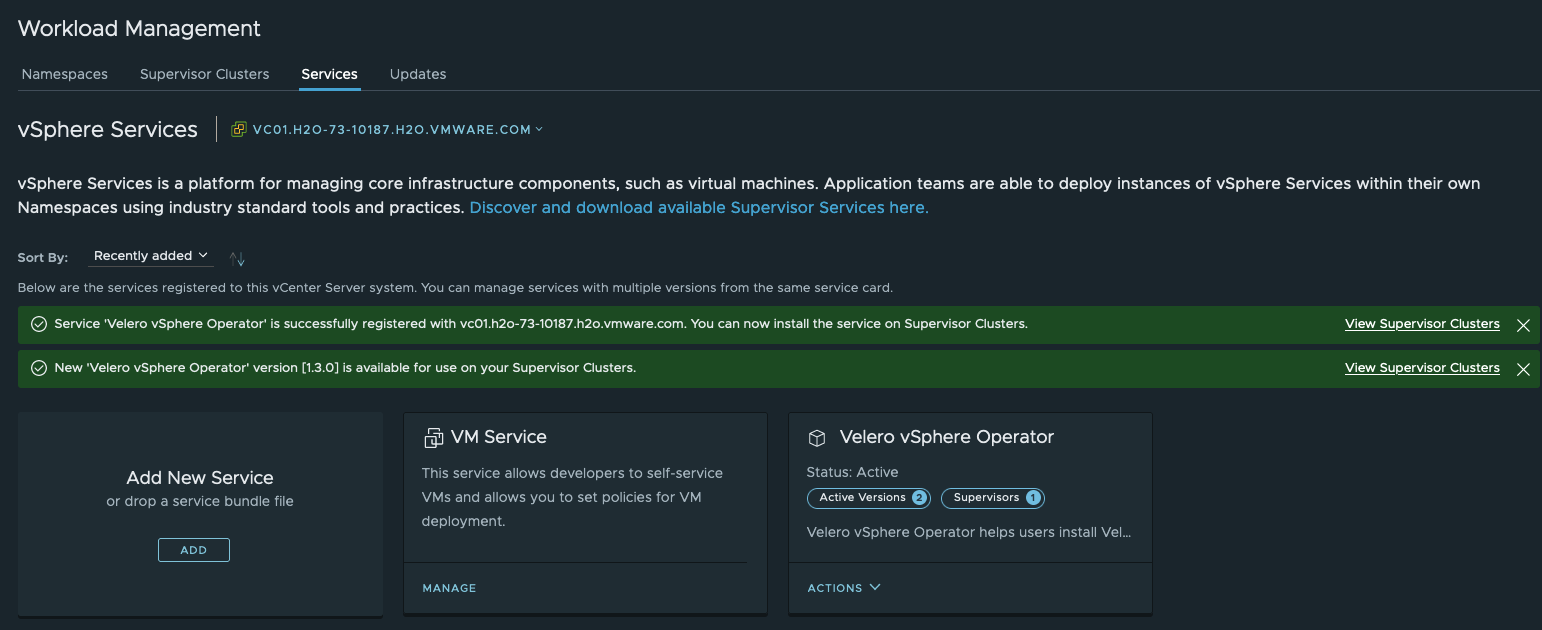
New notifications are showing up in the vSphere client after successfully registering a new service version on the vCenter Server.
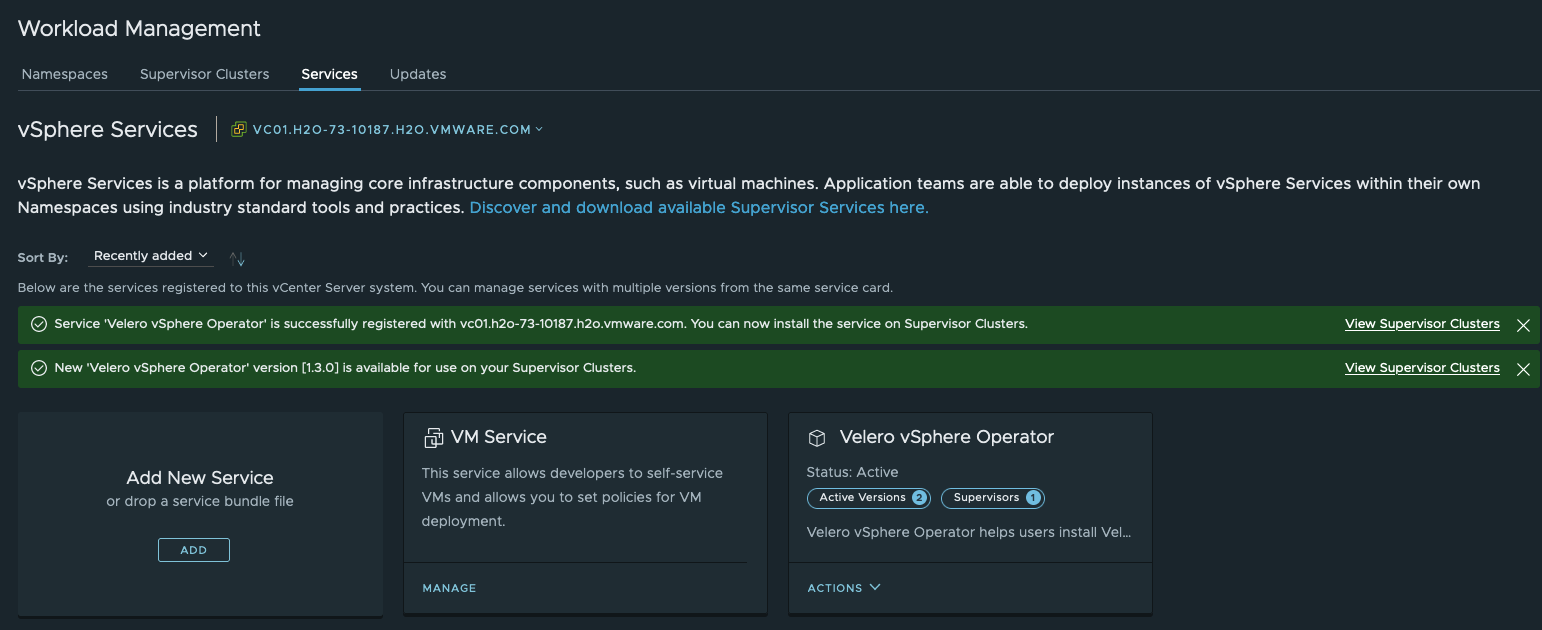
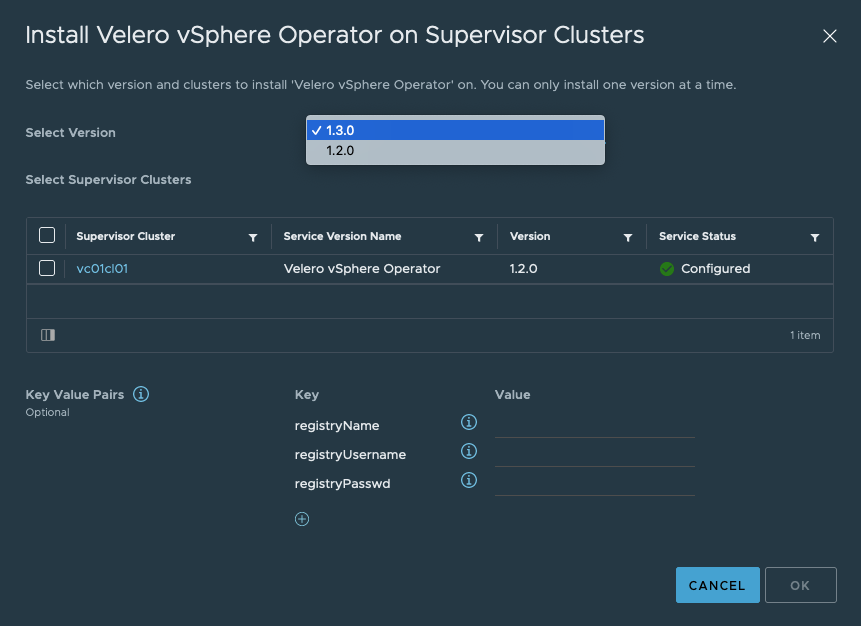
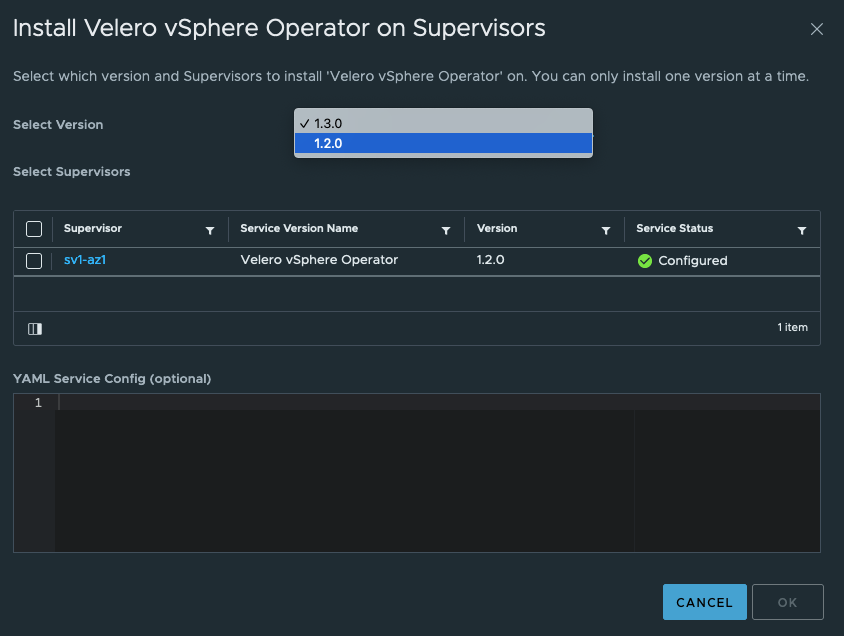
Now, there are actually two ways to have a new version installed on your Supervisor cluster(s). The first way is to basically follow the same process like it is when you install a new service on a Supervisor cluster for the first time. Click on ACTIONS and select Install on Supervisors. You should be able to select the newly added version of the service.
In vSphere 7, you could add data to the values registryName, registryUsername and registryPasswd. This looks already different in vSphere 8! In vSphere 8, you have the ability to provide your custom values with the appropriate data via the embedded editor (Figure Xa).
The second provided way is to Edit the service via the (per) Supervisor Configuration - Service Overview section in the vSphere Client. In vSphere 7, this section is available when you select your vSphere cluster in the Hosts and Clusters Inventory view and then via the Configure tab.
It differs in vSphere 8. In vSphere 8, you have to first select Workload Management, then Supervisors, your Supervisor Cluster and ultimately it’ll show up under the Configure tab as well.
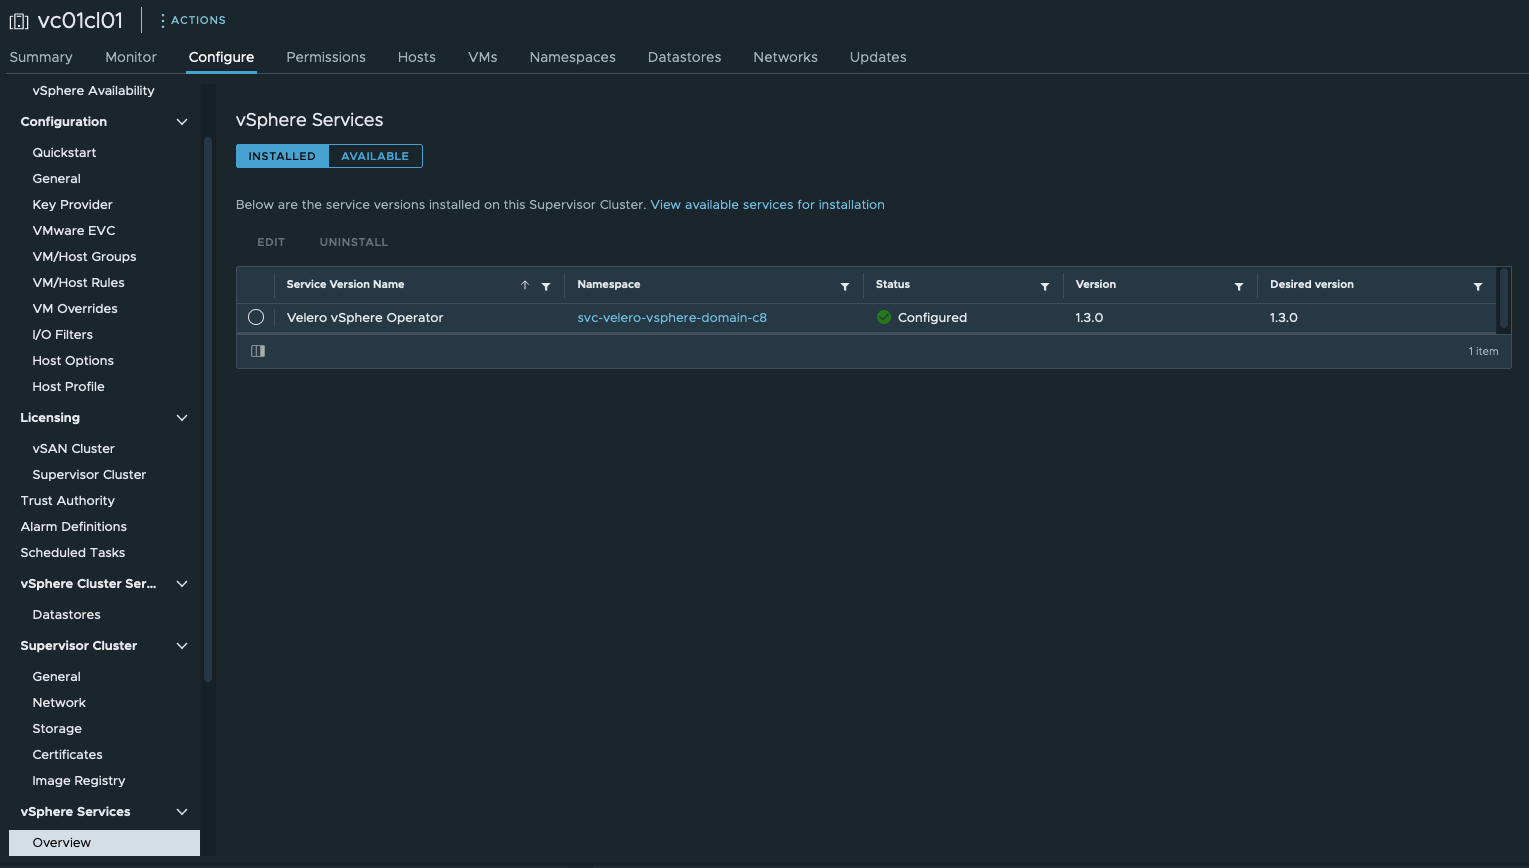
Notice the New version info behind the already installed version.
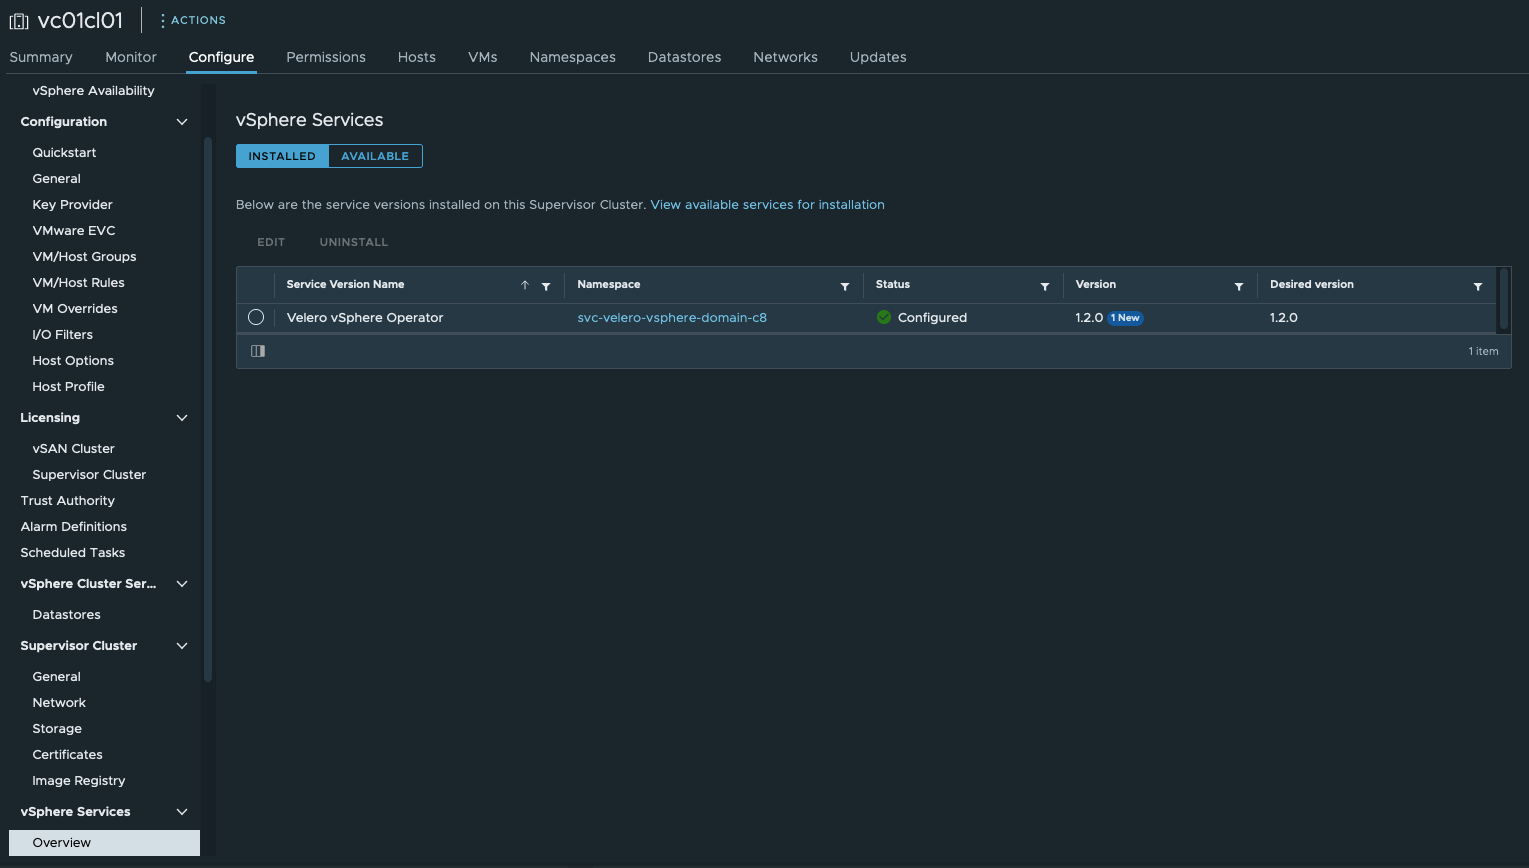
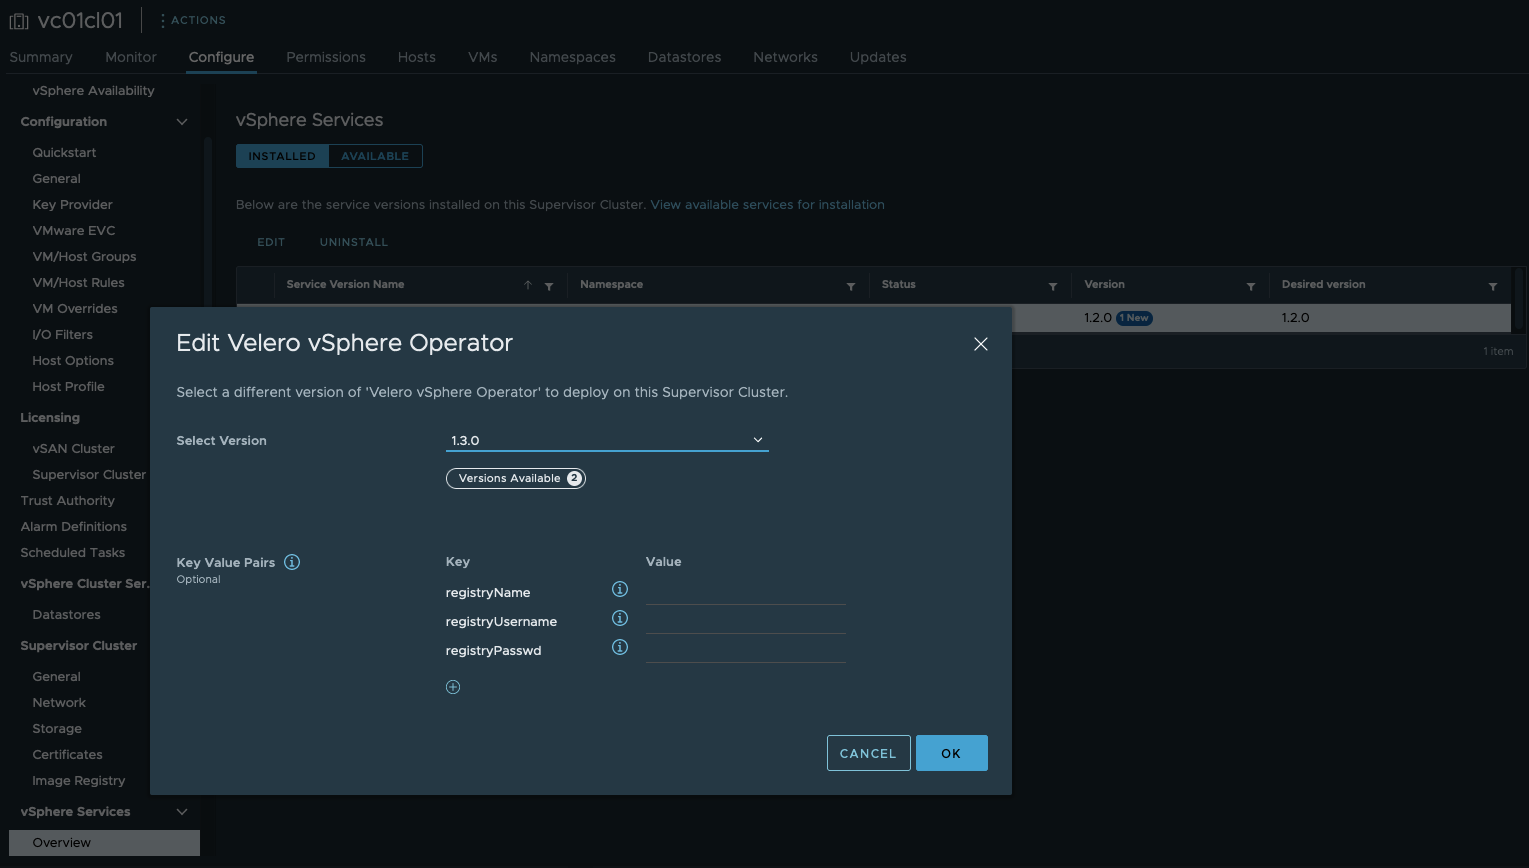
When you select the desired service and click on Edit, you’ll be provided with the same options as it is with the first described way of doing it.
Select the new version and click on OK.
Installing the new version will be done via a complete redeployment of the service (Kubernetes application) itself. This is typically for Kubernetes applications and therefore important that you provide your custom value specifications when registering a new service version and when ultimately updating a service.
Redeploying a new service will not have an impact on persistent data! This is e.g. important for the Container Image Registry Service - Harbor.
🎥 I recorded the rollout of the new Velero vSphere Operator service version v1.3.0. By watching this short recording, you’ll notice after the first half that new pods are going to be created (ContainerCreating) and old pods are going to be deleted (Terminating).
After a couple of seconds wait time, the new version is ready to serve.
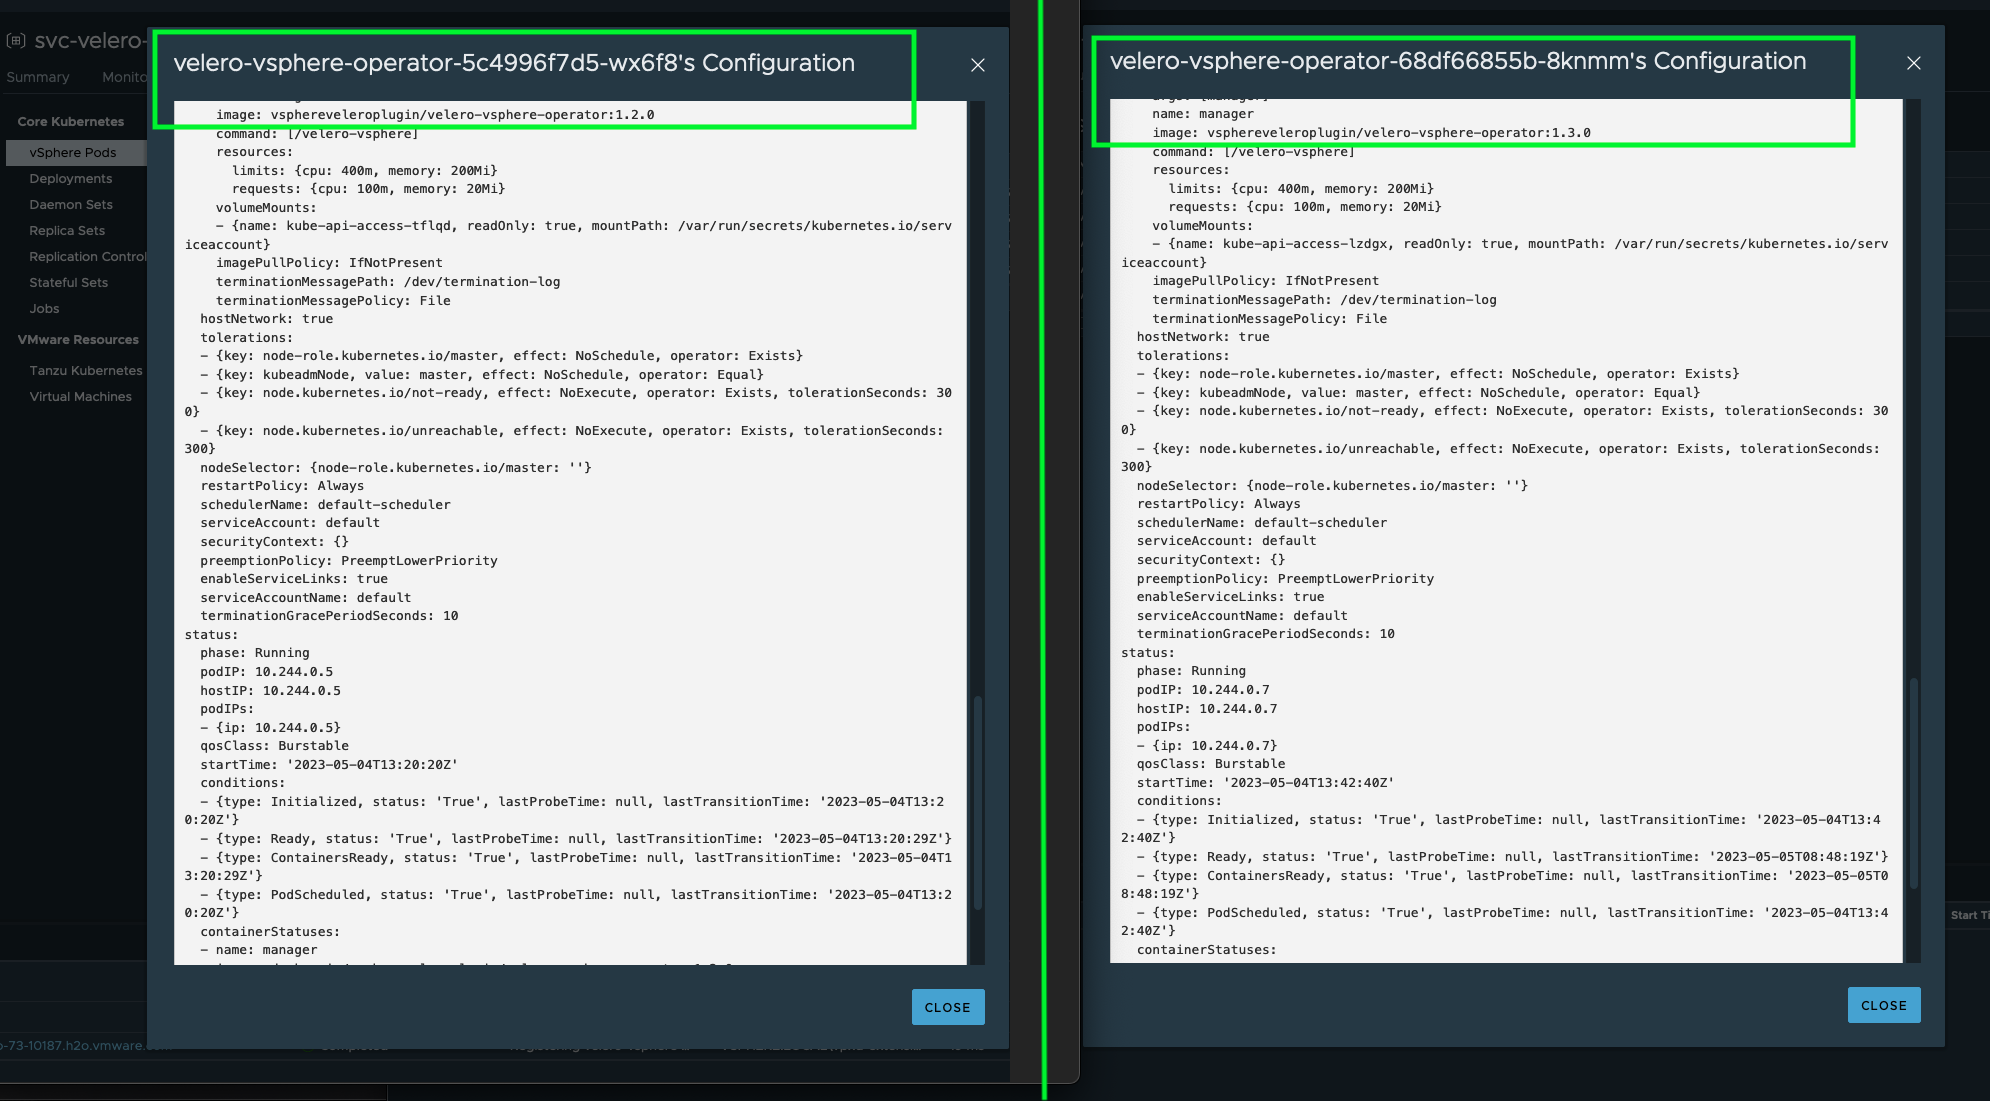
Picture XIV only intends to illustrate the old (v1.2.0) used container image reference (left) vs. the new (v1.3.0) installed container image reference (right).
Uninstalling a Supervisor Service
The complete uninstallation of a Supervisor Service is a multi-step process. Only providing a big red DELETE button (fire and forget) would be a too simplistic approach to handle this lifecycle operation. Therefore, the first step is the deactivation of a Service itself in case e.g. it’s not needed/consumed anymore.
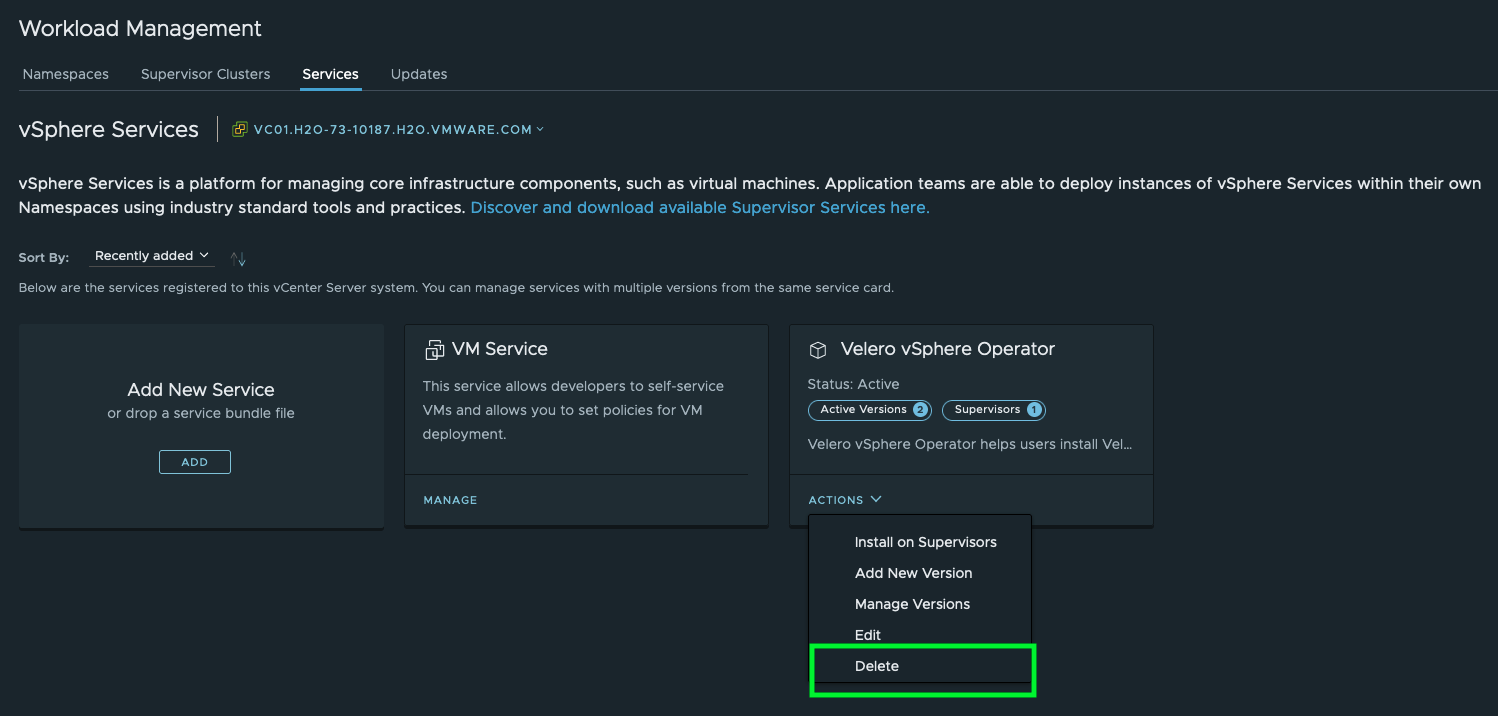
Manage Supervisor Services privileges in vSphere.Go to the Supervisor Services section in the vSphere client and select Delete via the ACTIONS button on the respective service tile.
All three steps are showing up on the next window (Figure XVI) with a brief description on each step. Deactivate the Velero service by clicking on CONFIRM. This first step will only deactivate the option to install this particular service on other Supervisor clusters.
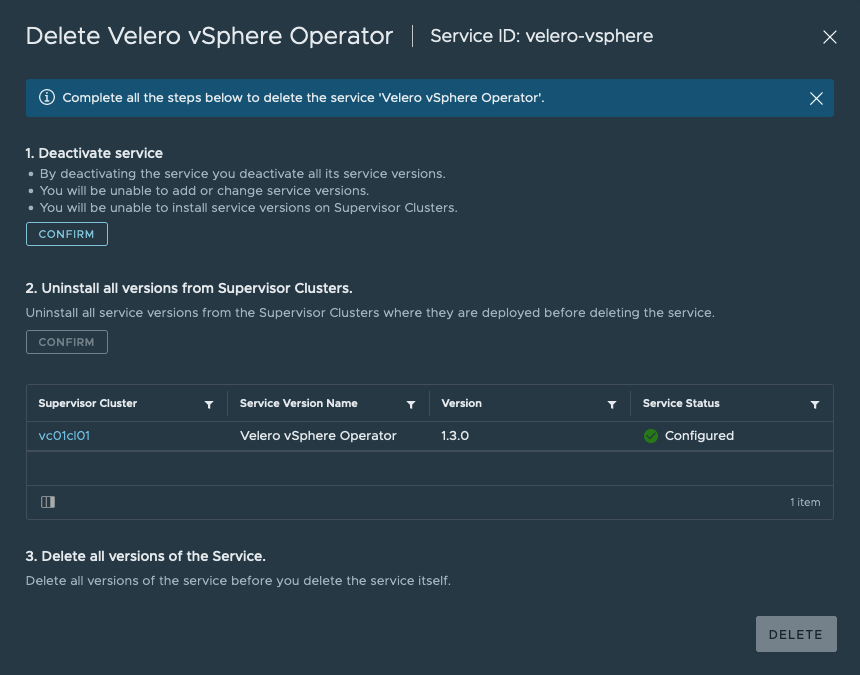
A confirmation of a successful deactivation of the service will appear within the same window (Figure XVII). Notice the ✅ behind step 1.
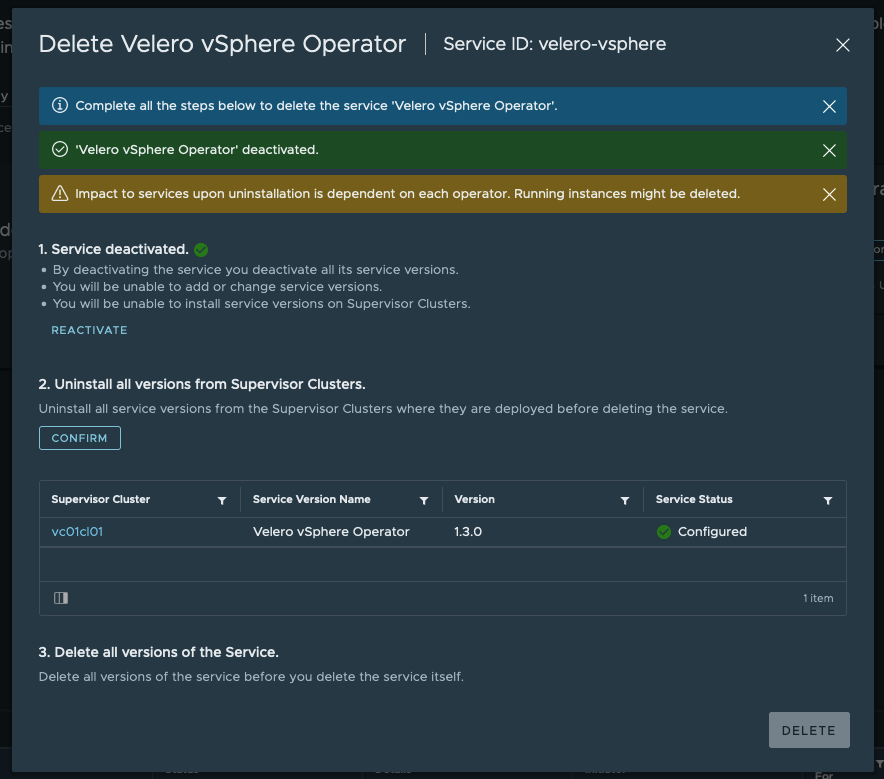
The second step is the uninstallation of the Supervisor Service from the cluster. In case of the Velero Supervisor Service, this means the uninstallation from the Supervisor control plane nodes. Click CONFIRM on step 2.
The uninstallation will be kicked off in the background. If you are not planning to completly unregister the service via step 3, you can go ahead and close the wizard.
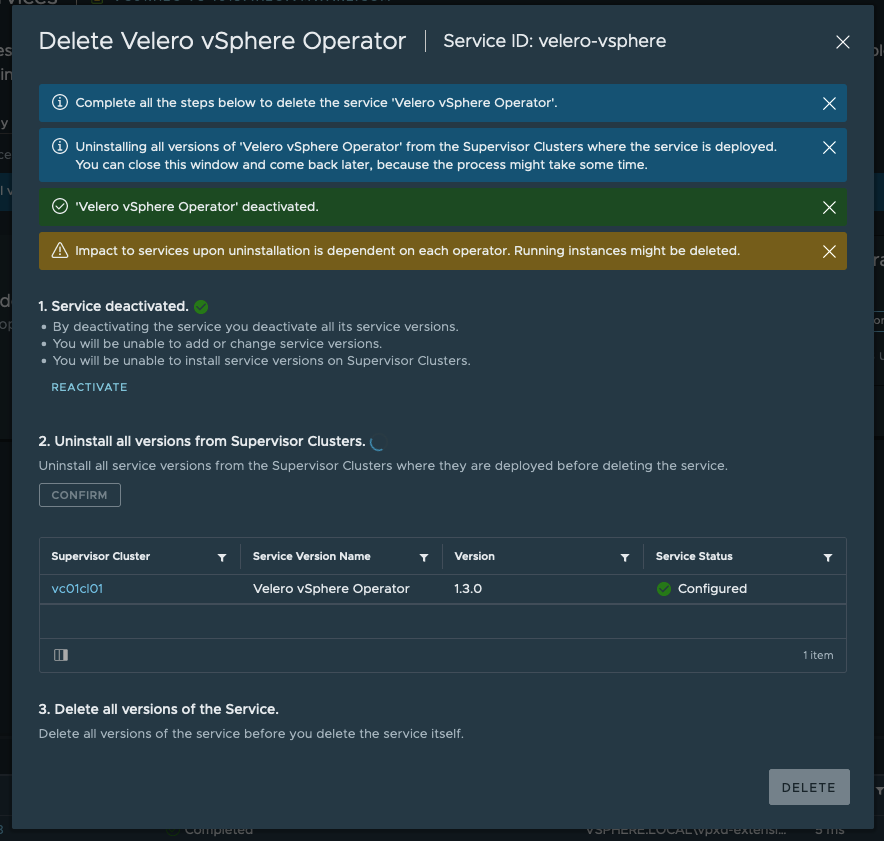
🎥 I also recorded the uninstallation of the Velero vSphere Operator service.
If you intend to not use the service ever again, step 3 will unregister the service version(s) from the vCenter Server.
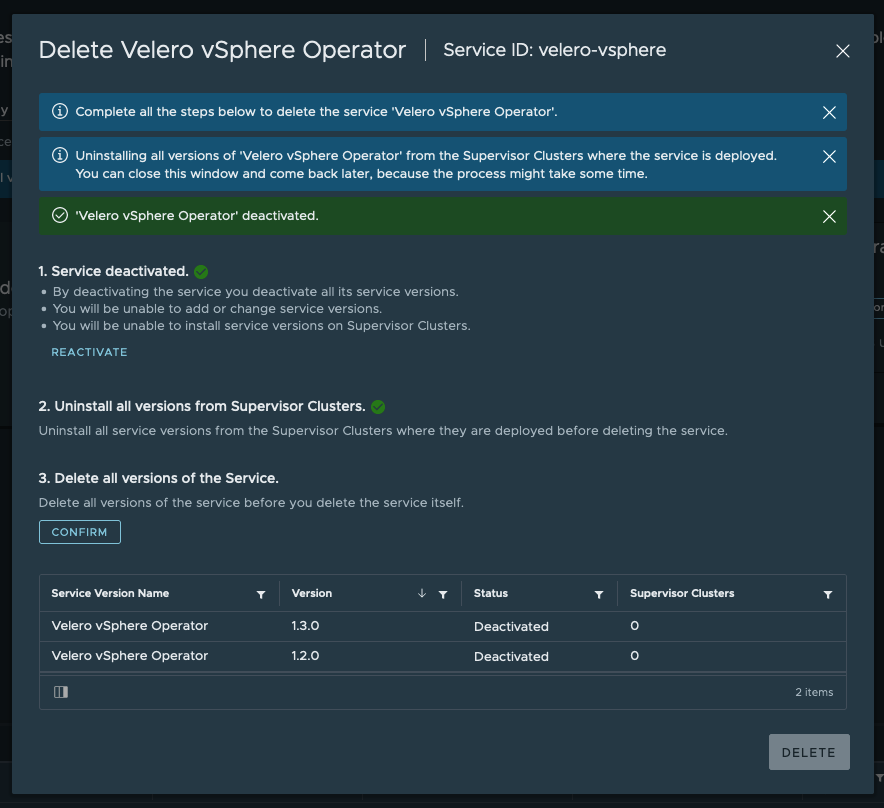
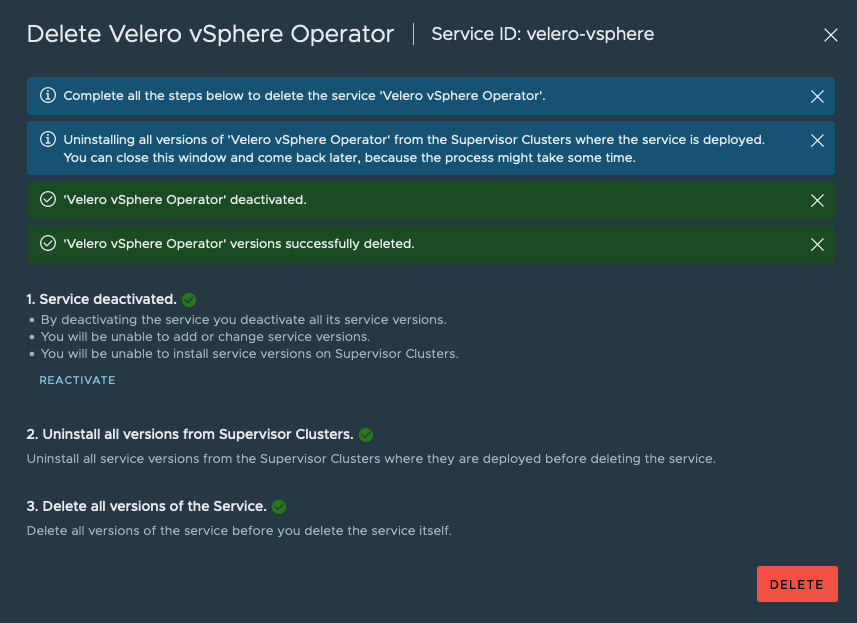
By selecting CONFIRM on step 3, the big red DELETE button will appear and will execute the final judgment on the service.
I hope this part of my series enlightened you on the lifecycle operations of the vSphere with Tanzu Supervisor Services.
Thanks for reading.